pg/sg 55
Moderators: warb, Rawdyn, Leroy, byronbus, Tonz Magonz, dmb
-
D-Train

- DSKer
- Posts: 3492
- Joined: Mon Nov 28, 2005 3:03 pm
- Location: coffs harbour
Re: pg/sg 55
Thanks blokes! Just need that 1st momentum then it’s off n racing. Even better havin the bus 20feet away too!
-
D-Train
- DSKer
- Posts: 3492
- Joined: Mon Nov 28, 2005 3:03 pm
- Location: coffs harbour
Re: pg/sg 55
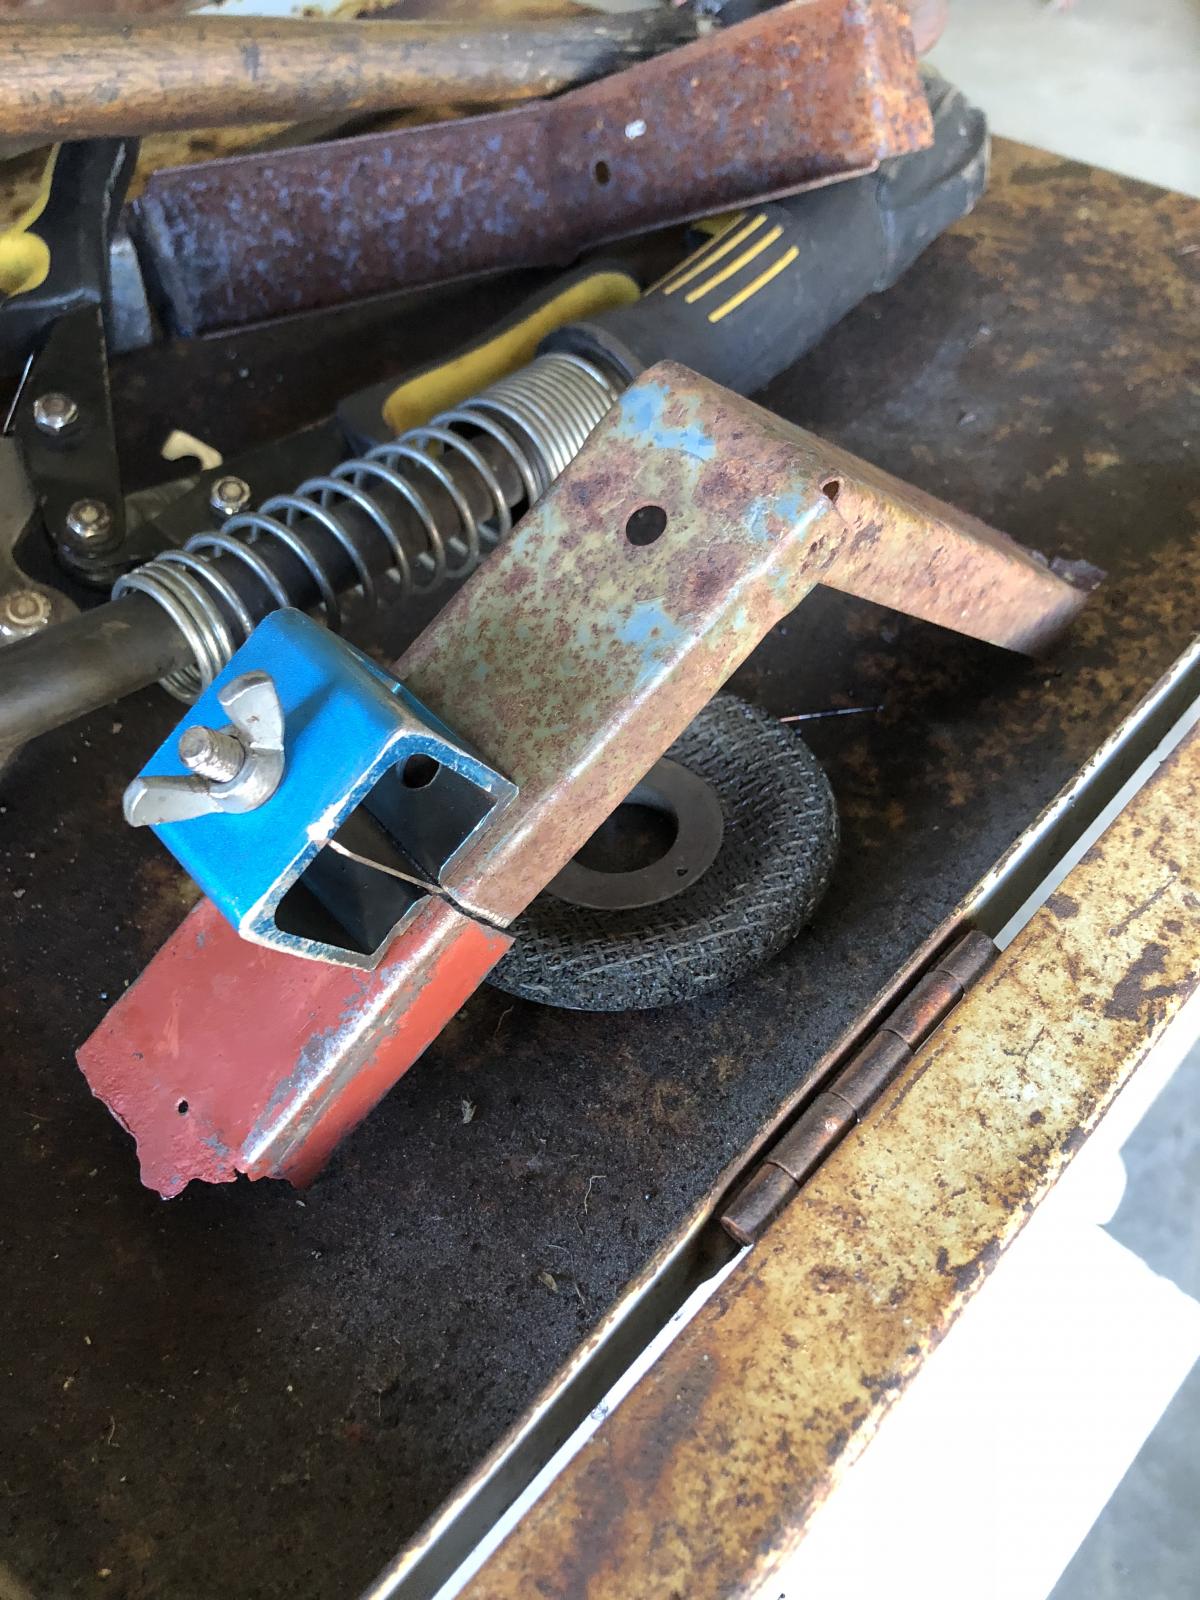
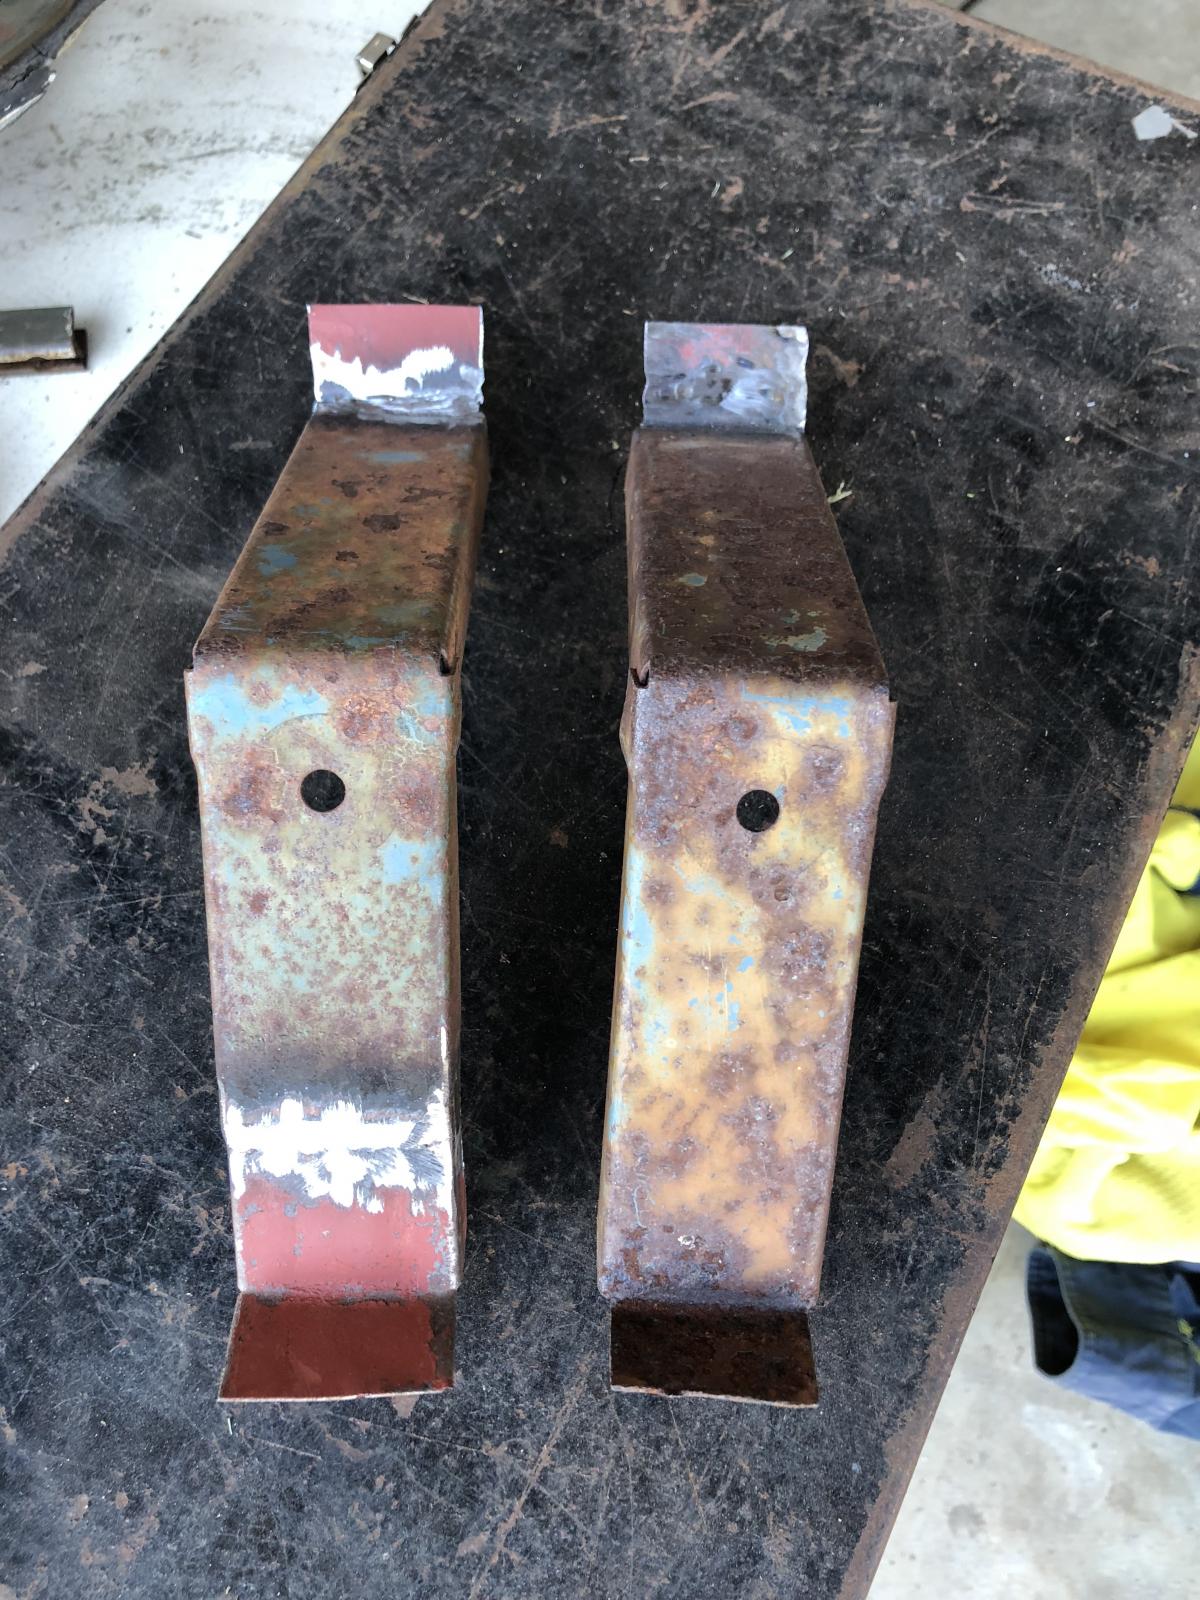
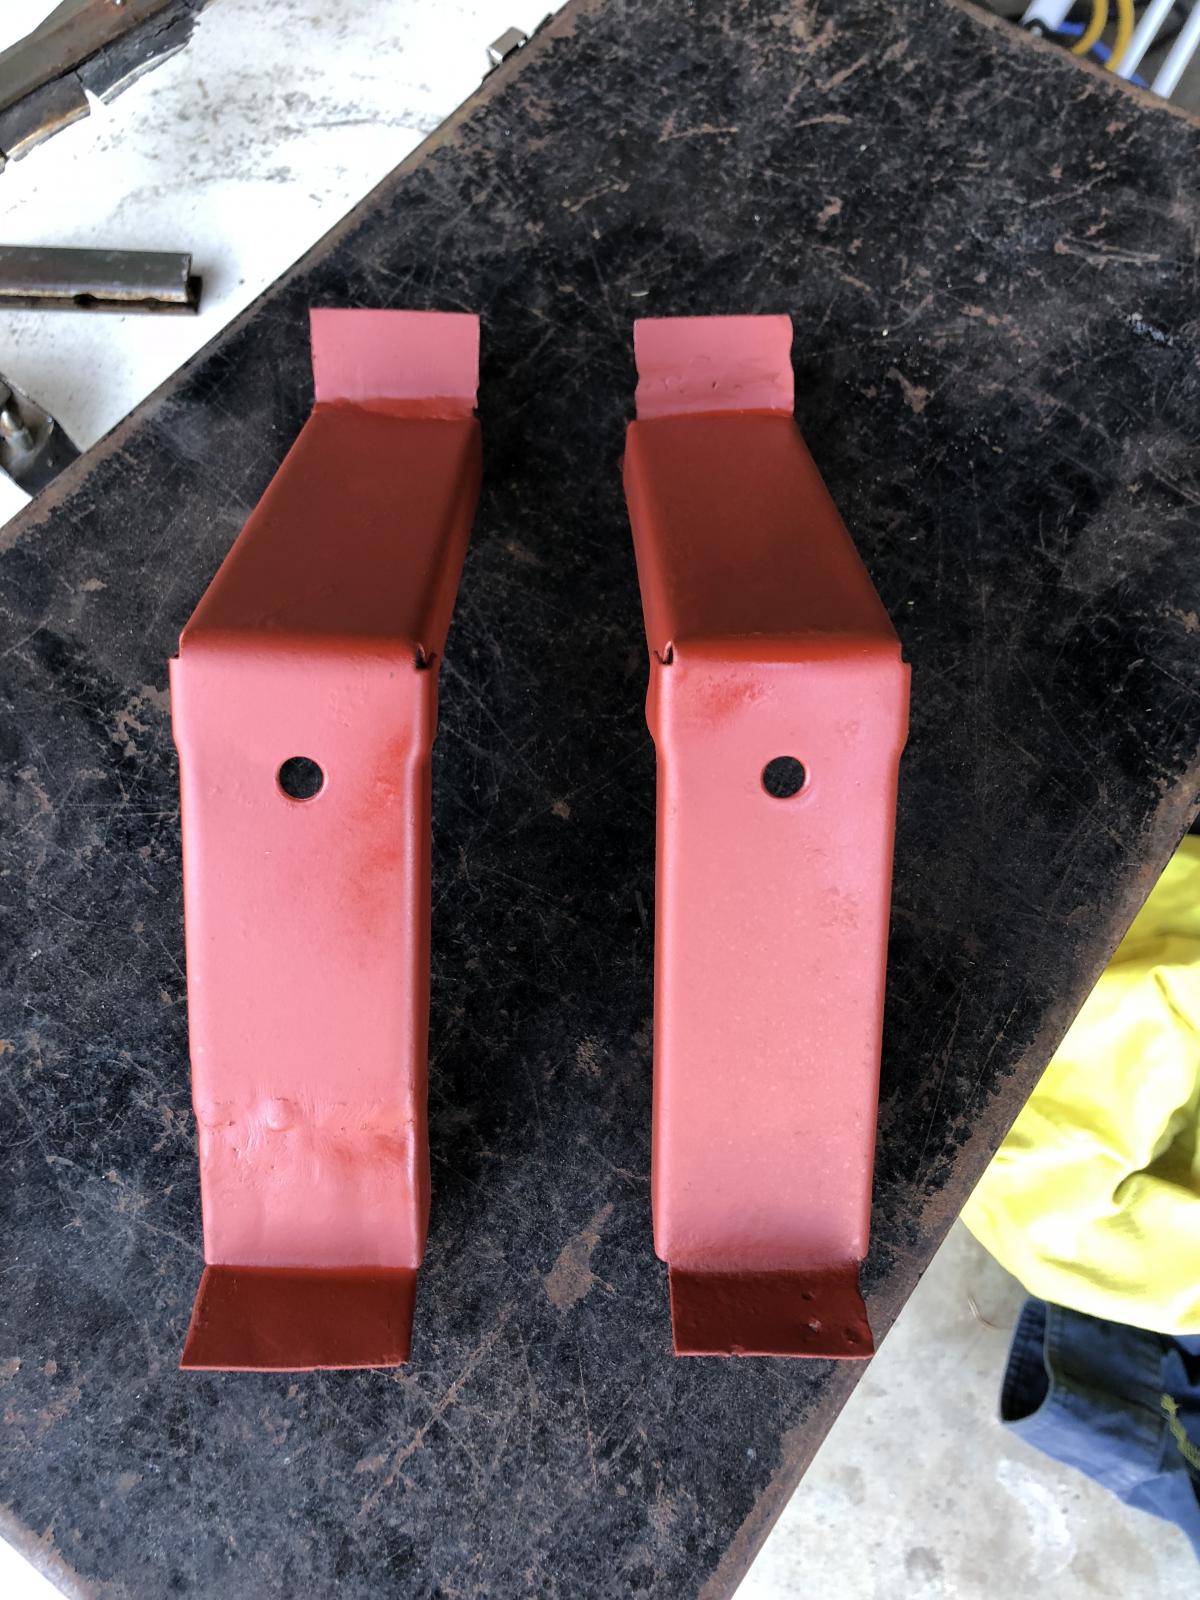
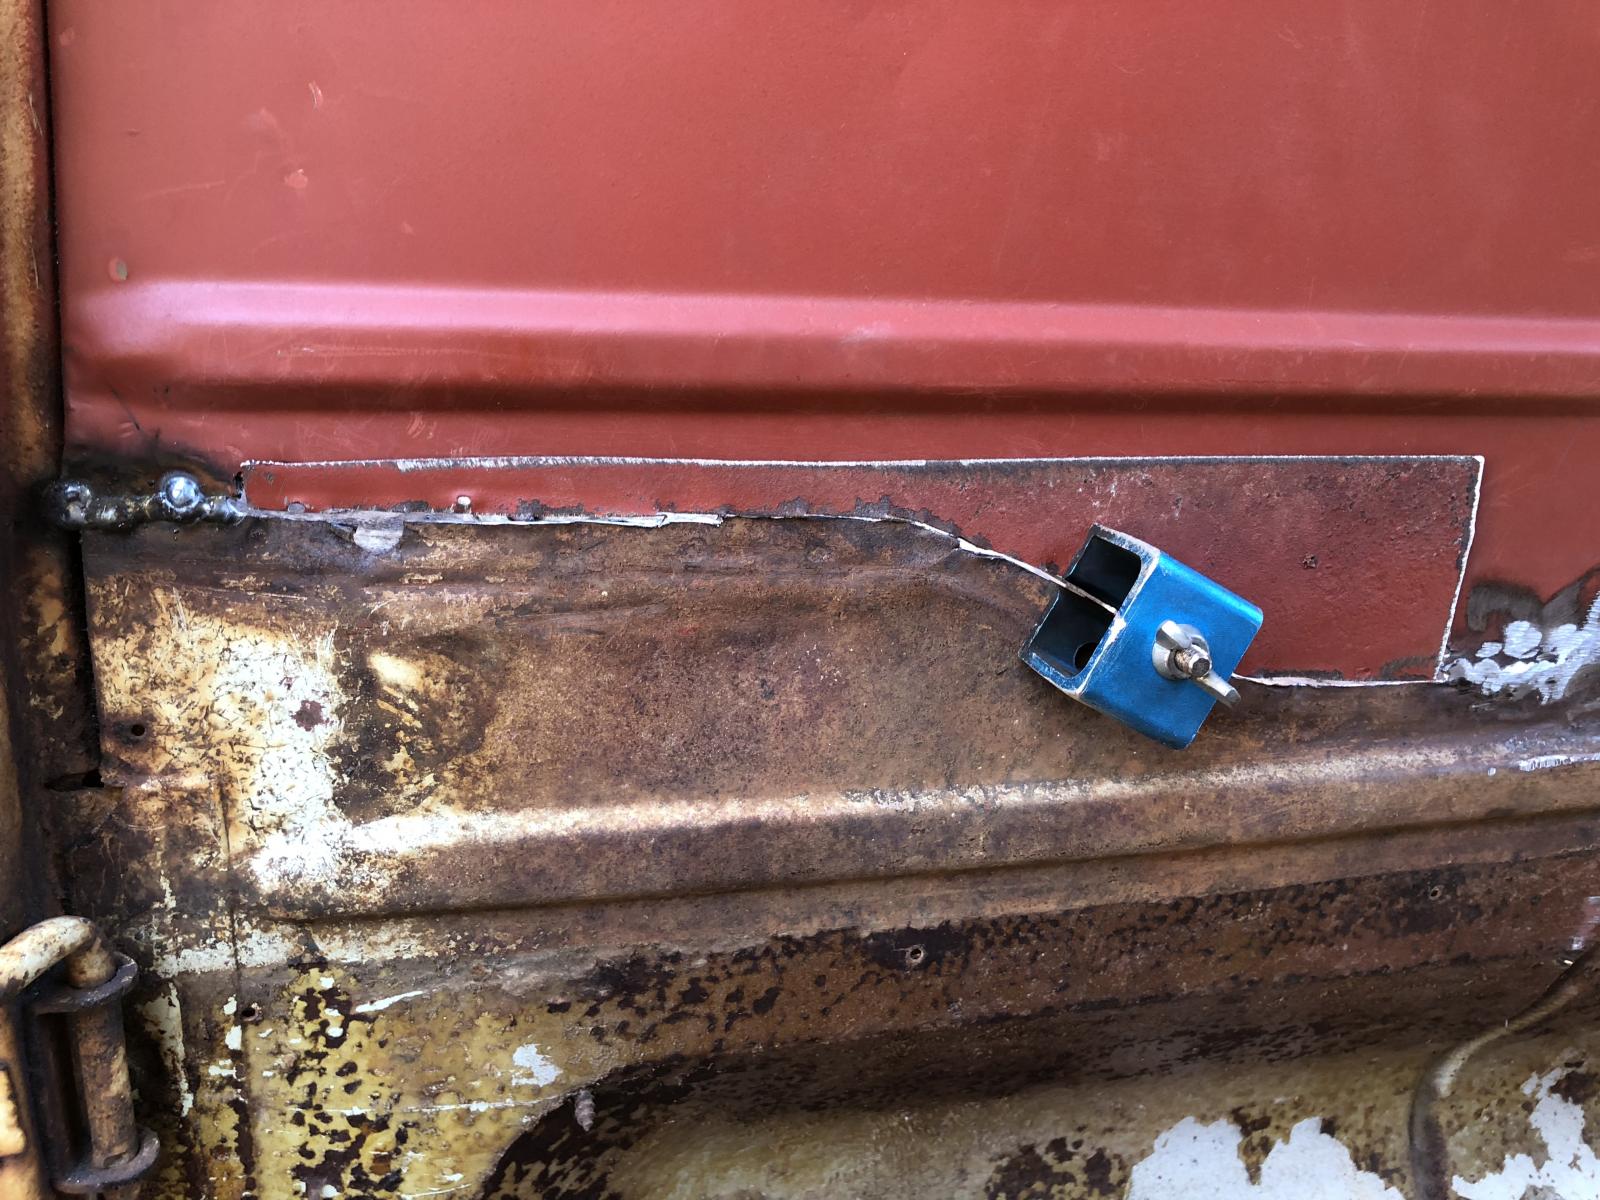
So I’ve had the seat mount brackets for a while an was going to use them as a template. But then changed my mind. So repaired them. My welding skills arnt the best but it’s not structural, there was good penetration and it will do the job for me! I don’t want it perfect, so if people look st it they can see what’s been done to get it back on the road.

-
D-Train
- DSKer
- Posts: 3492
- Joined: Mon Nov 28, 2005 3:03 pm
- Location: coffs harbour
Re: pg/sg 55
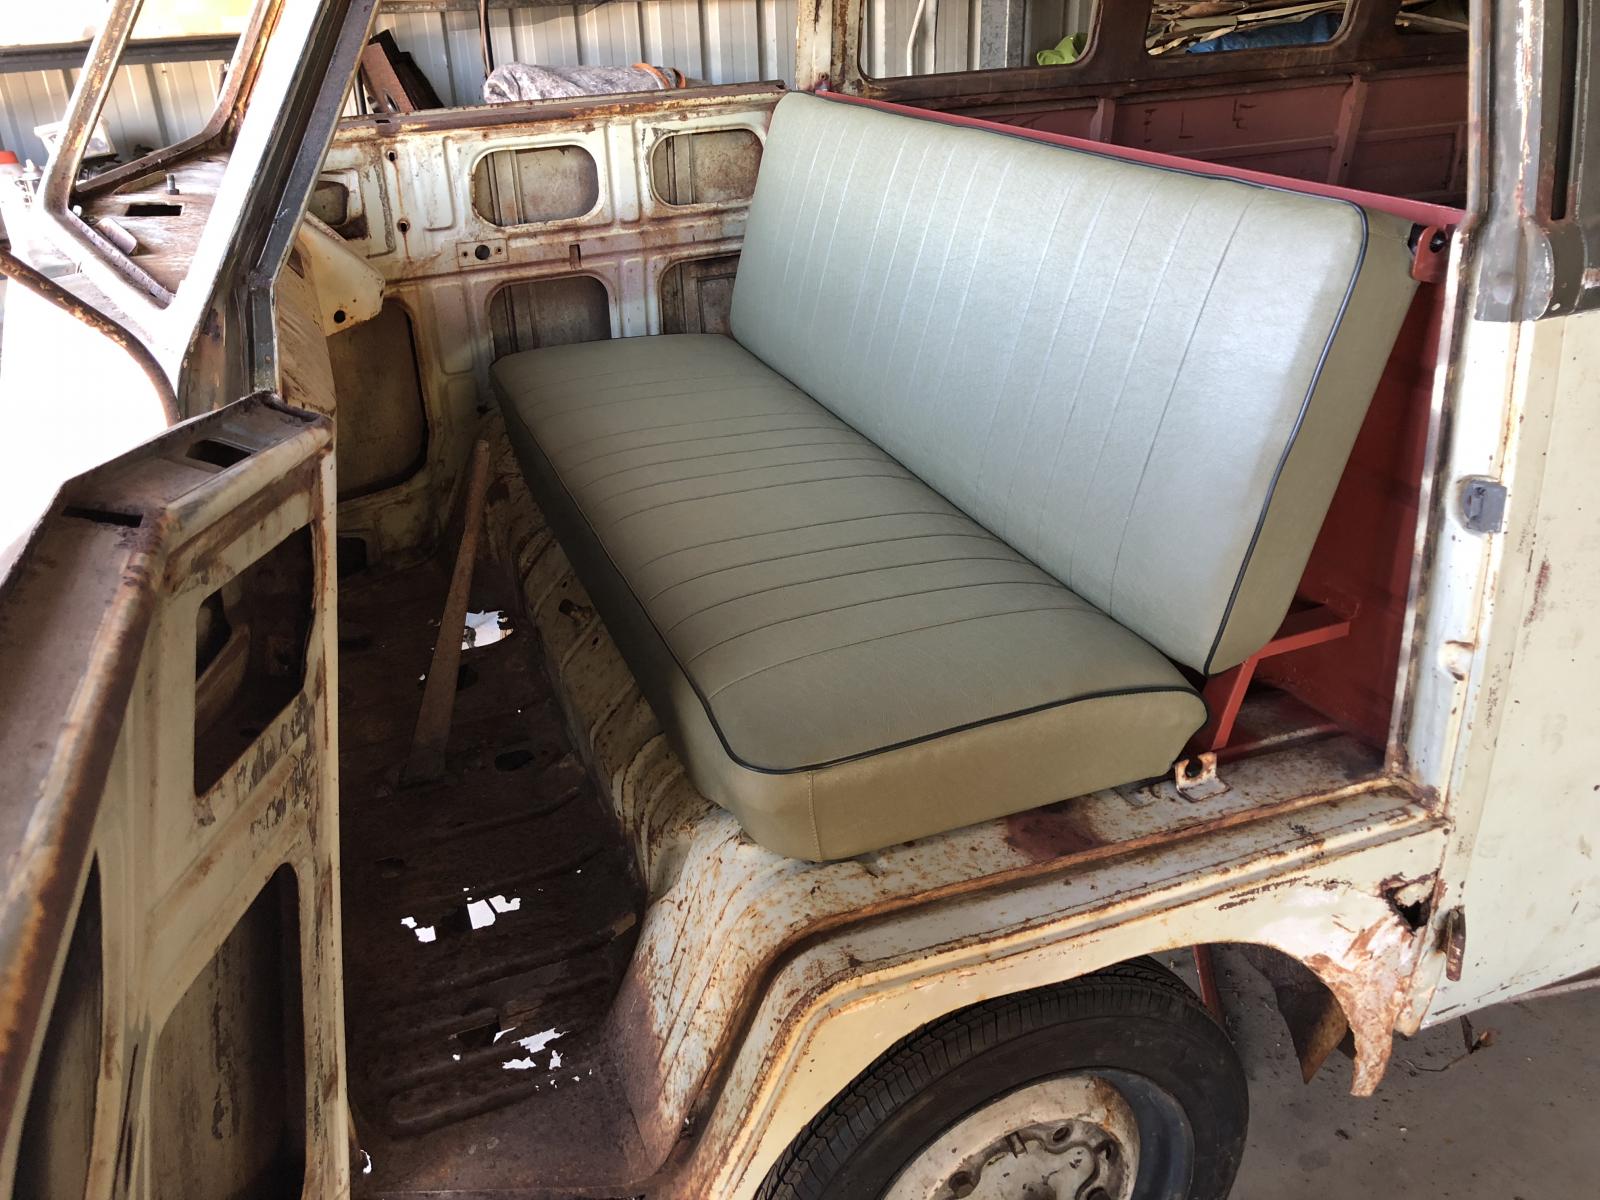
Test fitted the seat mounts, not bad. Finished off the final bulkhead hole.
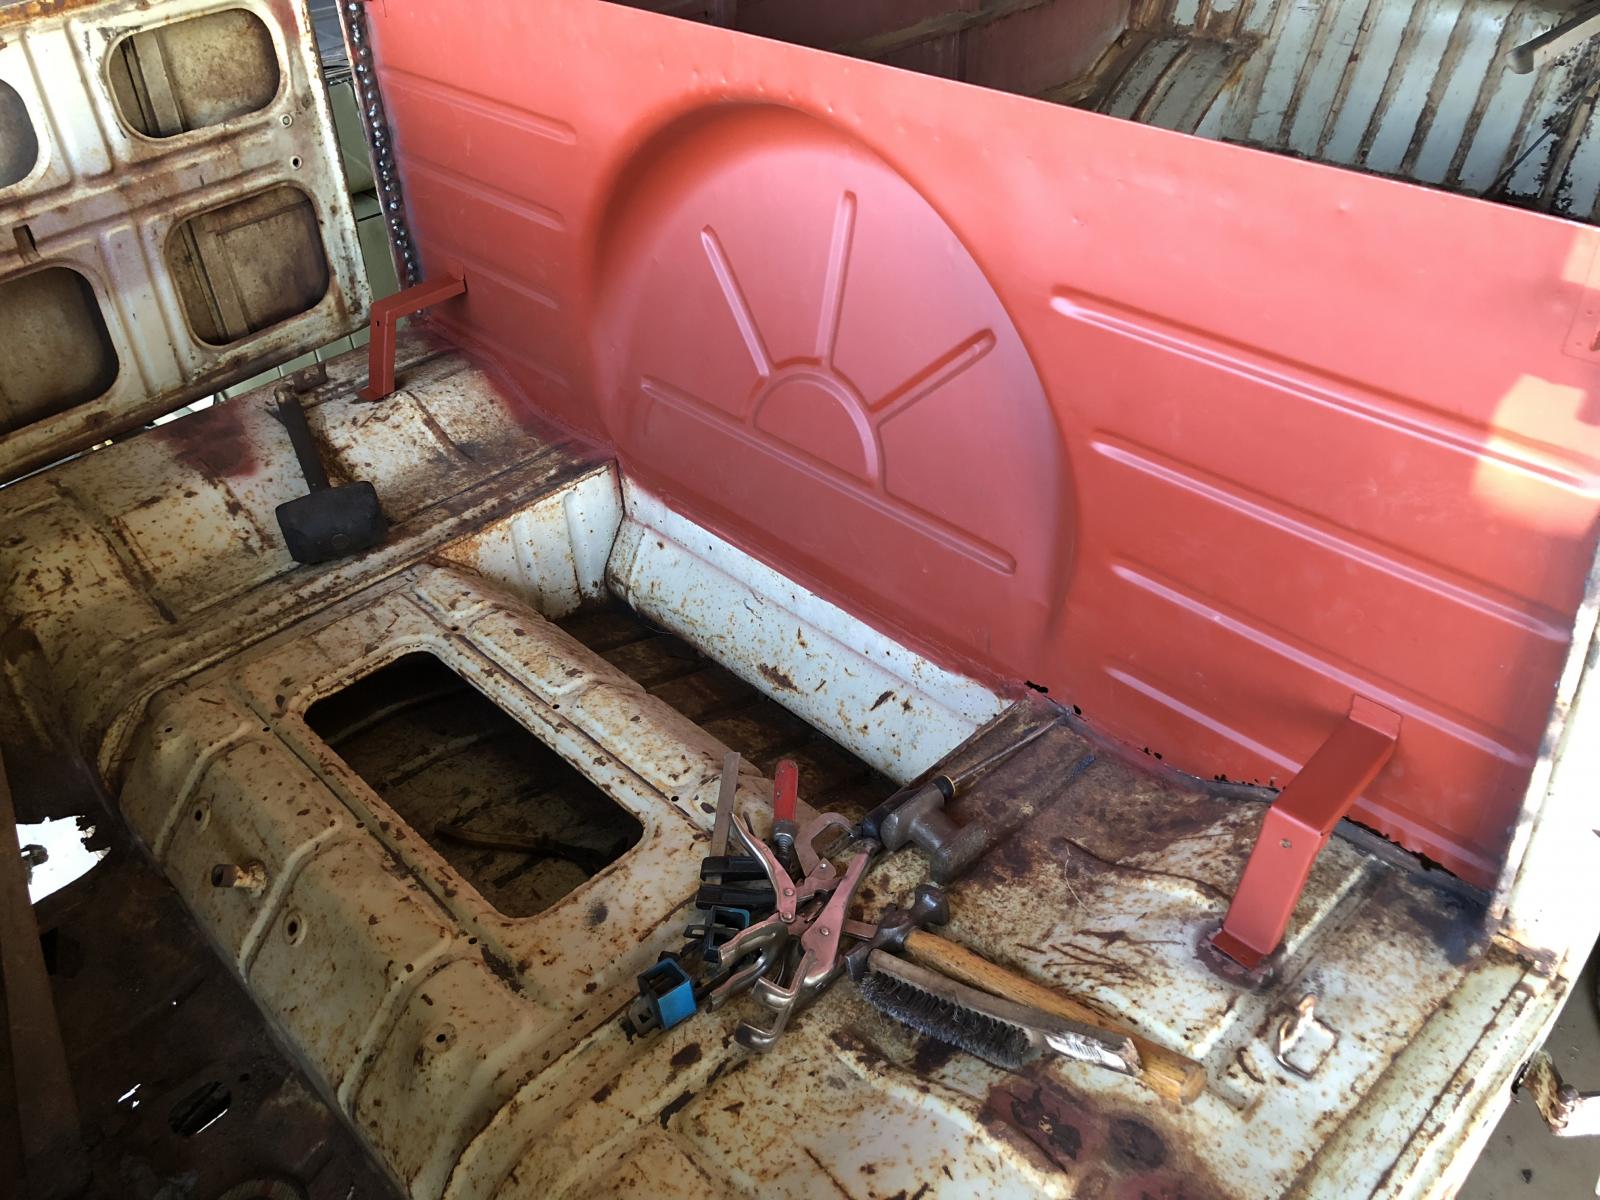

Put the front seat in and made car noises while sitting in it. Felt like a big win.
Put the front seat in and made car noises while sitting in it. Felt like a big win.
-
D-Train
- DSKer
- Posts: 3492
- Joined: Mon Nov 28, 2005 3:03 pm
- Location: coffs harbour
Re: pg/sg 55
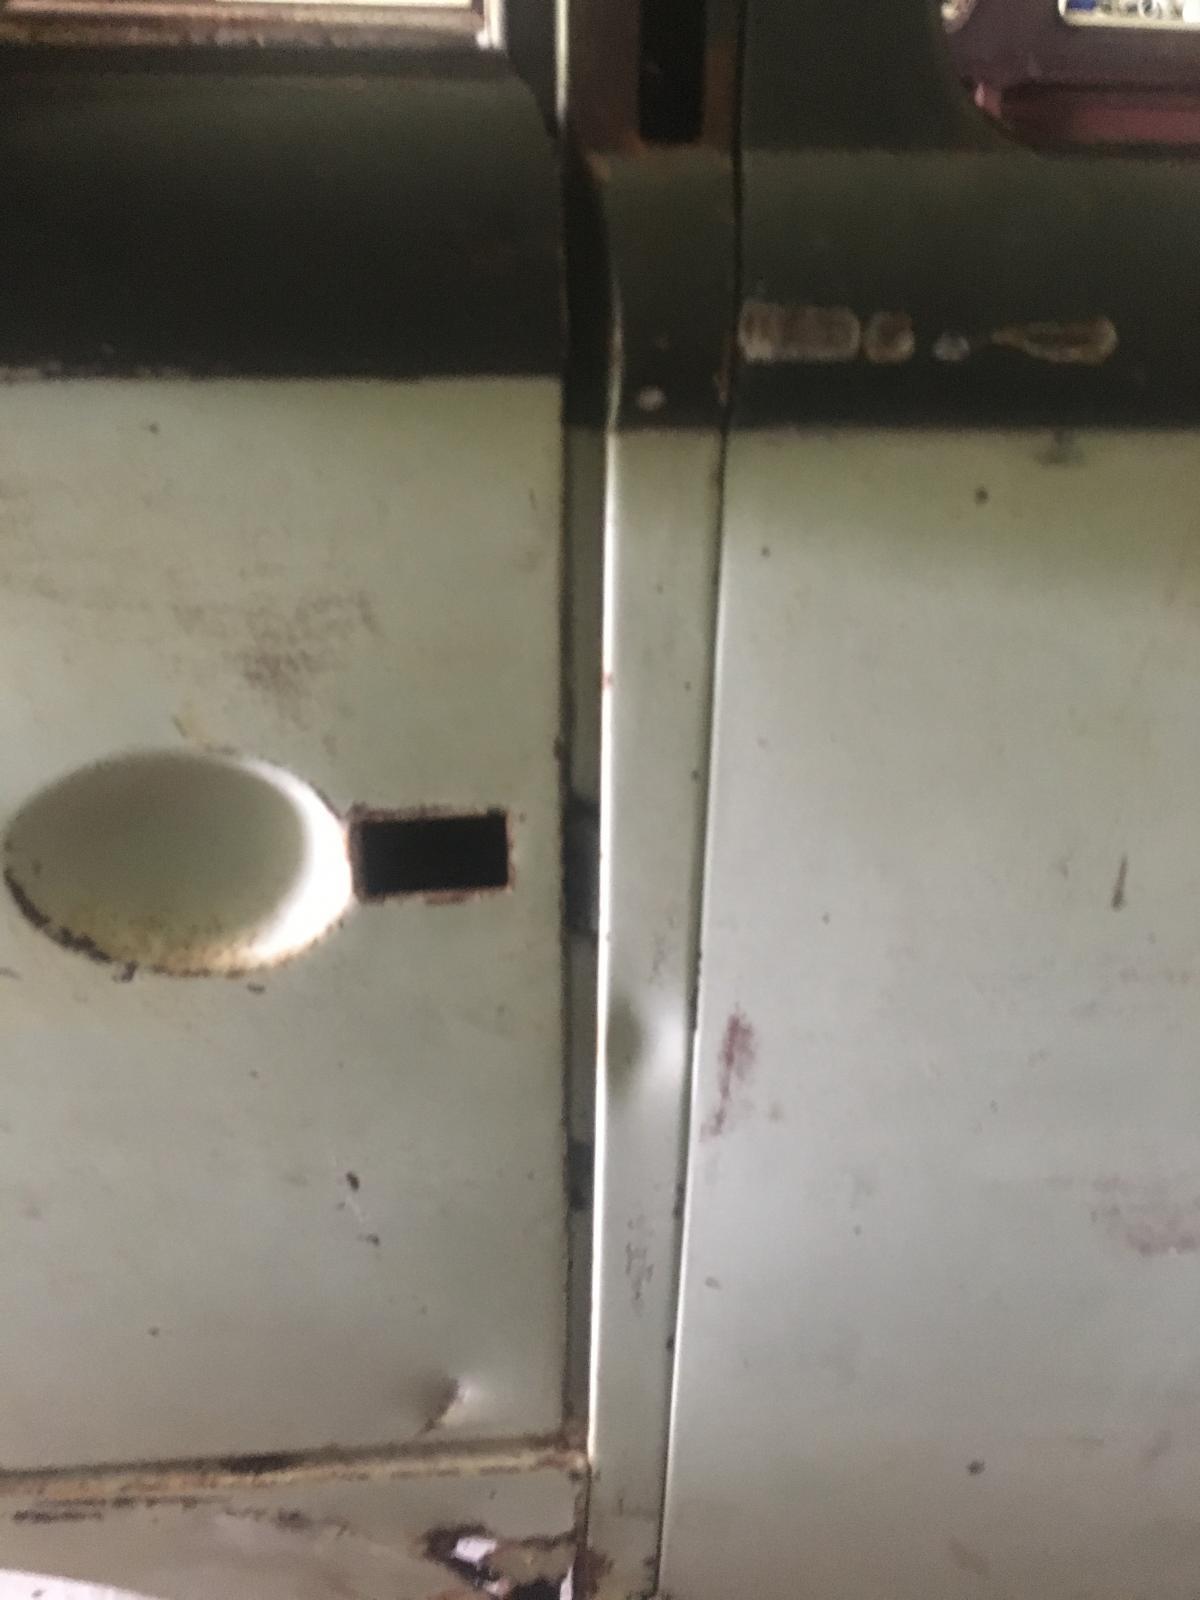
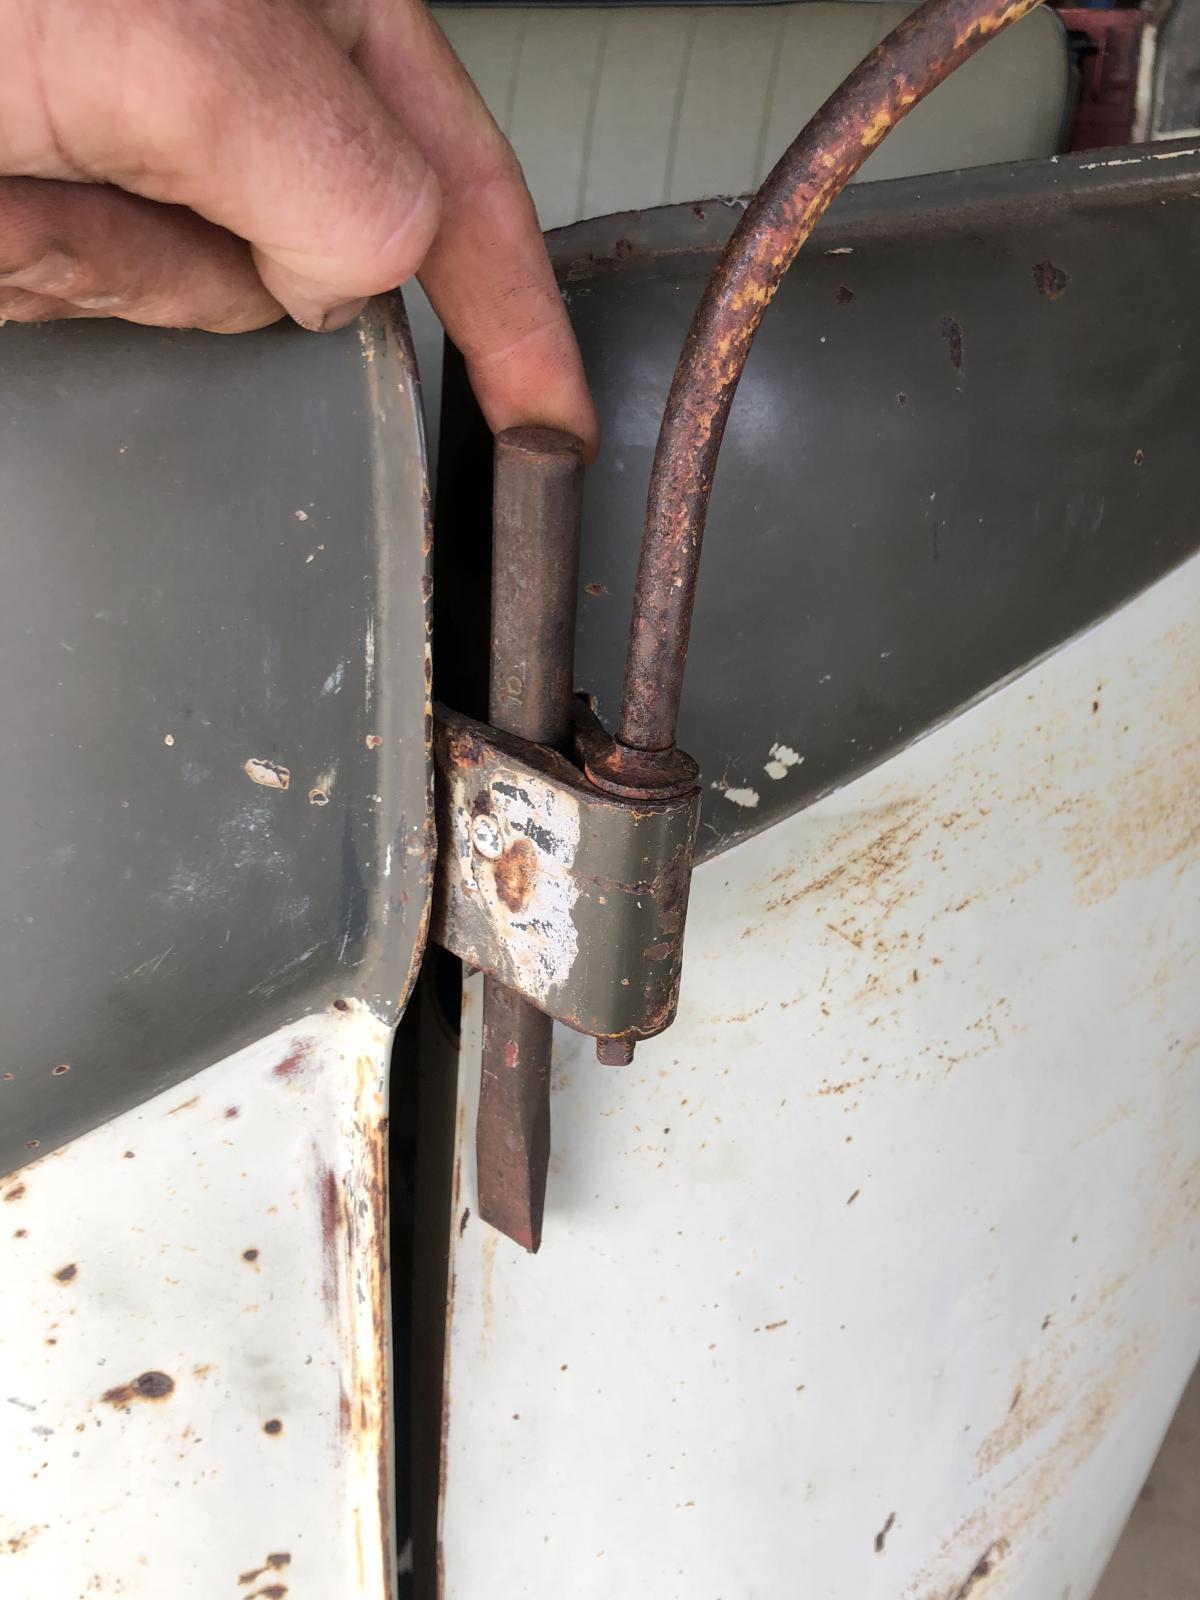
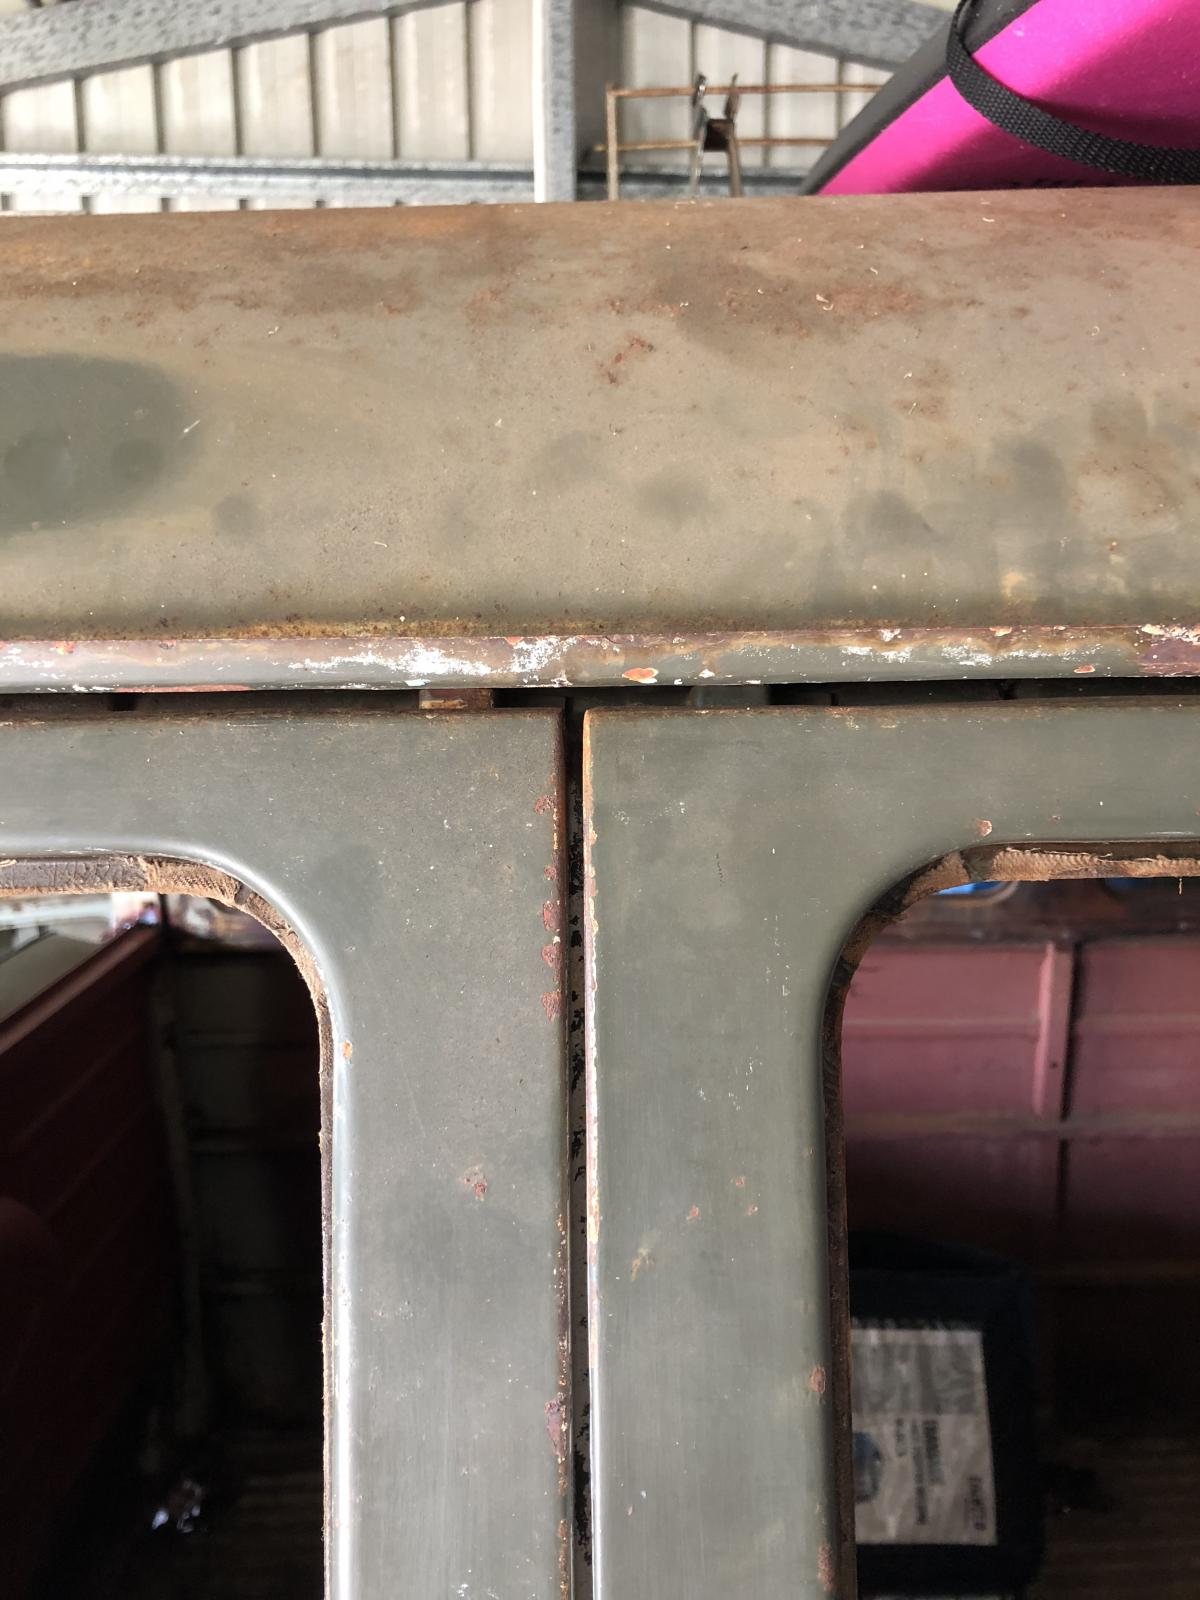
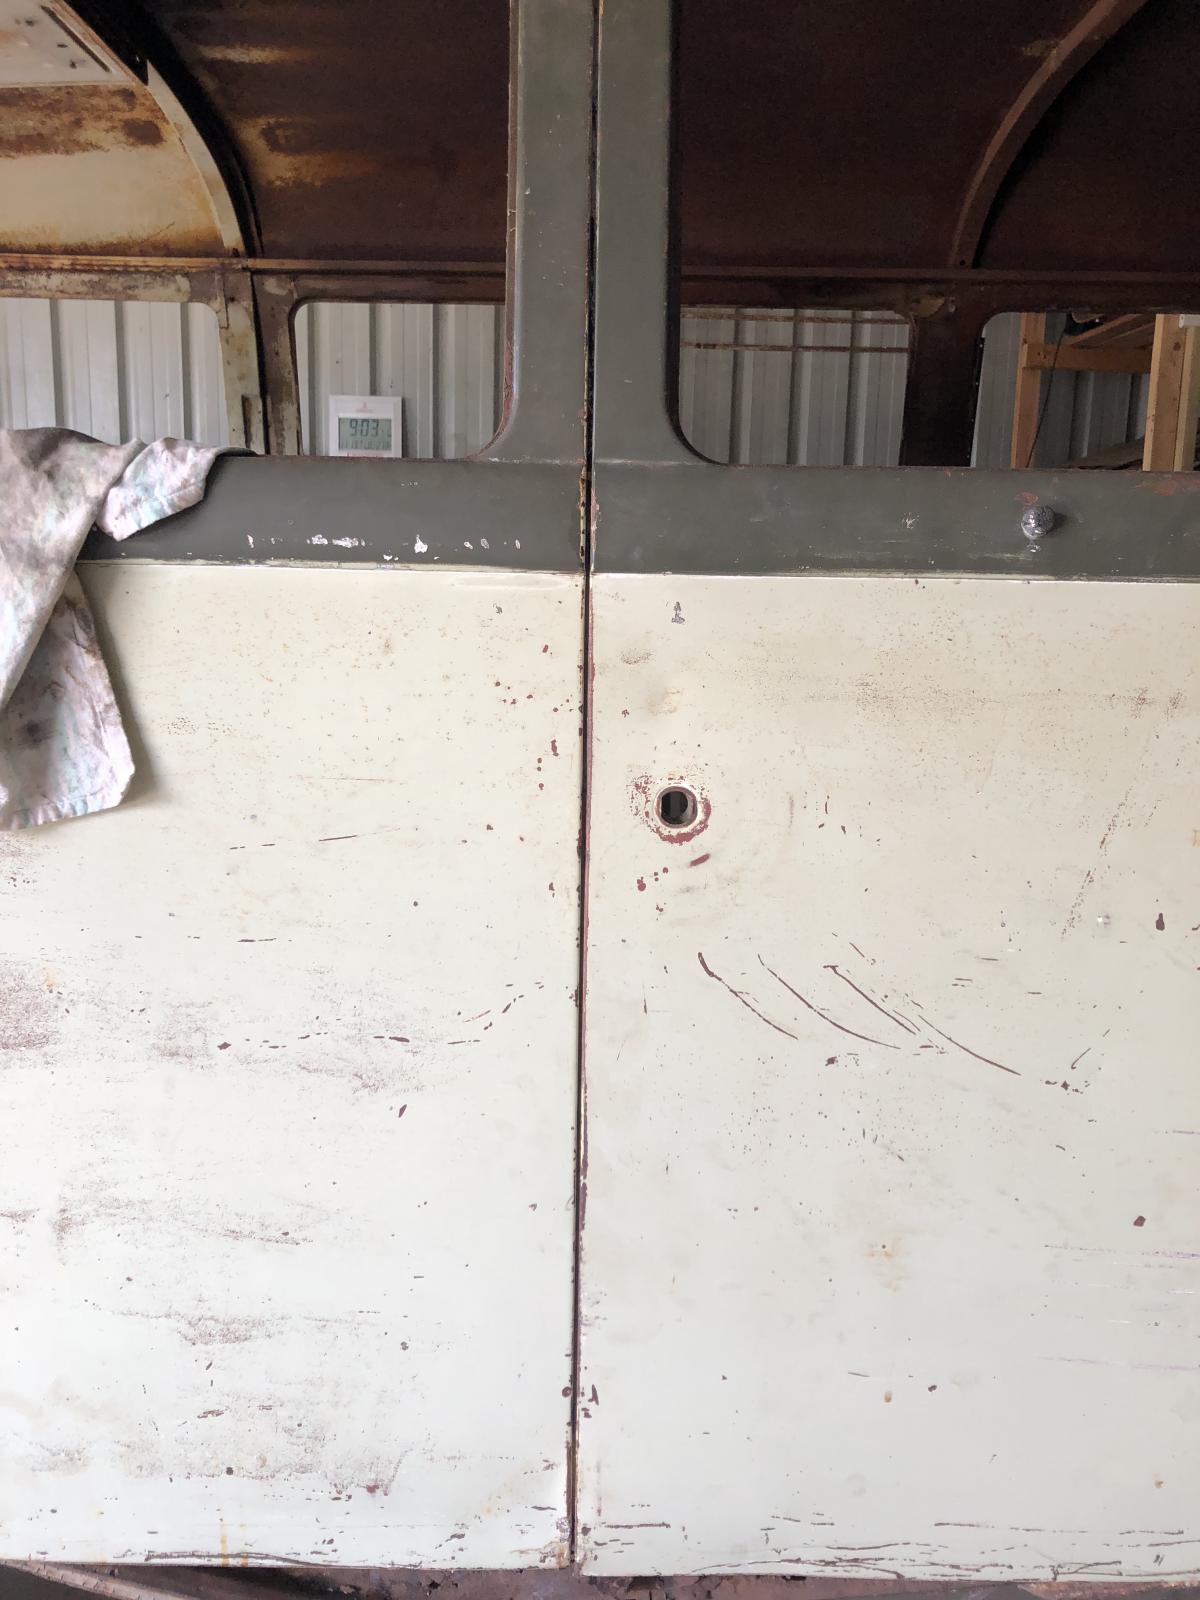
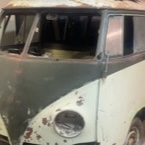
Cleaning the shed and kept walking past the passenger door gettin annoyed at the gap, so decided to do something about it.
Before
Some help
From my friends..
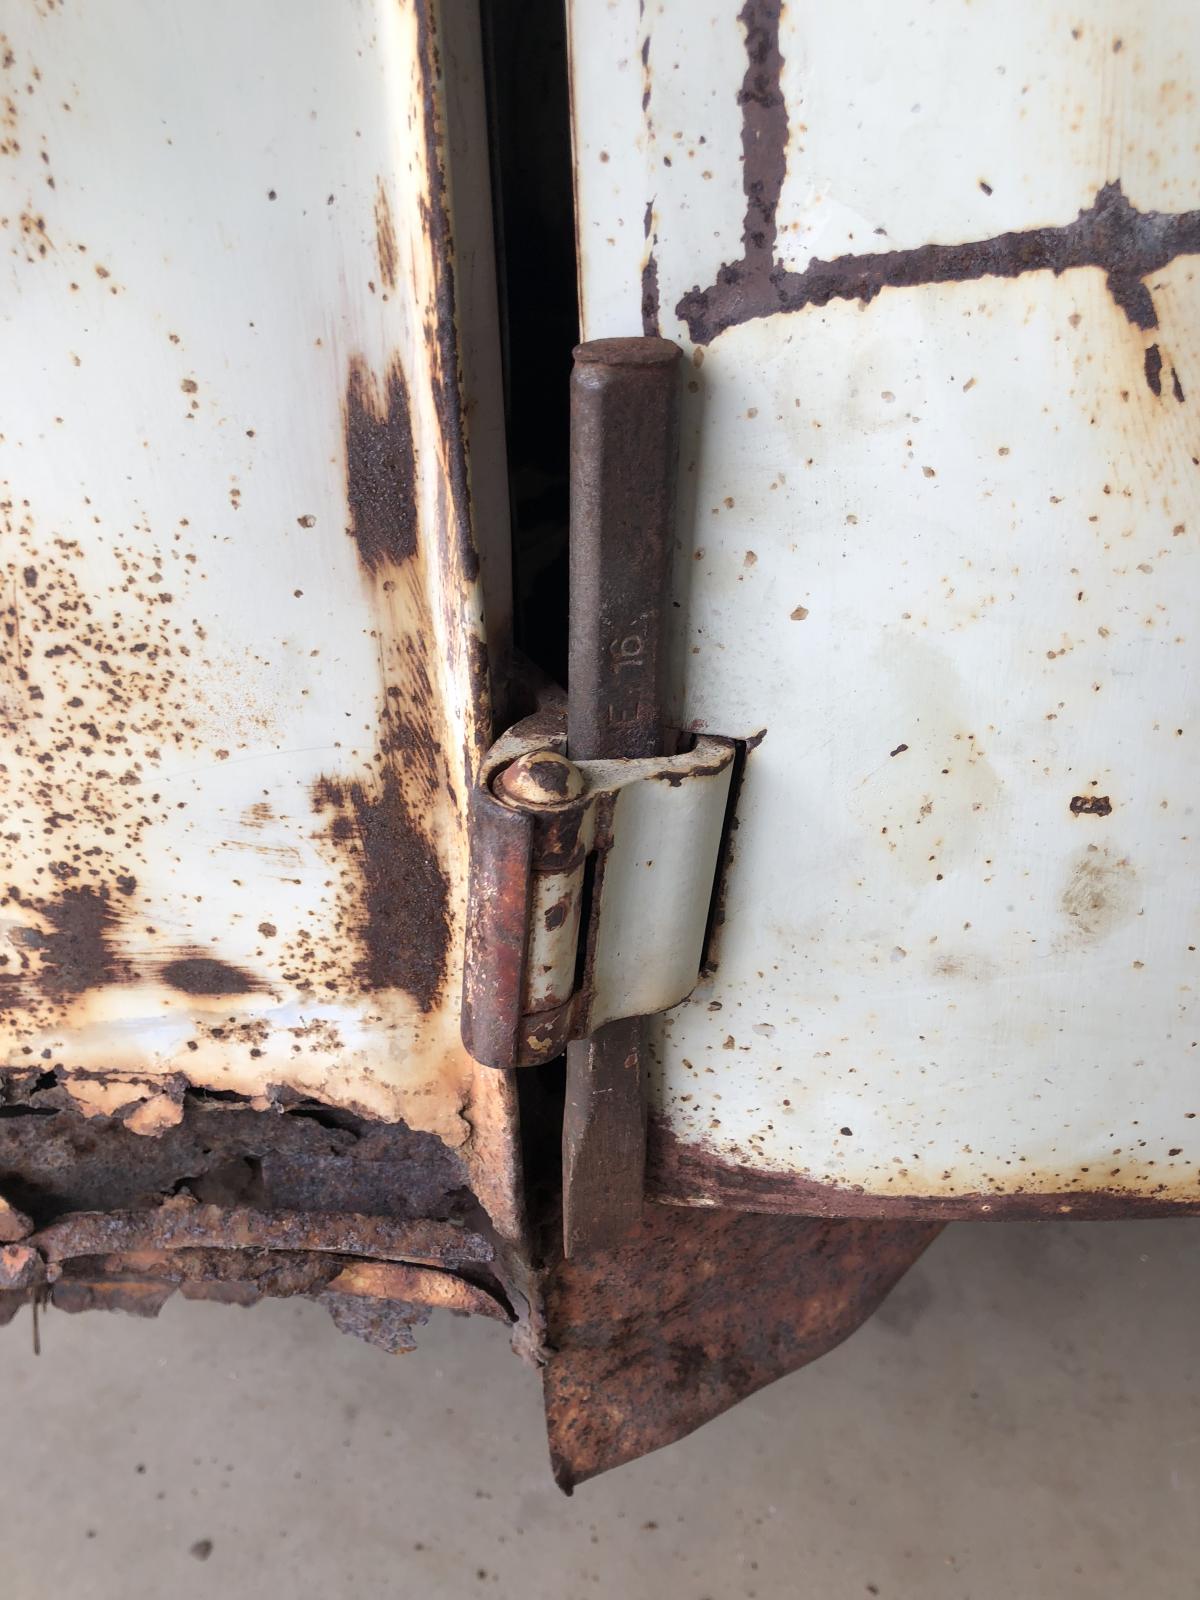
End result
Massive difference. Nearly looks like a door again!
Before
Some help
From my friends..
End result
Massive difference. Nearly looks like a door again!
-
63 left hooker

- DSKer
- Posts: 1215
- Joined: Tue Nov 24, 2009 1:03 pm
- Location: Northern Beaches Sydney
-
Ged

- DSKer
- Posts: 515
- Joined: Tue Dec 13, 2011 8:30 pm
- Location: Gold Coast
Re: pg/sg 55
Jimmy Barnes would be proud
Ged
57 11window project
64 Standard Beetle
69 Lowlight
70 CB100 x 2
57 11window project
64 Standard Beetle
69 Lowlight
70 CB100 x 2
-
Wassa

- DSKer
- Posts: 332
- Joined: Mon Dec 09, 2013 9:40 pm
- Location: BRISBANE
Re: pg/sg 55
Keep chipping mate, well done 
-
D-Train
- DSKer
- Posts: 3492
- Joined: Mon Nov 28, 2005 3:03 pm
- Location: coffs harbour
Re: pg/sg 55
It seemed just too easy. But then that’s how the factory might of done it back in the day, some of the old manuals have some dodgy repairs authorised by the factory! Haha
-
067DUB

- DSKer
- Posts: 2885
- Joined: Mon Oct 24, 2011 5:09 pm
Re: pg/sg 55
Old skool work , nice job man
-
D-Train
- DSKer
- Posts: 3492
- Joined: Mon Nov 28, 2005 3:03 pm
- Location: coffs harbour
Re: pg/sg 55
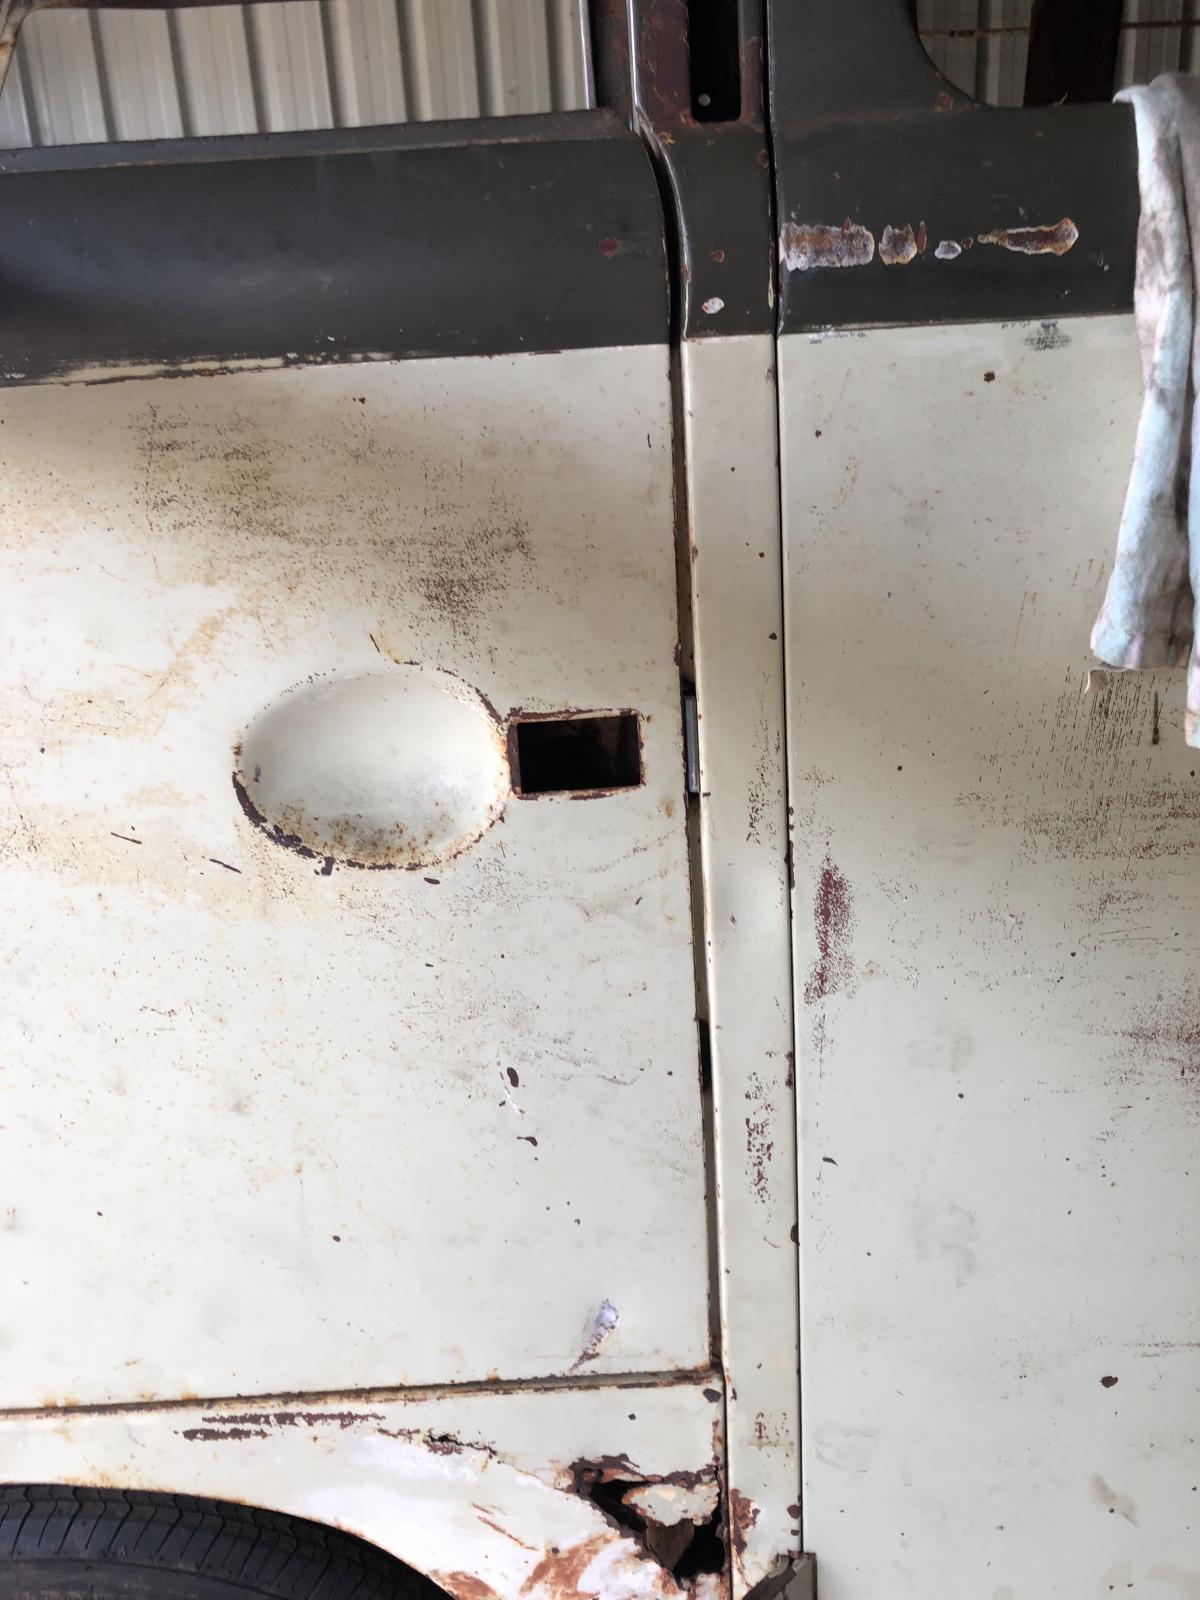
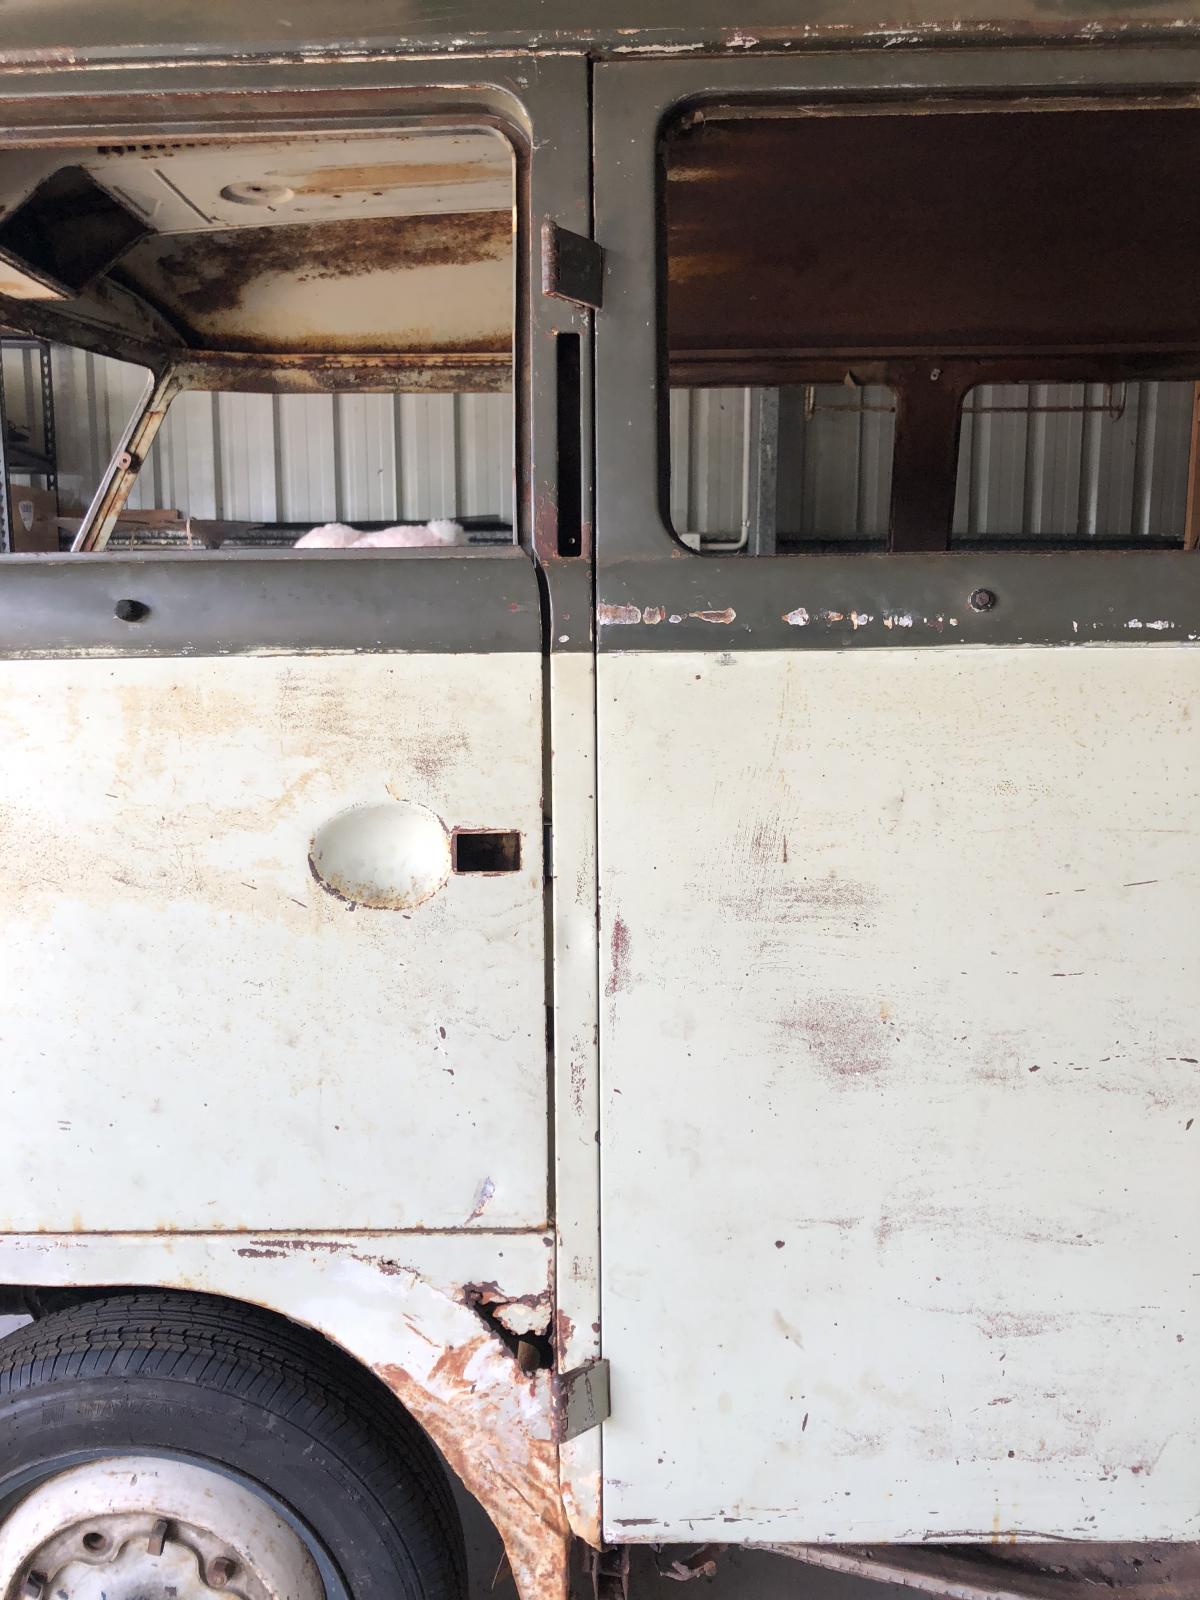
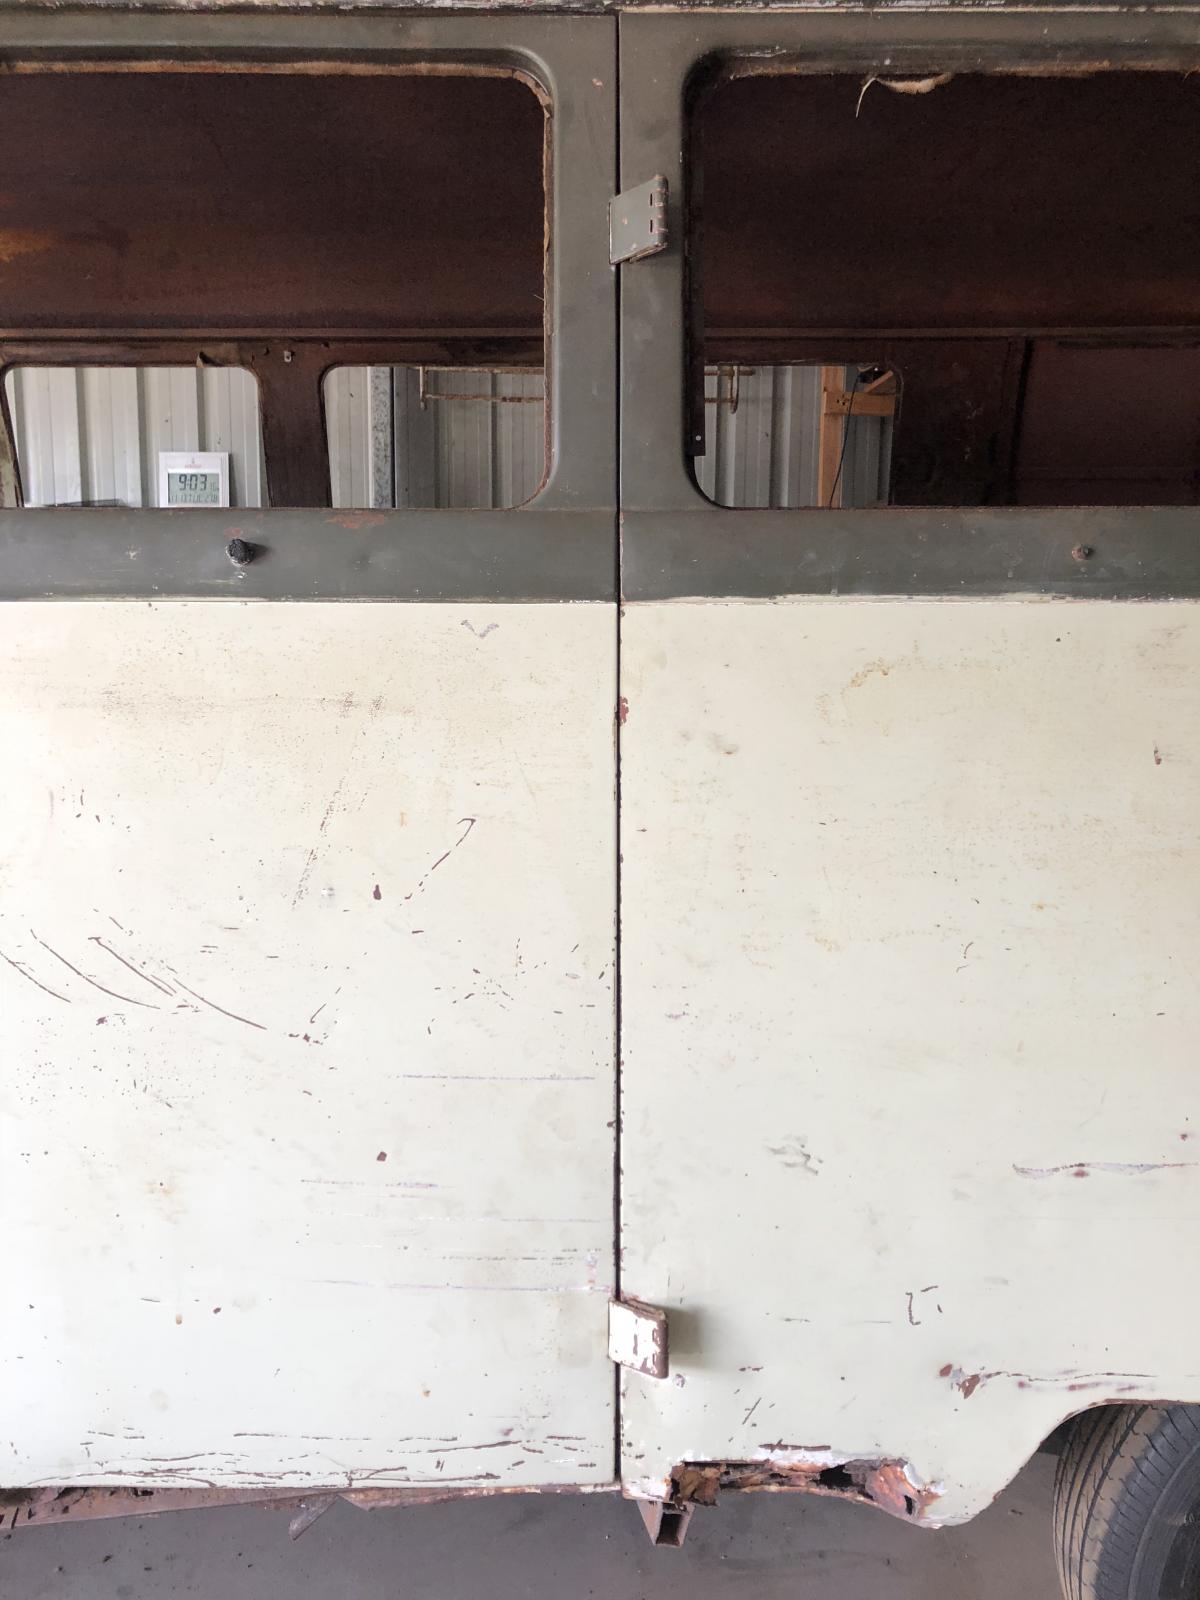
Got around to the cargo doors and the gaps on them. Same method with a chisel and gentle persuasion..
Before
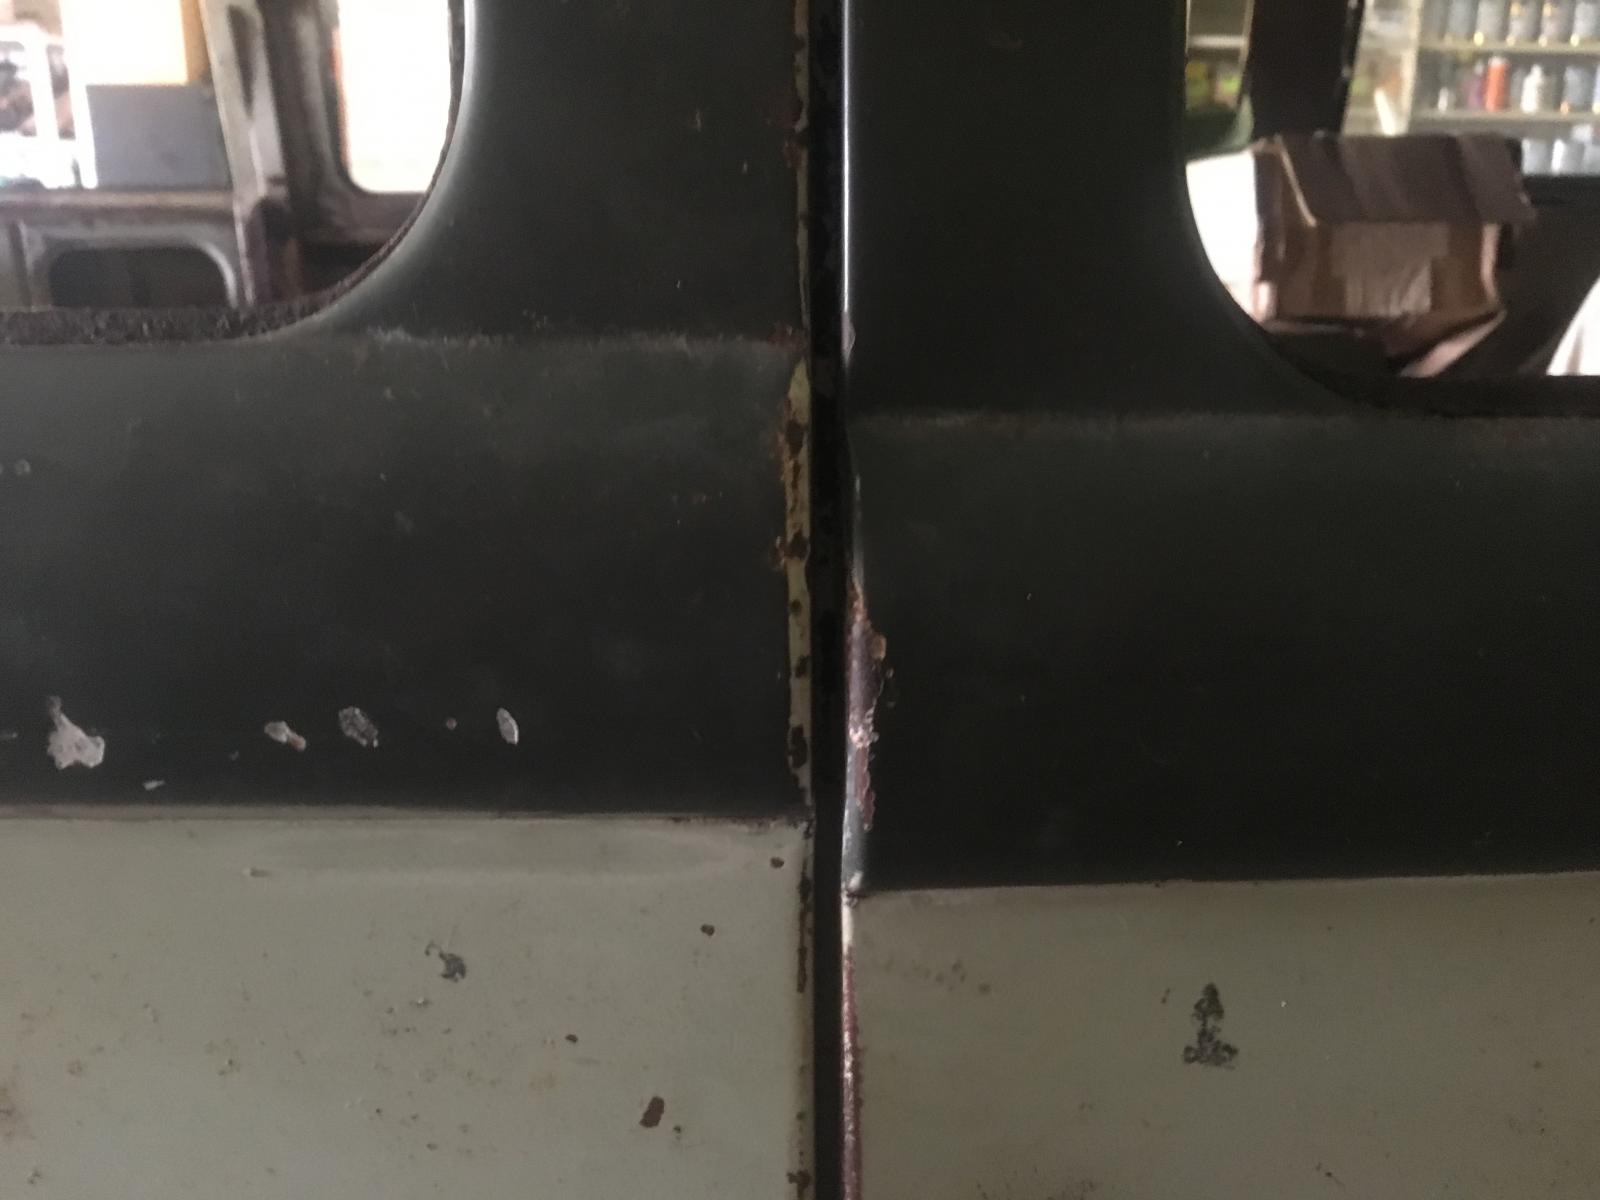

After
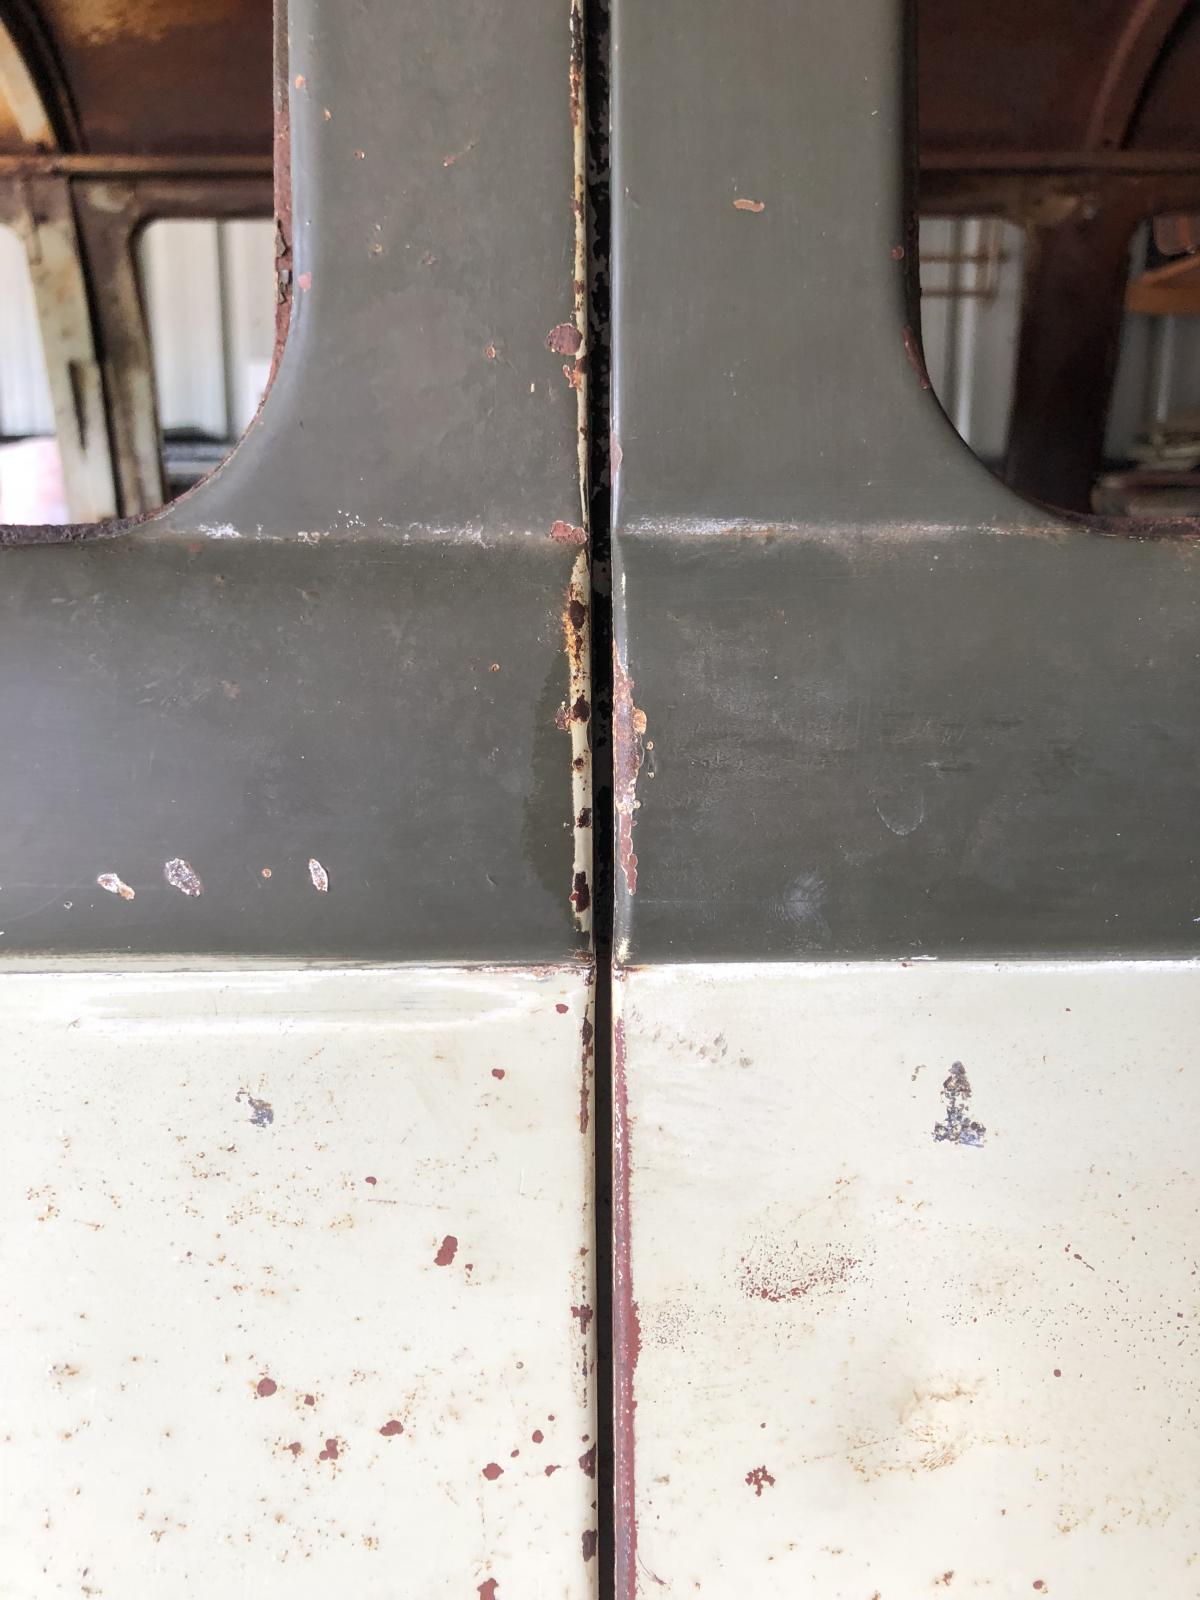
Overall the doors align pretty good now.
Before
After
Overall the doors align pretty good now.
-
rusty 55
- DSKer
- Posts: 567
- Joined: Wed Nov 28, 2007 8:56 pm
- Location: Adelaide
Re: pg/sg 55
Nice one
Looking good, I only hope mine comes up as good
Looking good, I only hope mine comes up as good
it’s got nuffin to do wiv yer “vor sprung Durch technic” ya know!
-
D-Train
- DSKer
- Posts: 3492
- Joined: Mon Nov 28, 2005 3:03 pm
- Location: coffs harbour
Re: pg/sg 55
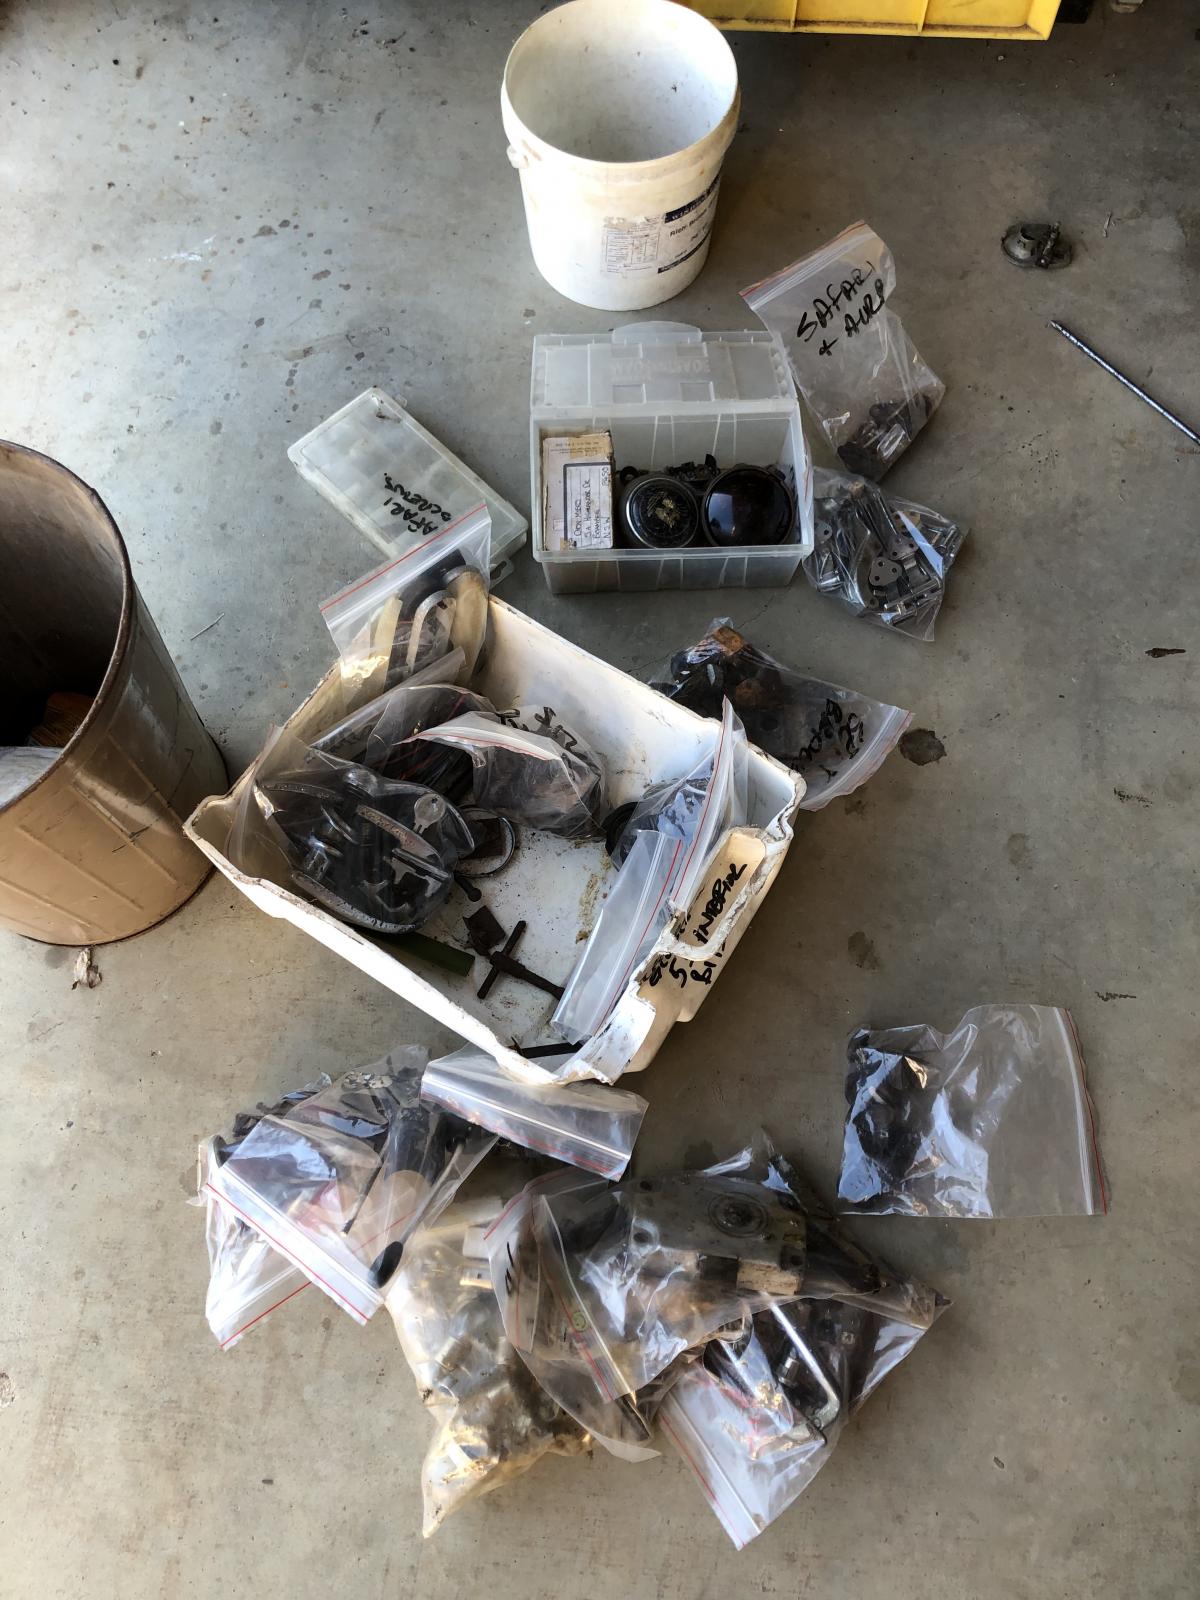
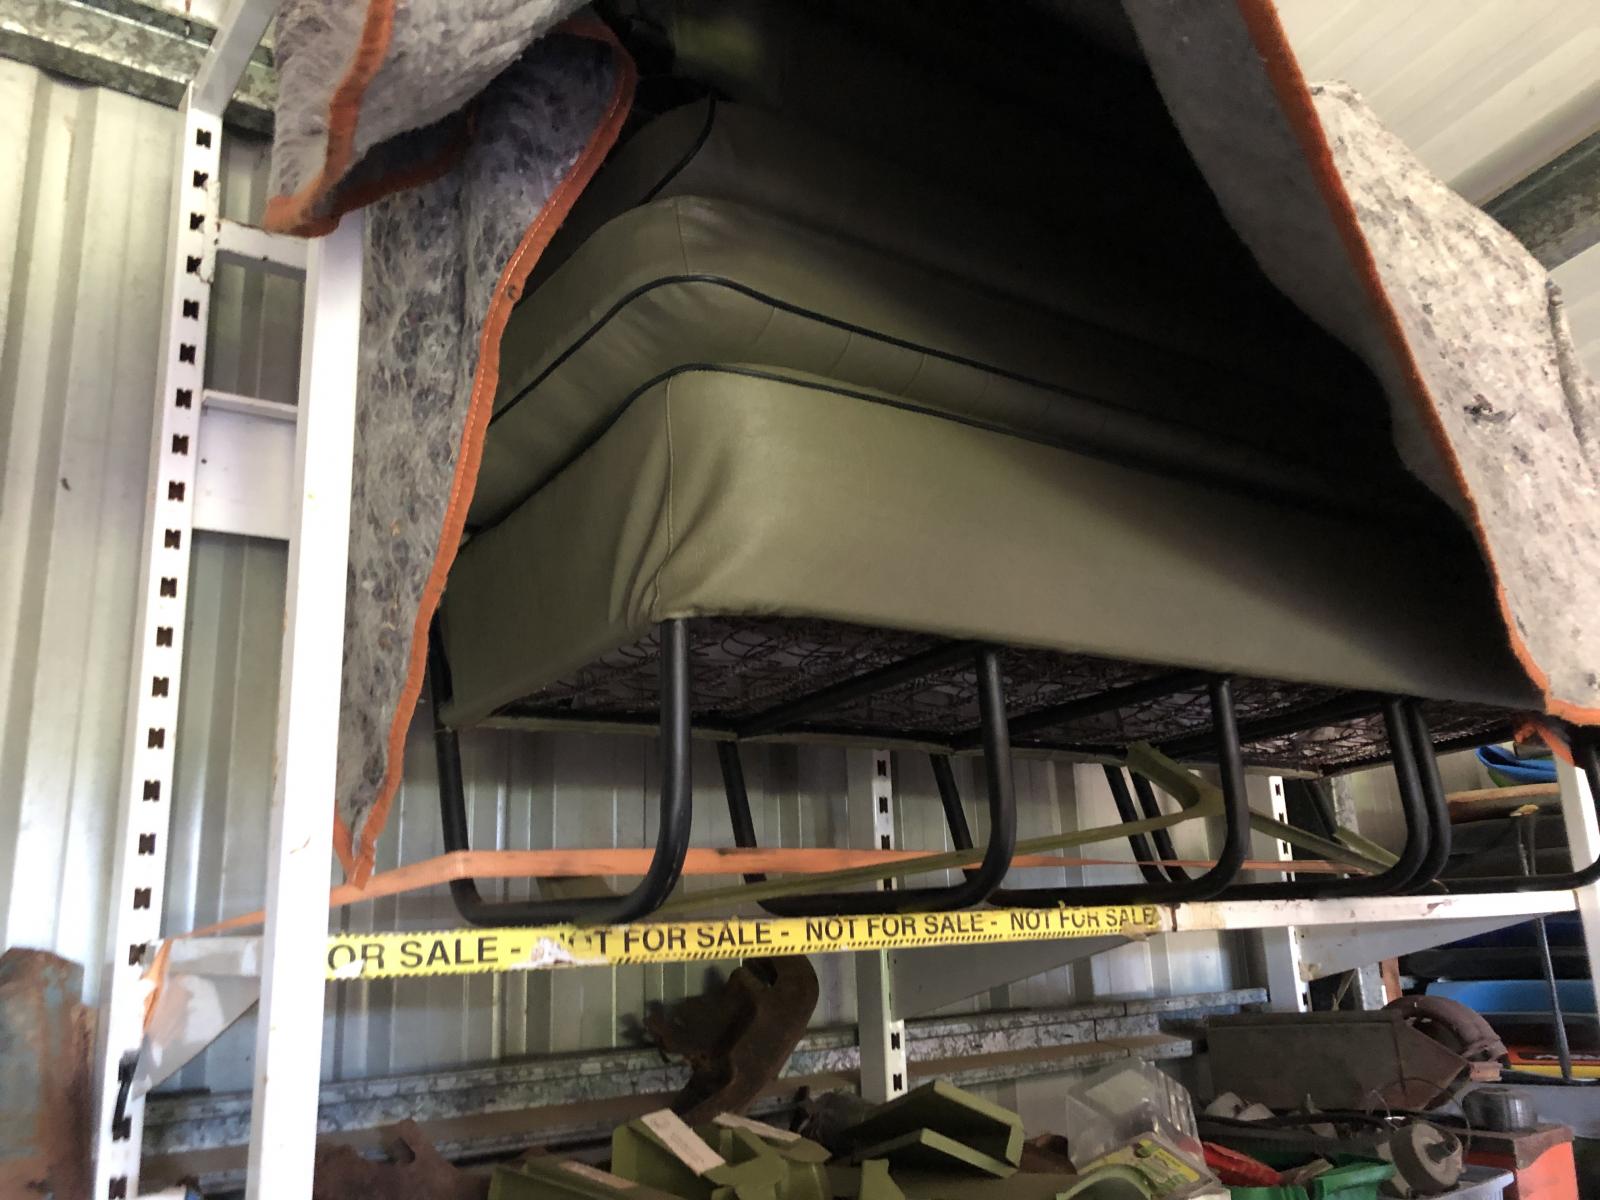
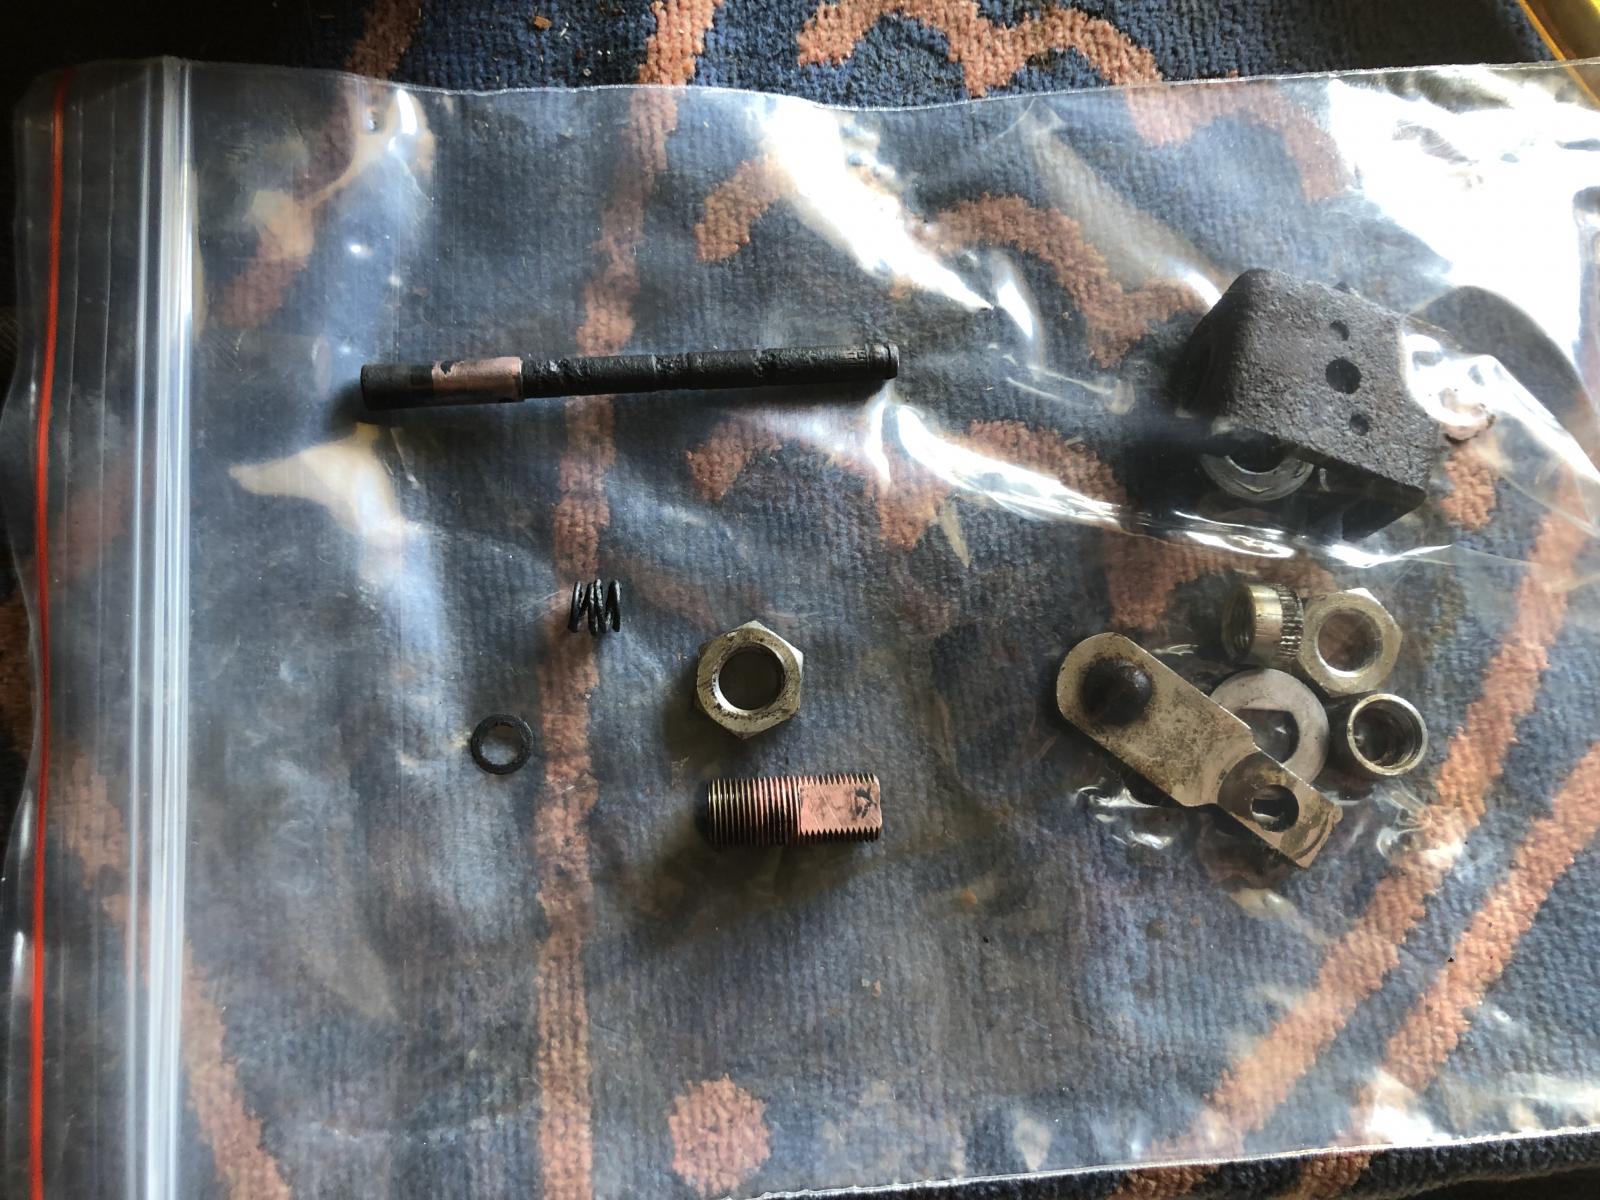
Had some time to get into some small jobs. Sorted out and bagged up bits in groups. Amazing what’s actually there and what’s I’ve collected for it when it’s all condensed. Got the seats up and safely away also. That’s some hard lifting by yourself...

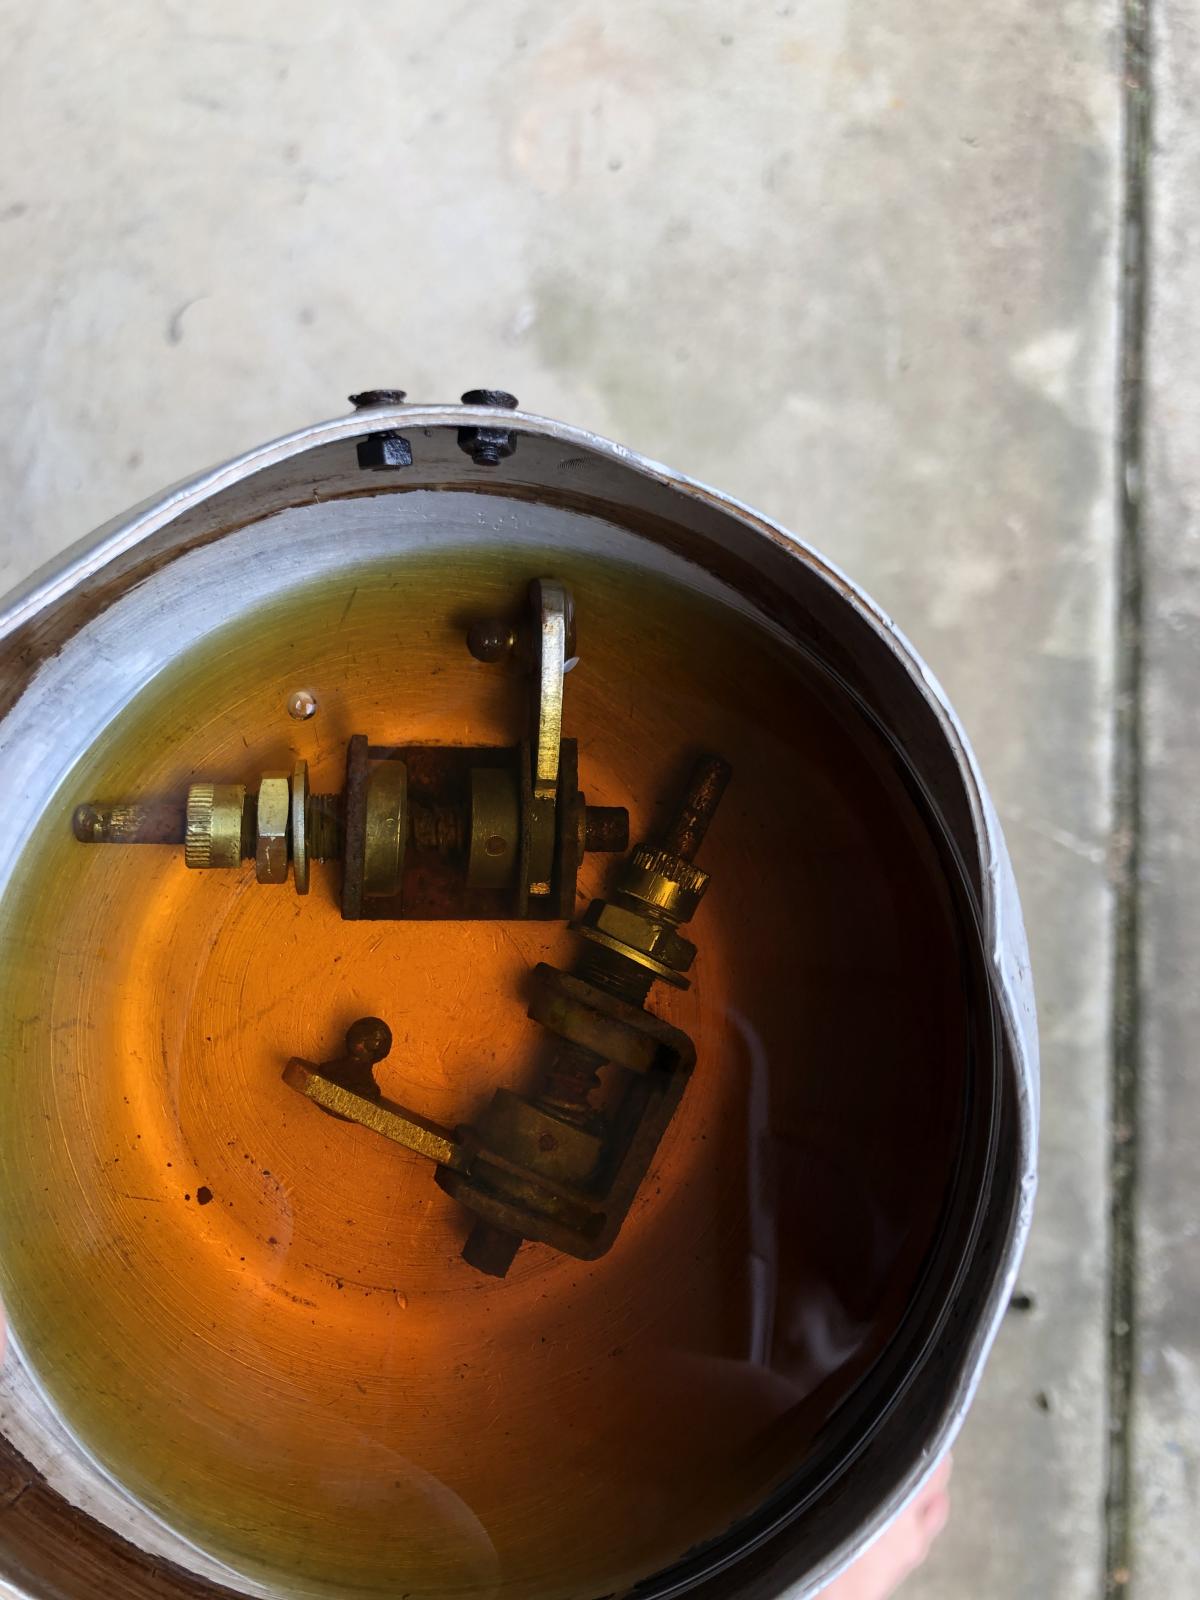
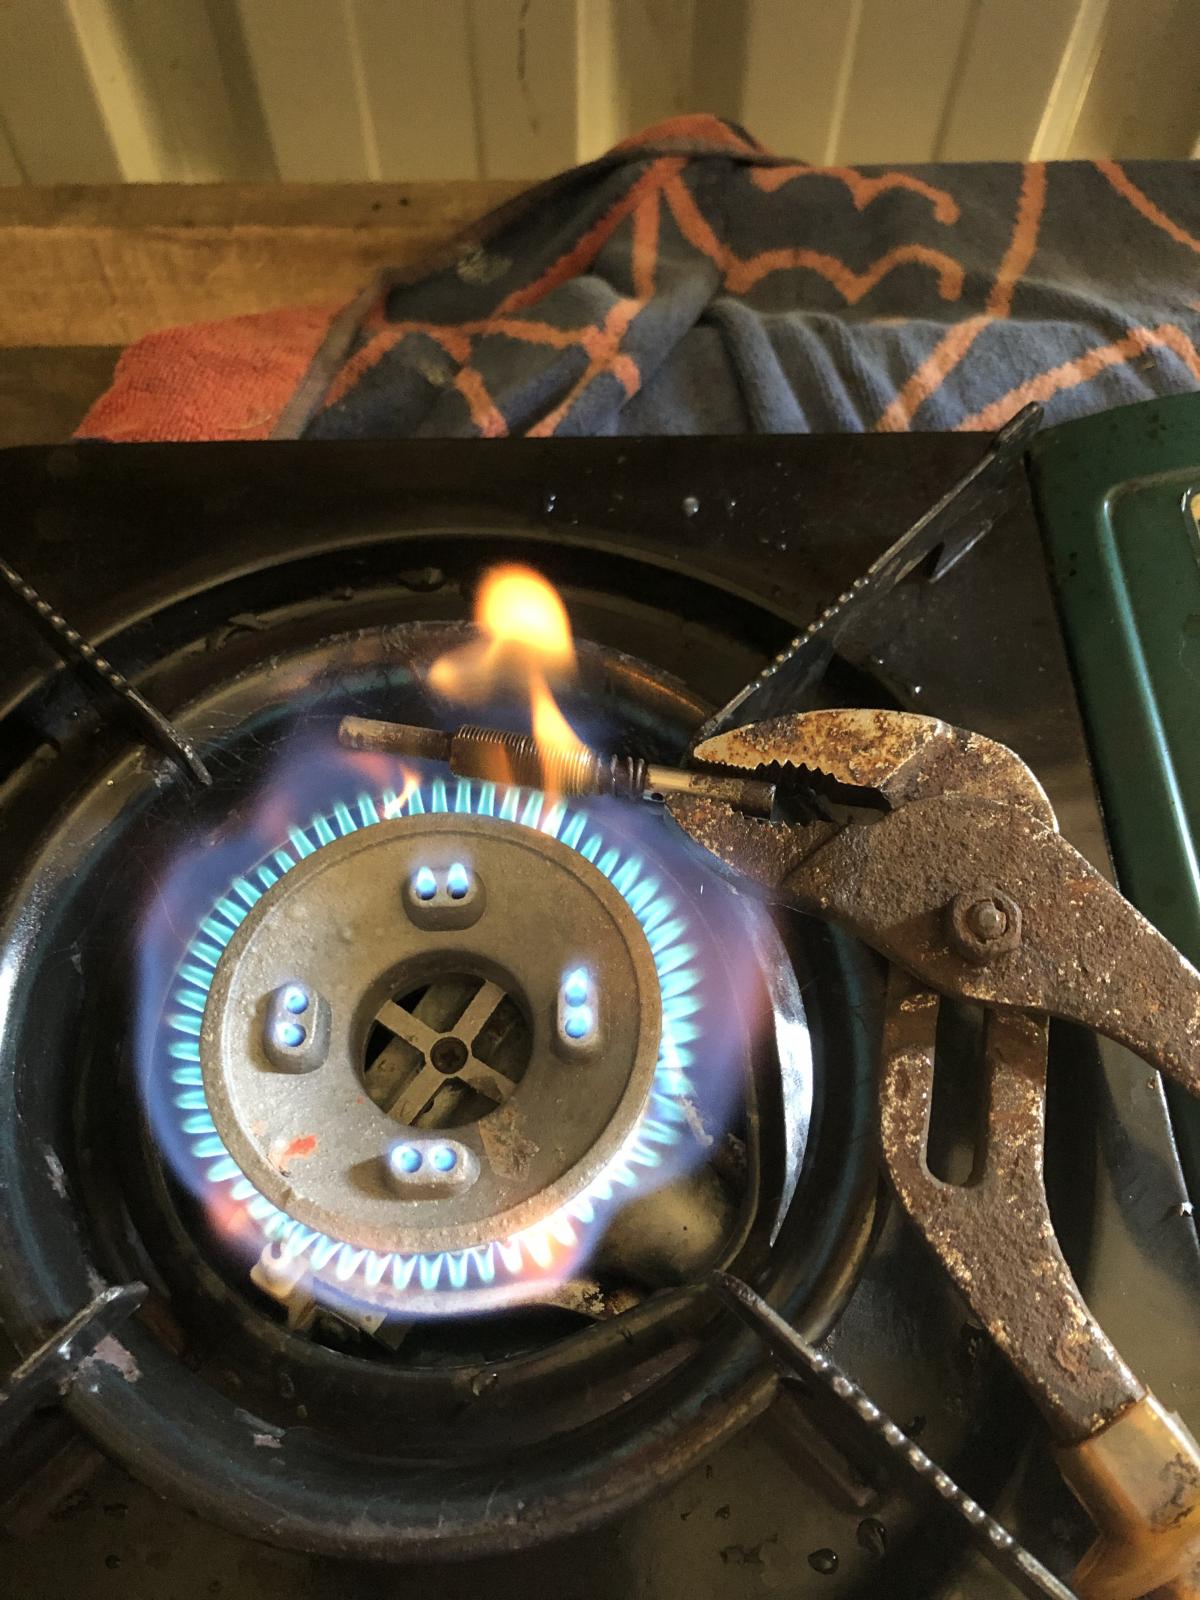
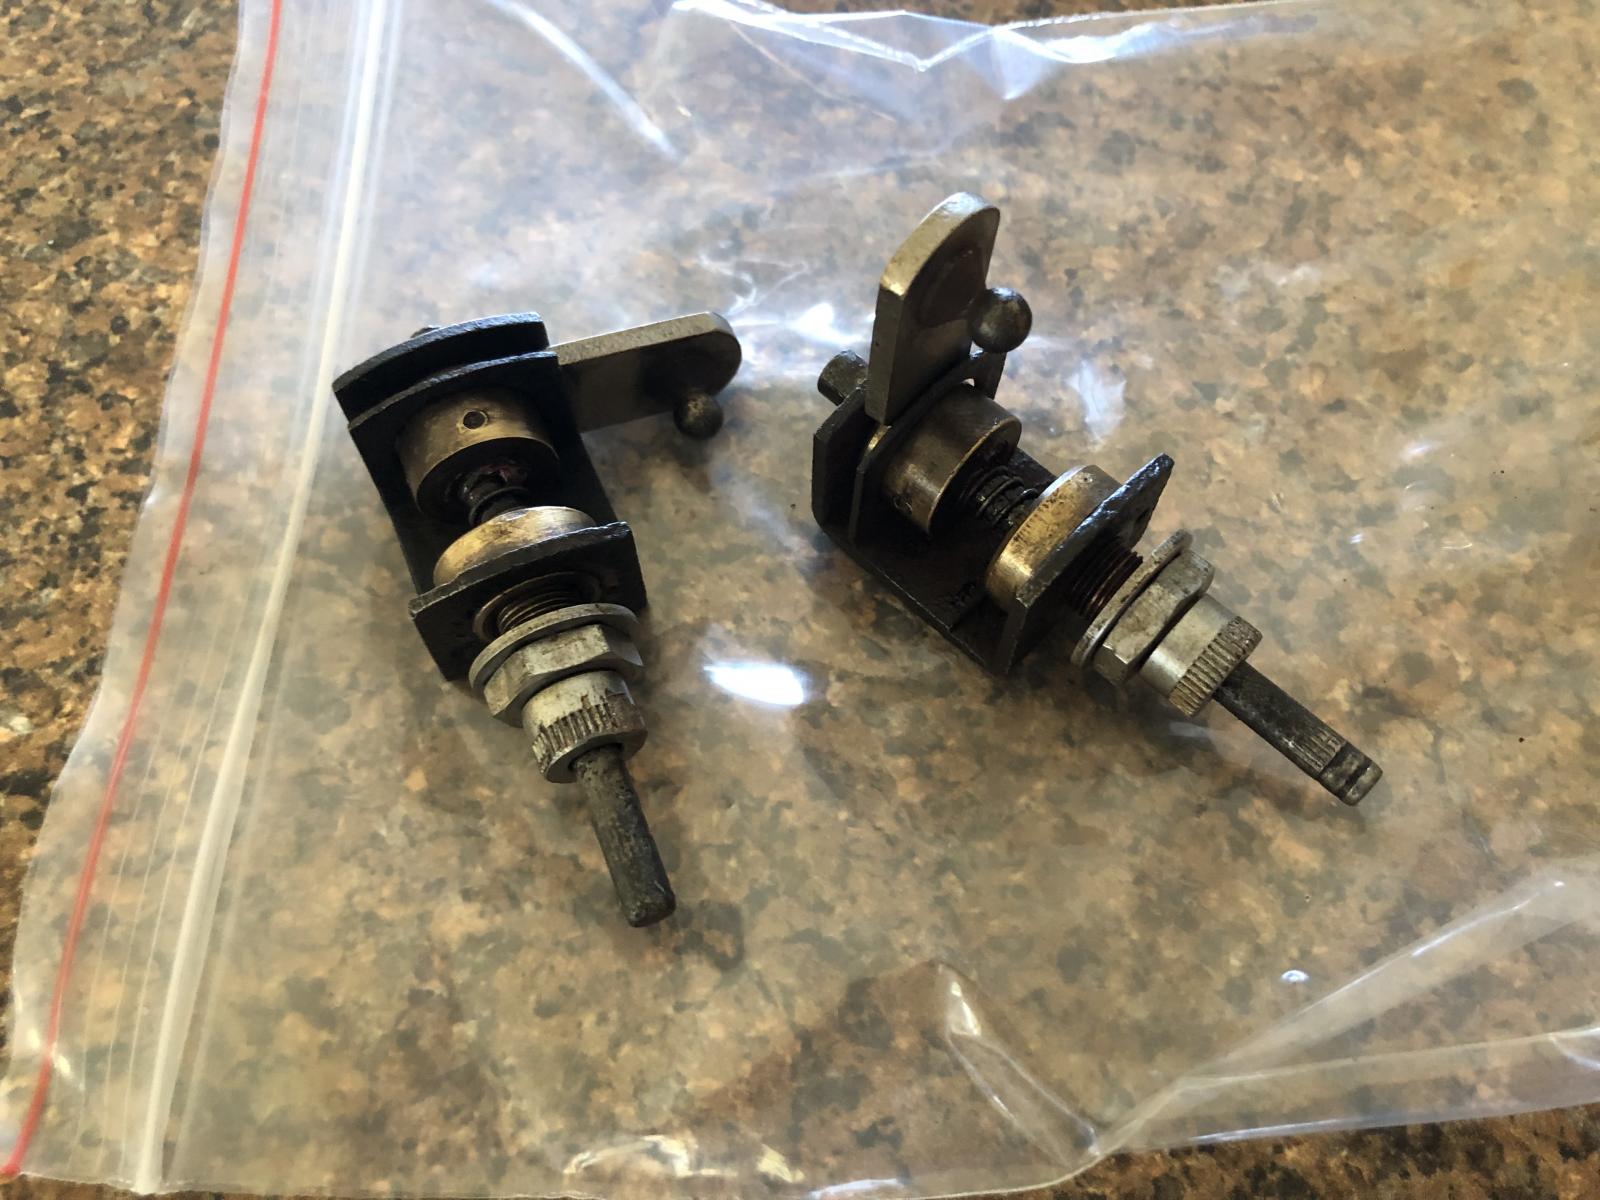
I found a set of reproduction wiper spindles that I bought because the originals were frozen solid, They are good, but i decided to fix what I have.
Soaking. Some heat, friendly persuasion and next thing. 2 great safari spindles again. Replaced the springs on them cause they were rusted.
I found a set of reproduction wiper spindles that I bought because the originals were frozen solid, They are good, but i decided to fix what I have.
Soaking. Some heat, friendly persuasion and next thing. 2 great safari spindles again. Replaced the springs on them cause they were rusted.
-
D-Train
- DSKer
- Posts: 3492
- Joined: Mon Nov 28, 2005 3:03 pm
- Location: coffs harbour
Re: pg/sg 55
Doing small jobs here and there, this time it was the rusted Vin plate and made in western Germany tag.
Been reading about how to “restore” them, and my biggest concern was losing the chassis number because of how light they were stamped so sandblast was out of the question. So, took them off and soaked them for hours and hours in a solution that “eats” rust away, and carefully with some super fine steel wool slowly scrubbed parts off then soaked again..
here’s the results.
Before
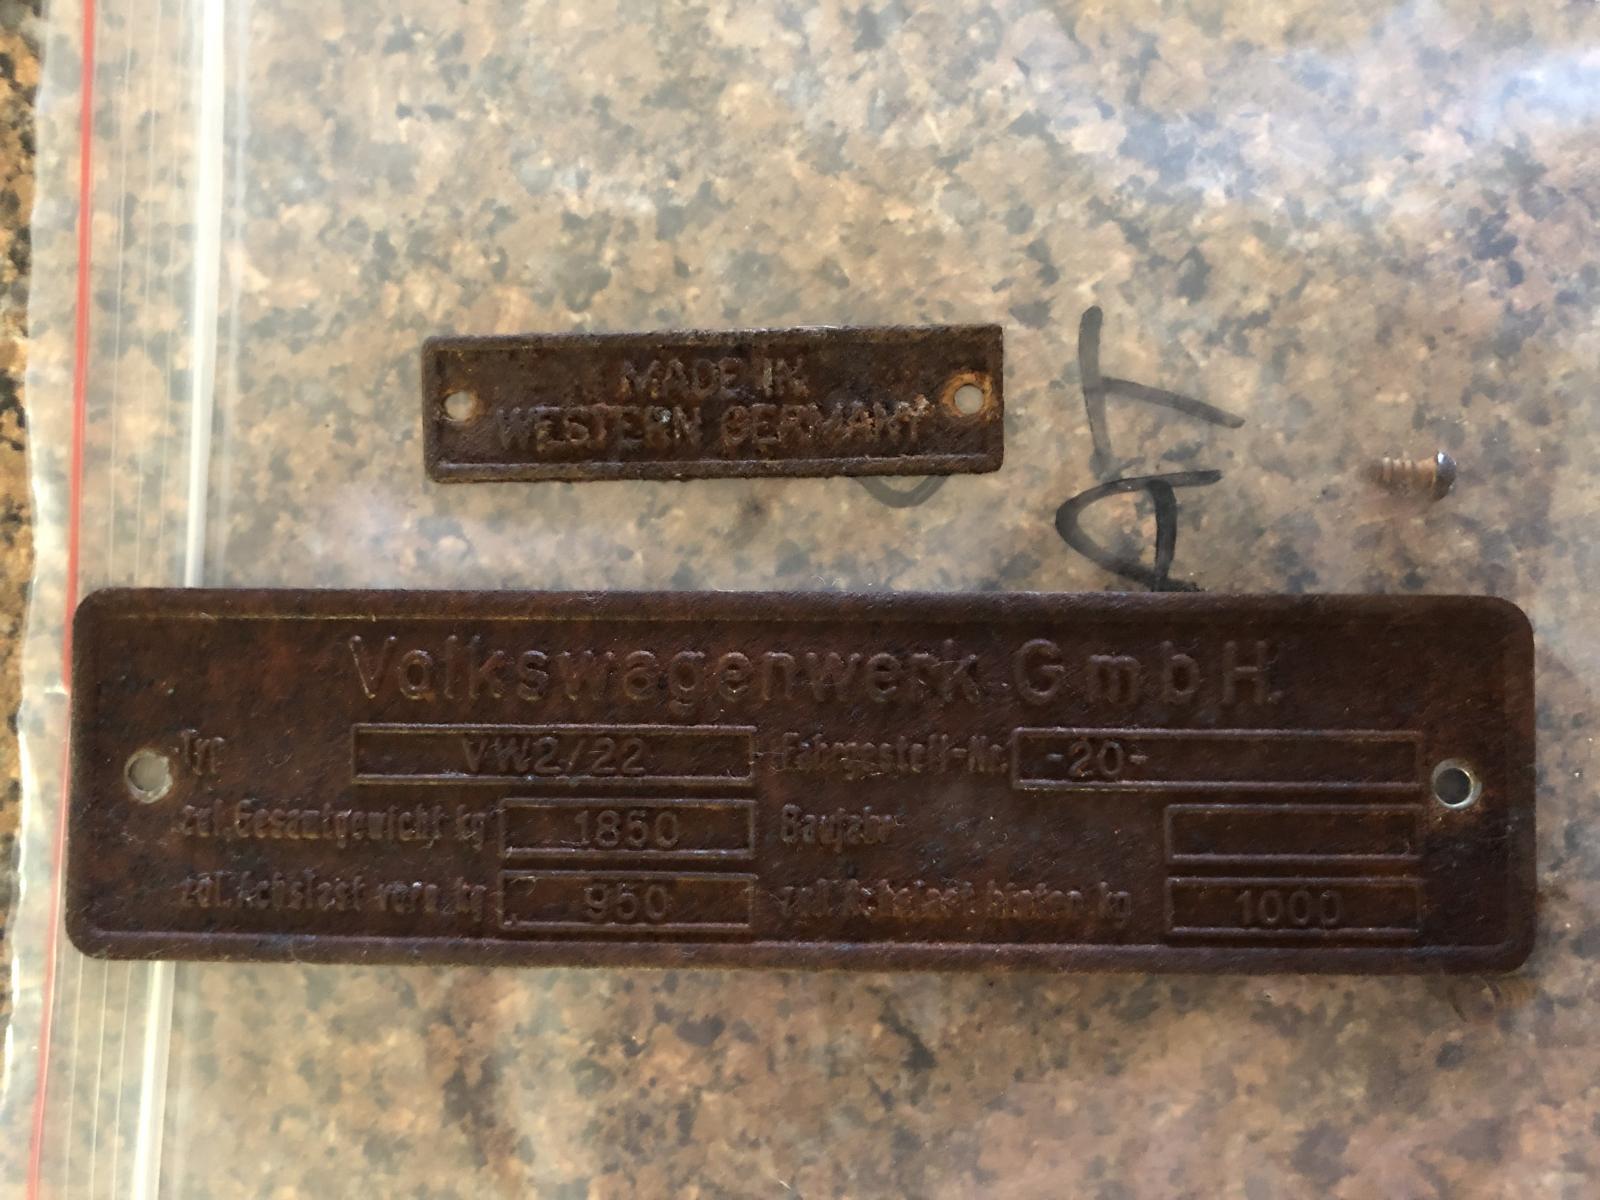
During (boring)
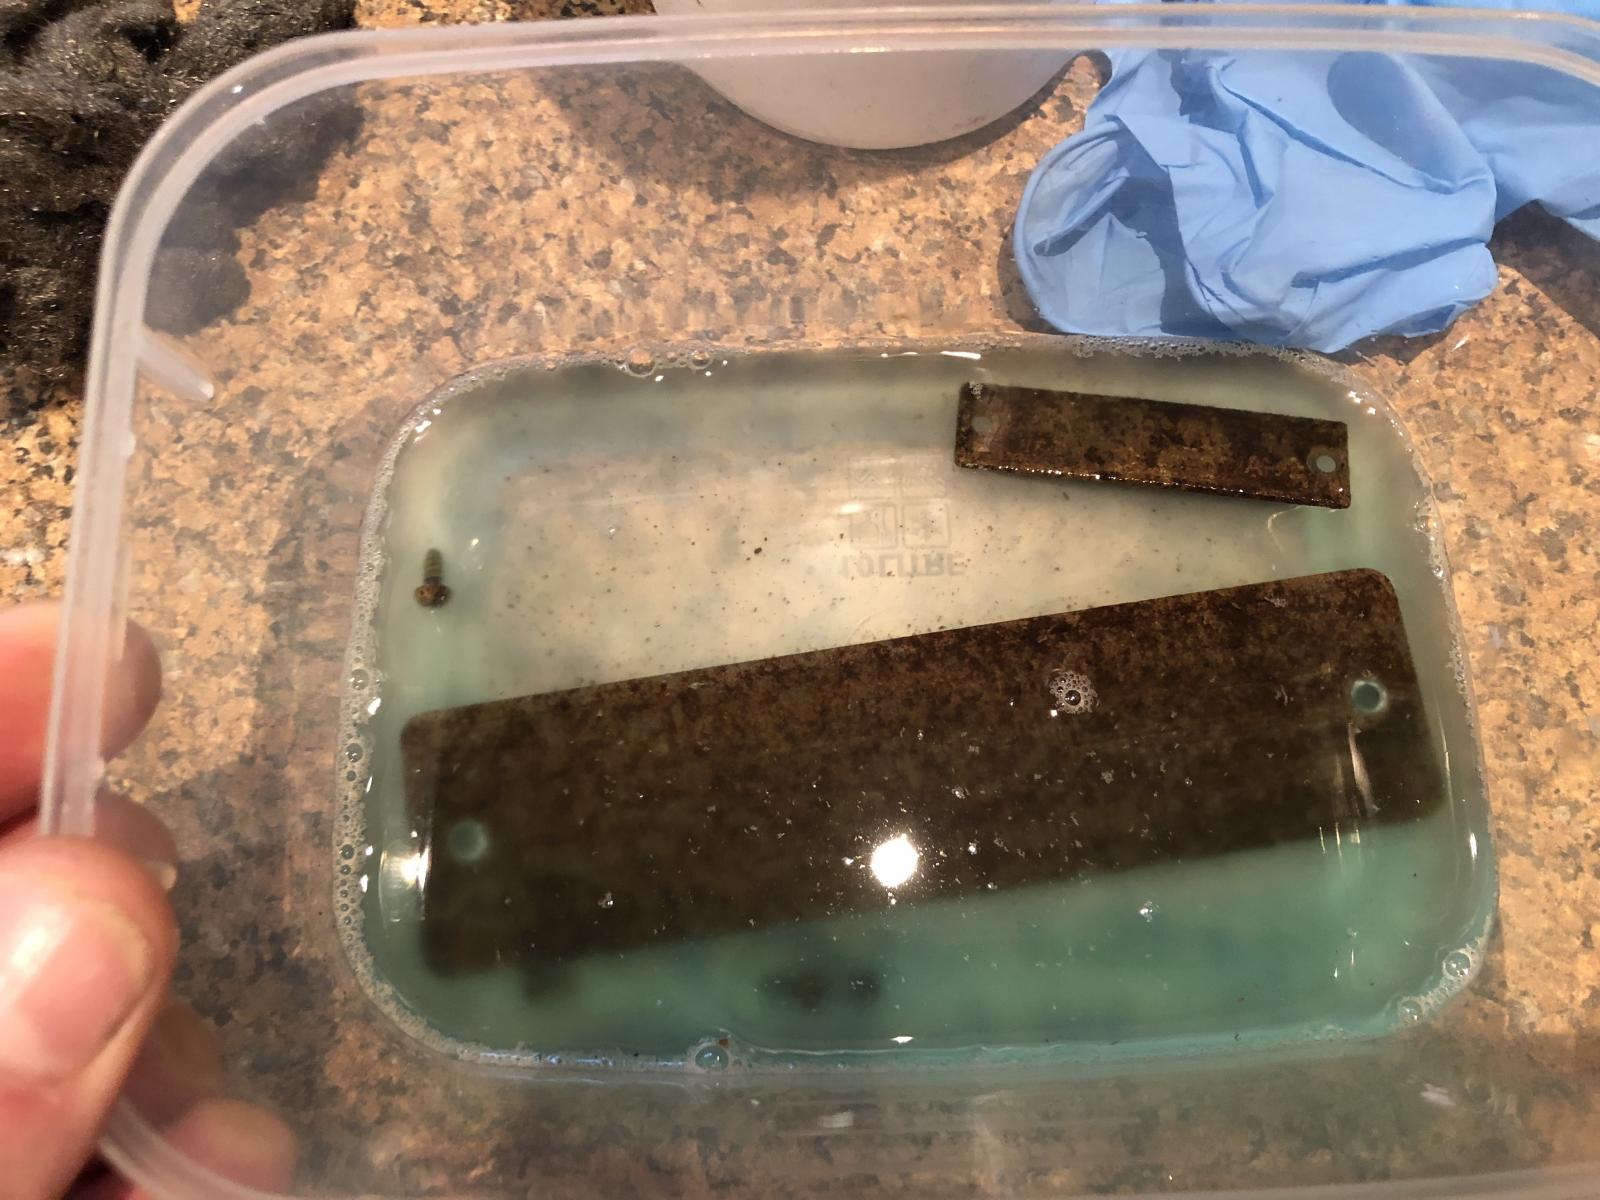
And after.
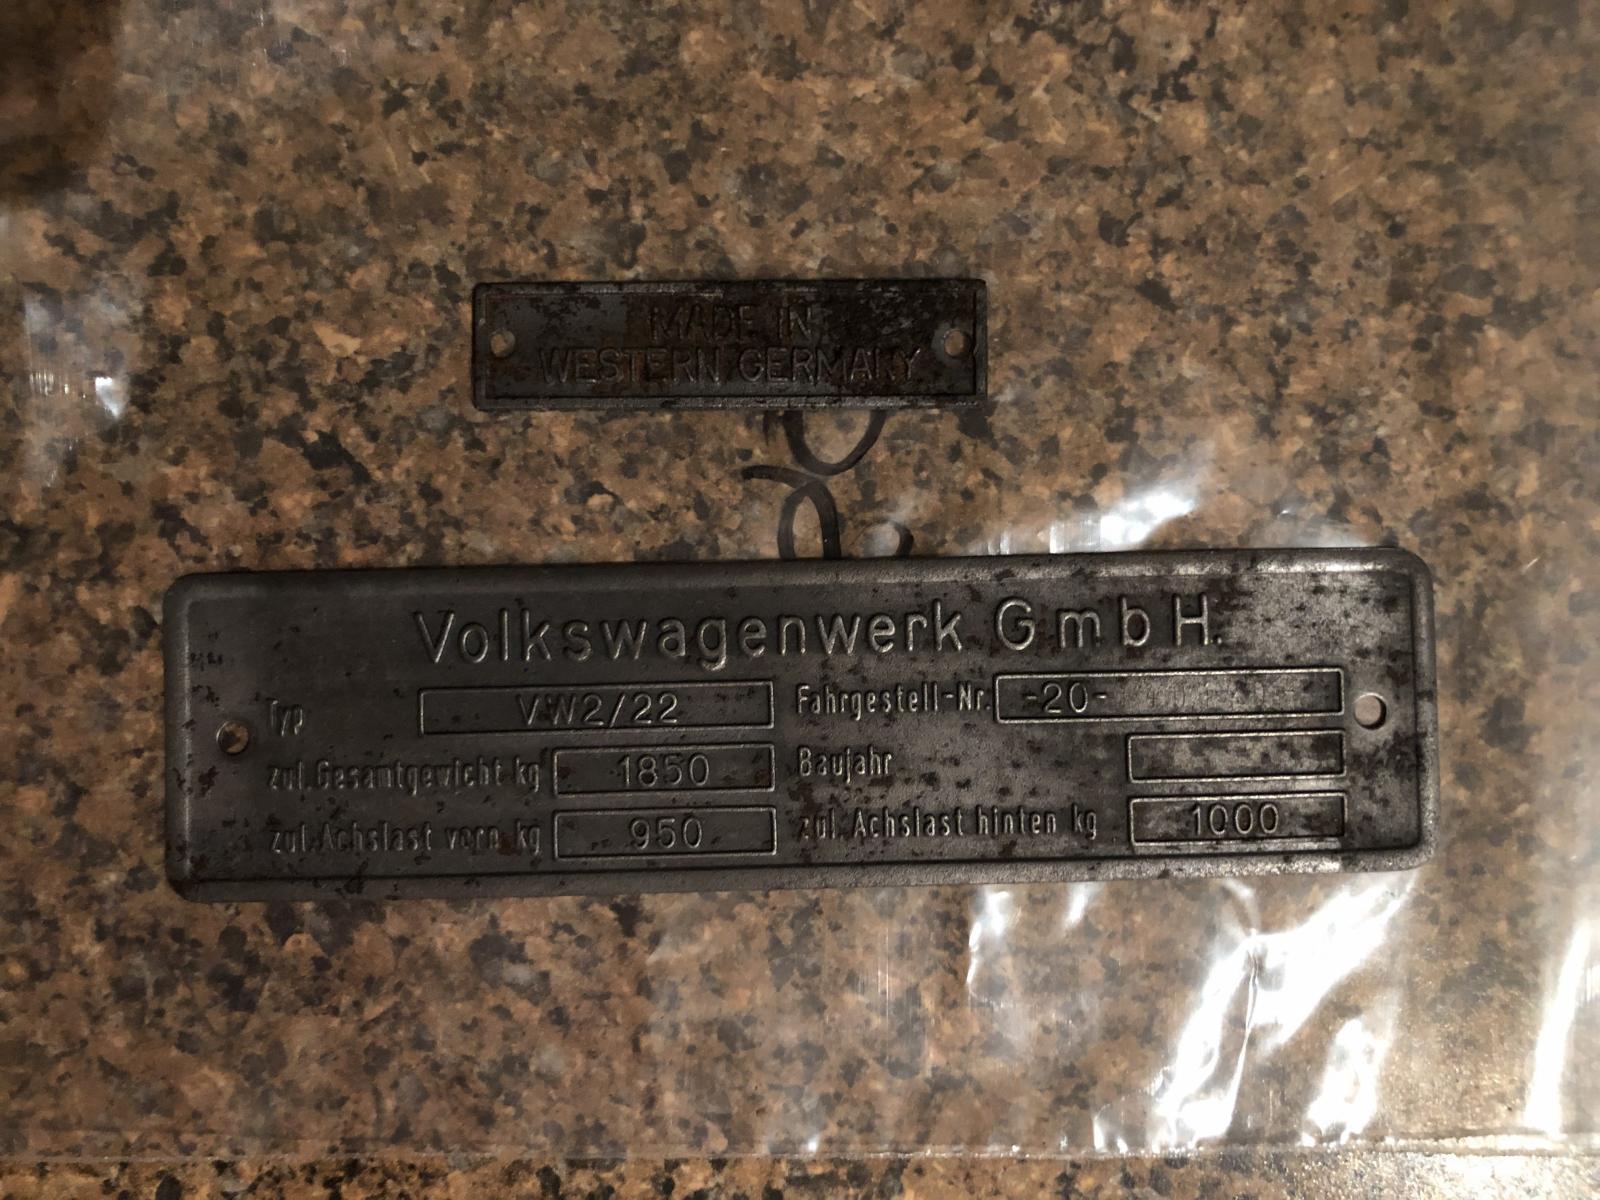
With the final result.
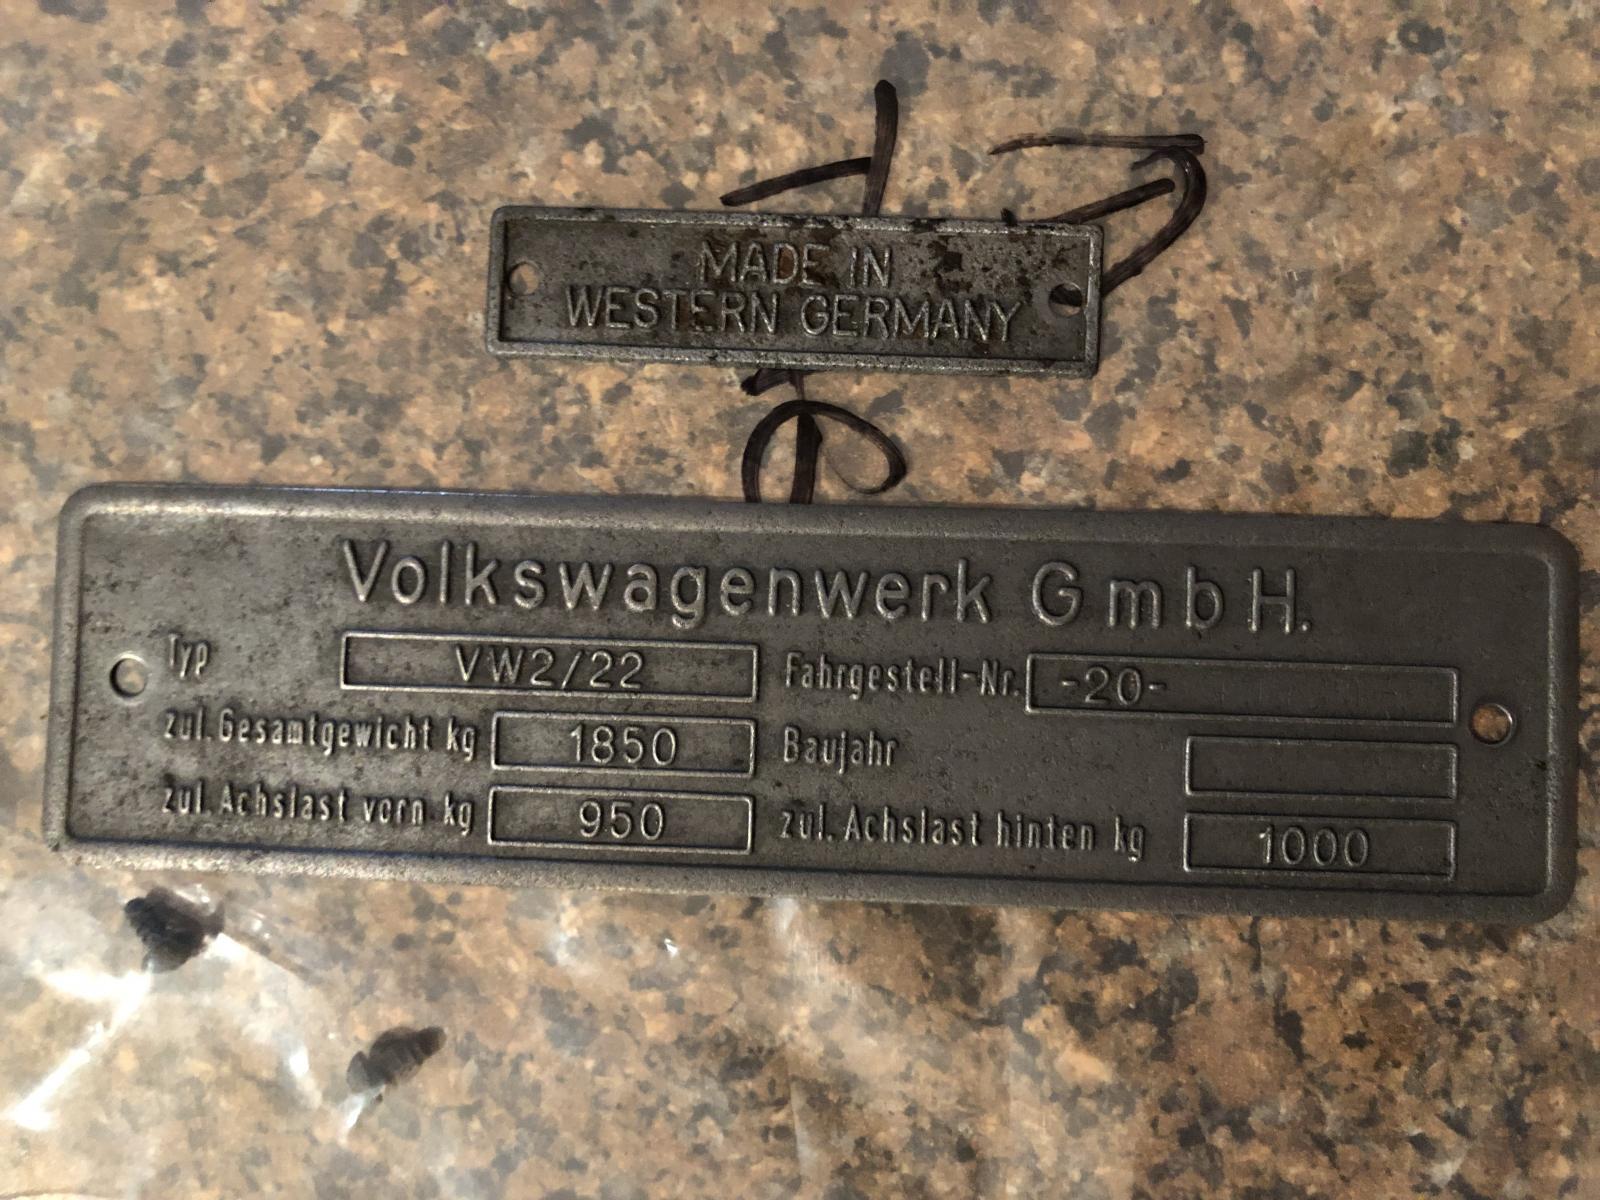
The smaller tag was pitted badly and corroded in places so it didn’t turn up as good. The Vin number can be read on the right angle. They really didn’t stamp it all that hard.
Been reading about how to “restore” them, and my biggest concern was losing the chassis number because of how light they were stamped so sandblast was out of the question. So, took them off and soaked them for hours and hours in a solution that “eats” rust away, and carefully with some super fine steel wool slowly scrubbed parts off then soaked again..
here’s the results.
Before
During (boring)
And after.
With the final result.
The smaller tag was pitted badly and corroded in places so it didn’t turn up as good. The Vin number can be read on the right angle. They really didn’t stamp it all that hard.
-
vanell
- DSKer
- Posts: 1559
- Joined: Sat Jul 15, 2006 3:58 pm
Re: pg/sg 55
I’m going have to push you to start the inevitable, you got to start on the outriggers, floor, sills, b pillars, an c pillars ,gotta get that bottom 6 inches done, that’s the starting point, you’ve been dodging it, do l have to come around there and give you a good talking to! I’m miles away but only a phone call away for help, Ian
-
splitthis

- DSKer
- Posts: 1559
- Joined: Wed Nov 28, 2007 8:47 pm
- Location: Adelaide
Re: pg/sg 55
What was the magic solution D-train? Coming up great.
Chasing any Neiman steering lock parts, will consider anything.