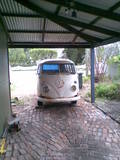
Just sharing some pictures of my custom 59 project. It's been going a while now and starting to take shape. I had a 67 splitty (eg PMG) when I first met my wife - quite some time ago. With the kids pretty much grown up we decided to go back to where the romance started so to speak...
My original 67 was rough but loyal but we wanted to get a few creature comforts - effectively creating a custom splitty "tourer" and sourced a reasonable 59 from Steve Muller and got it to Al at Das Resto Haus. He along with Steve and Rob have building our dream splitty for over a year now.
As we intend to take her on many tours in the future and wanted a comfortable ride the bus includes things like Walk Through conversion, Air Con, Red 9 front end, Supercharged Engine and a few other creature comforts like a good sound system and rock and roll bed.
Here are some random shots - I'll put more photos up in historic sequence if anyone is interested.
59 11 window Splitty Custom Resto
Moderators: warb, Rawdyn, Leroy, byronbus, Tonz Magonz, dmb
-
67seeker
- DSKer
- Posts: 27
- Joined: Sun Feb 05, 2006 9:30 am
59 11 window Splitty Custom Resto
- Attachments
-
- Apr22arrival3.jpg (78.6 KiB) Viewed 4573 times
-
- Mar29hoisted.jpg (58.56 KiB) Viewed 4573 times
-
- Jul1red9in2.jpg (84.52 KiB) Viewed 4573 times
-
- Jun22throttlework1.jpg (73.28 KiB) Viewed 4573 times
-
Shayno
- DSKer
- Posts: 89
- Joined: Wed Apr 08, 2009 10:03 pm
- Location: South West WA
-
pixiesrock!
- DSKer
- Posts: 28
- Joined: Fri Jun 19, 2009 11:00 am
- Location: Newcastle NSW Aust.
-
zeuspig
- DSKer
- Posts: 1218
- Joined: Tue Apr 03, 2007 5:00 pm
- Location: Sunshine Coast
-
FrankenCab
- DSKer
- Posts: 3528
- Joined: Wed Apr 18, 2007 8:55 pm
-
resinmonkey
- DSKer
- Posts: 947
- Joined: Tue Jul 08, 2008 8:30 am
- Location: Margs
-
travellinbob
- DSKer
- Posts: 220
- Joined: Mon Apr 23, 2007 4:43 am
-
D-Train

- DSKer
- Posts: 3492
- Joined: Mon Nov 28, 2005 3:03 pm
- Location: coffs harbour
-
Dasdubber

- DSKer
- Posts: 1847
- Joined: Thu Dec 01, 2005 10:18 pm
- Location: Gold Coast
Cheers guys, we have been very fortunate to be part of this major resto and to run with a few ideas outside the square. Like any custom restoration, not all mods will be loved by everyone, but I am confident even those who aren't fans will still appreciate what has gone into the build.
I'll leave Armando to post up pics however I'm happy to help with any technical details if need be.
Thus far there are no other Red9 front ends on the road in Oz (according to Simon at Red9) and since this bus isn't quite on the road I can't comment on handling - there is a lot of adjustment so fine tuning the spring rate (coil overs) and bump/rebound stiffness (dual adjustable shocks) will be simple.
Engine longblock is being built in Brisbane but will be 2275cc type I based with CB wedgeport heads, mild cam, reasonably low compression and single throttle body EFI (Link ECU) - more details to come later.
Cheers
Al
-
GFresh

- DSKer
- Posts: 1104
- Joined: Wed Apr 29, 2009 8:12 pm
- Location: Geelong Australia
- Contact:
Hi Al, top work there mate, this will be yet another fine exampleDasdubber wrote:
Thus far there are no other Red9 front ends on the road in Oz (according to Simon at Red9) and since this bus isn't quite on the road I can't comment on handling - there is a lot of adjustment so fine tuning the spring rate (coil overs) and bump/rebound stiffness (dual adjustable shocks) will be simple.
Al
Just curious, what is the cost for a Red9 front end including shipping to Aus roughly, I've considered this set up due to the fine adjustment ability and also the later technology used.
Cheers George.
-
67seeker
- DSKer
- Posts: 27
- Joined: Sun Feb 05, 2006 9:30 am
I'll leave Al to answer the Red 9 questions and the technical stuff - in the mean time I'll attempt to chronicle the resto over time.....
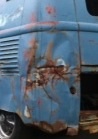
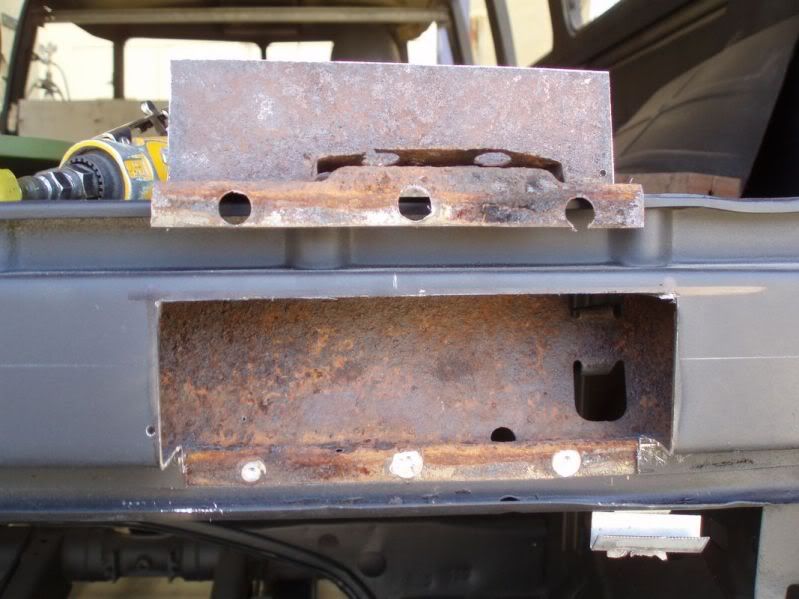
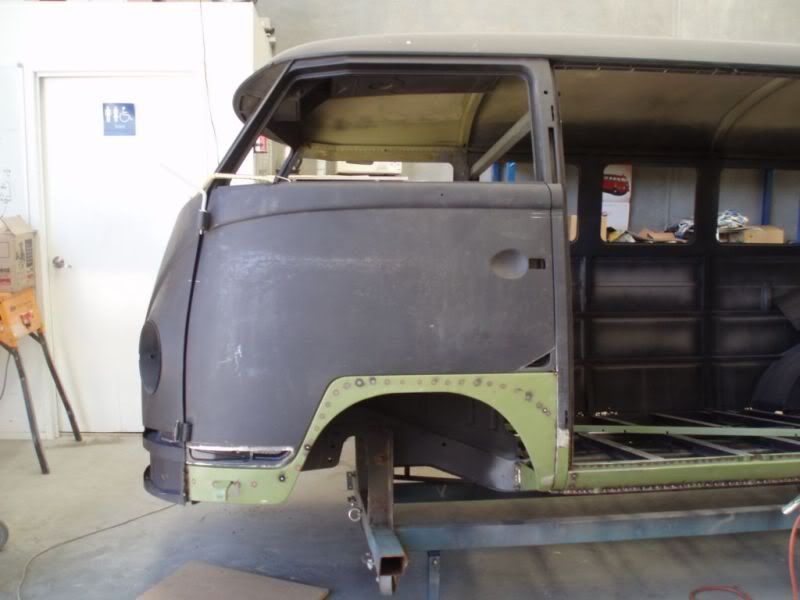
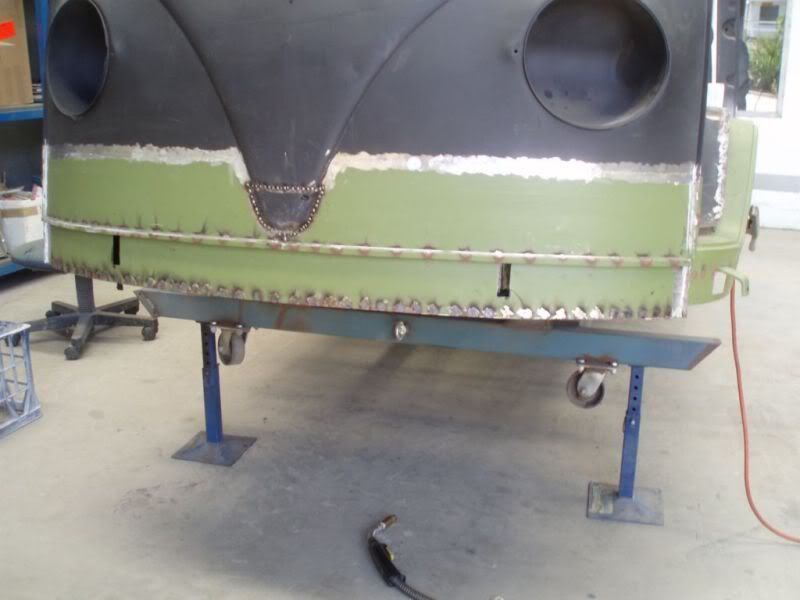
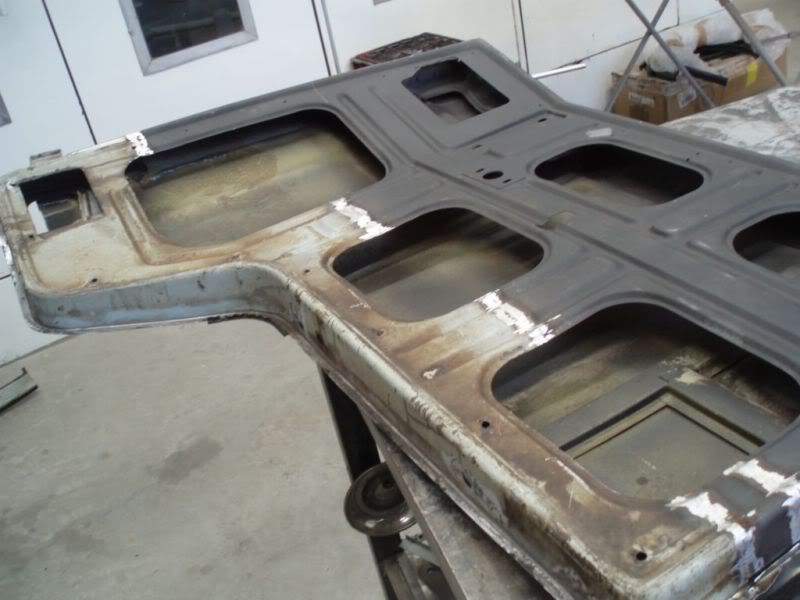
As per most restorations, more had to be cut out than expected
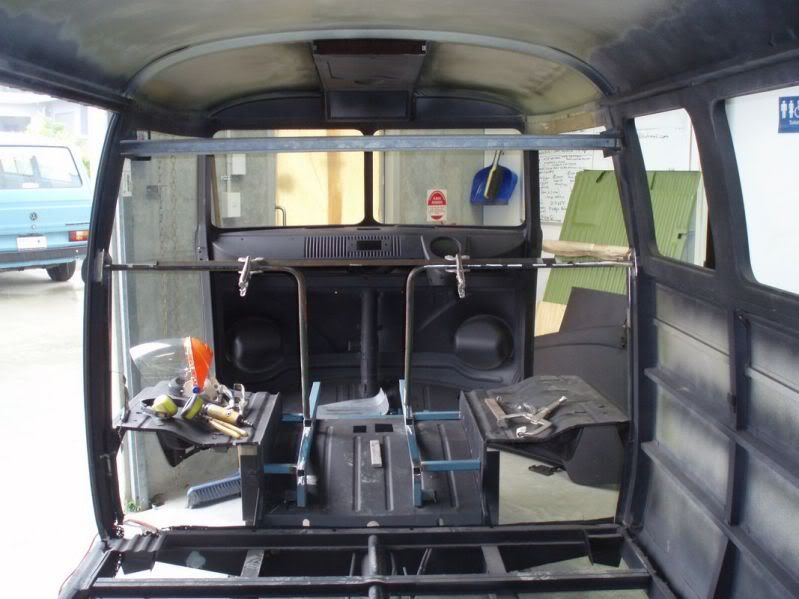
The early beginnings of the walk through conversion
Many many hours were spent straightening out dents accumulated throughout the years, but also factory intolerances in seams and joints
Shaping the walk through seat backs/bases
A lot of new metal went into the bus
As per most restorations, more had to be cut out than expected
The early beginnings of the walk through conversion
Many many hours were spent straightening out dents accumulated throughout the years, but also factory intolerances in seams and joints
Shaping the walk through seat backs/bases
A lot of new metal went into the bus
-
bay window bandit
- DSKer
- Posts: 749
- Joined: Thu Jun 29, 2006 1:27 pm
- Location: sydney

-
resinmonkey
- DSKer
- Posts: 947
- Joined: Tue Jul 08, 2008 8:30 am
- Location: Margs
-
67seeker
- DSKer
- Posts: 27
- Joined: Sun Feb 05, 2006 9:30 am
More progress shots
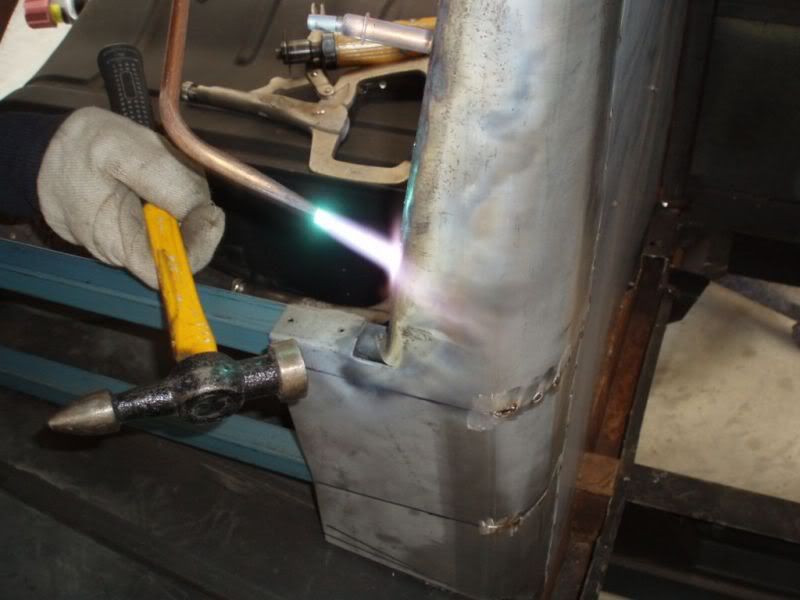
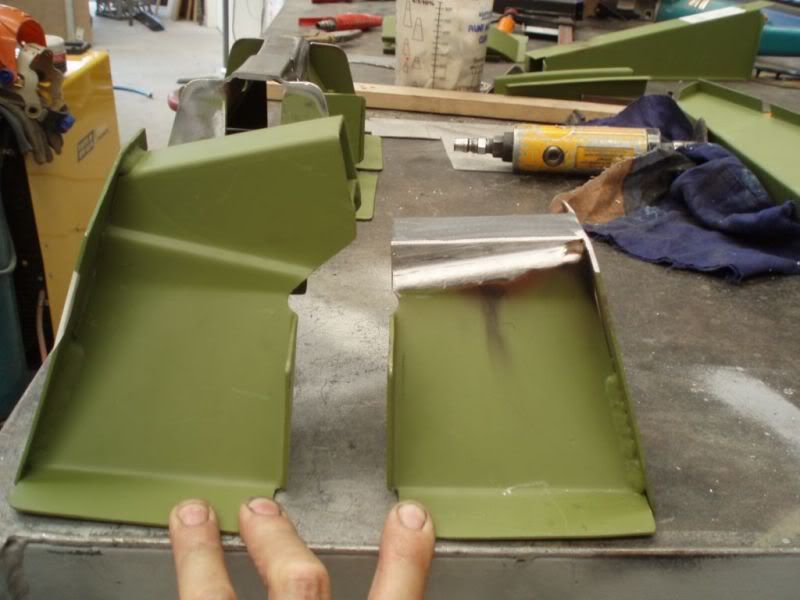
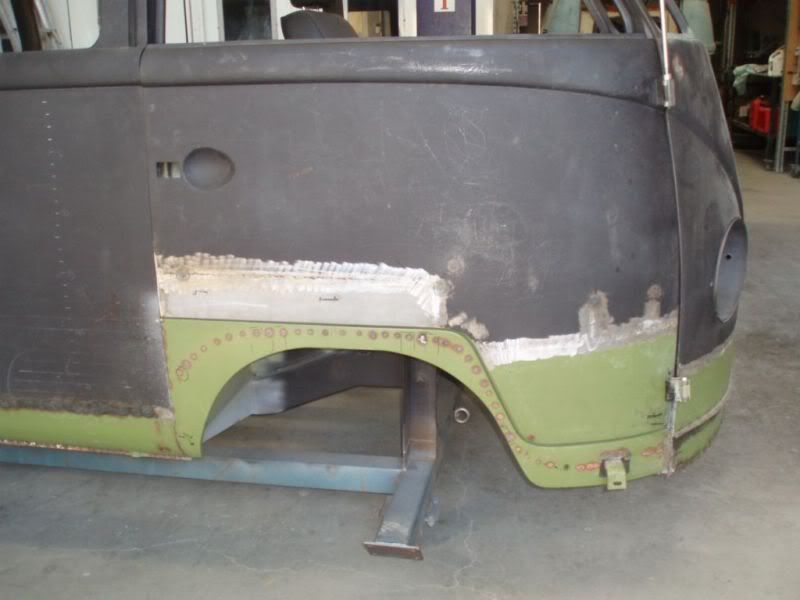
Doglegs on both sides had to be replaced as well as inner and outer valance and lower nose plus many other areas
Jacking points were customised so the ugly box sections are not visible from the side of the bus but are still functional for lifting on the hoist – late model non vw jack will be used on chassis rail instead.
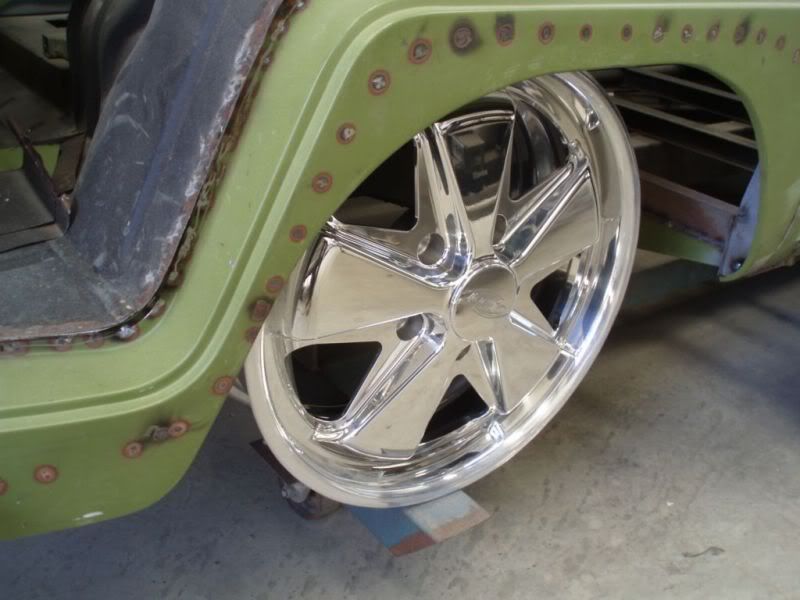
A hint of things to come
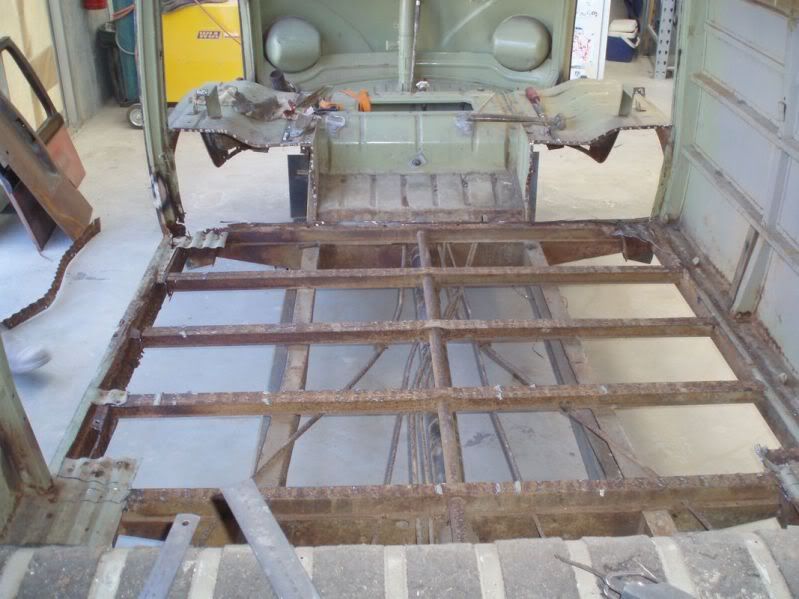
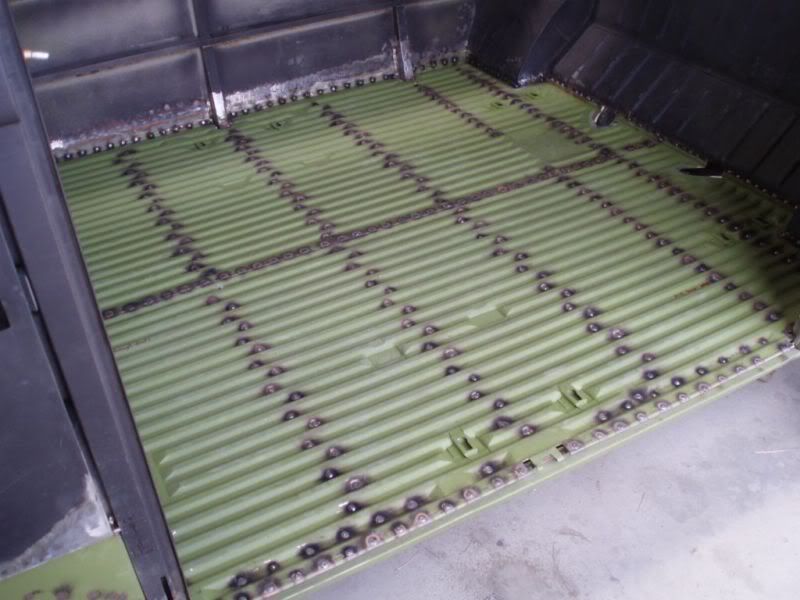
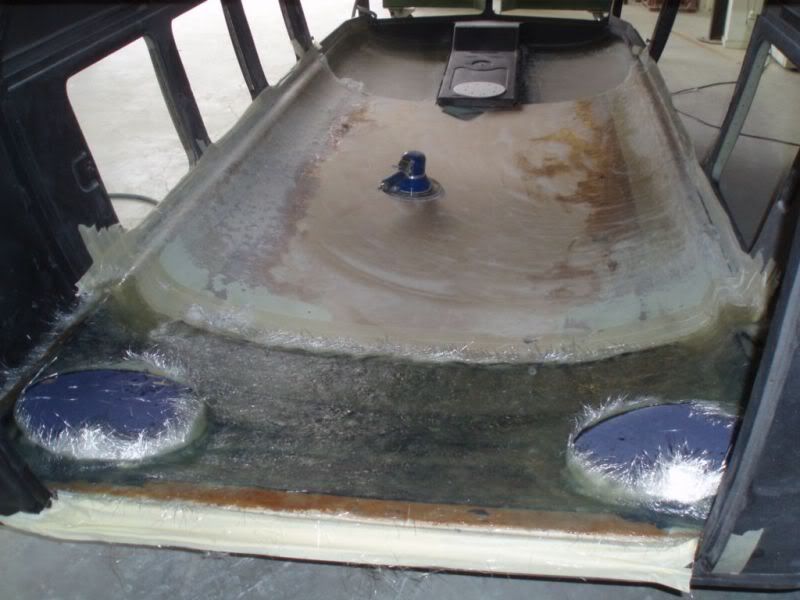
New cargo floor....
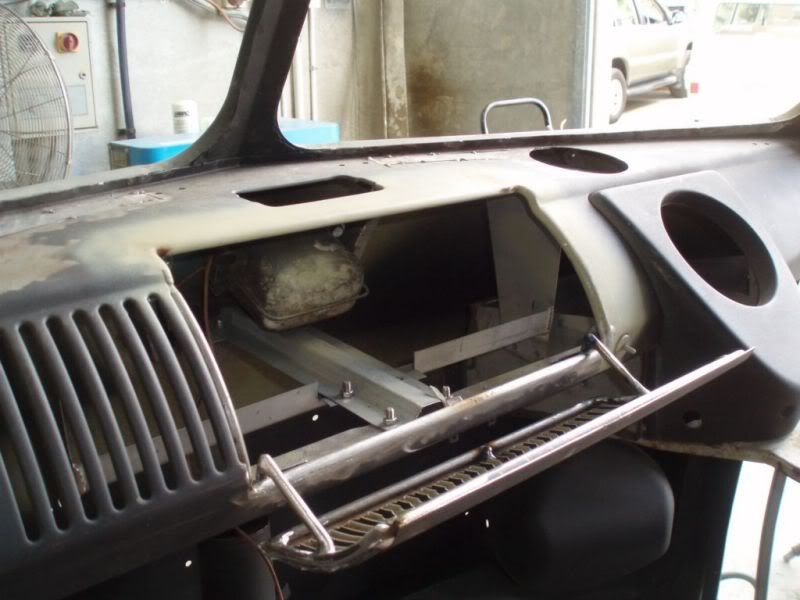
The start of the air conditioning installation – under dash blower unit
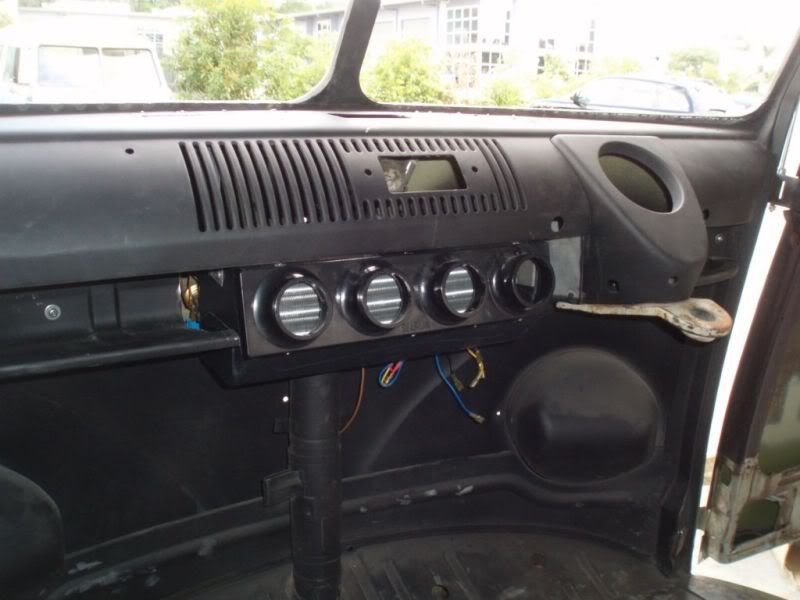
Original heater outlets on dash top were removed and round vents out of a Mondeo were used to allow directional and flow control

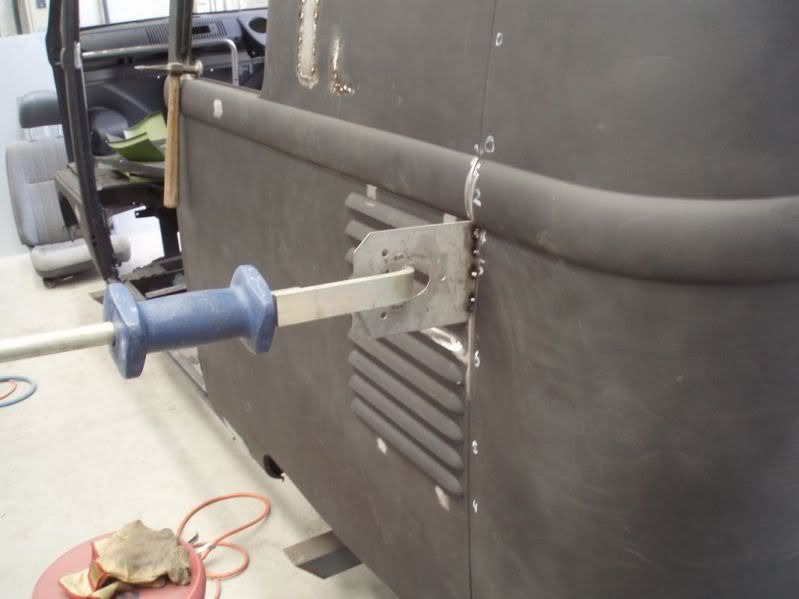
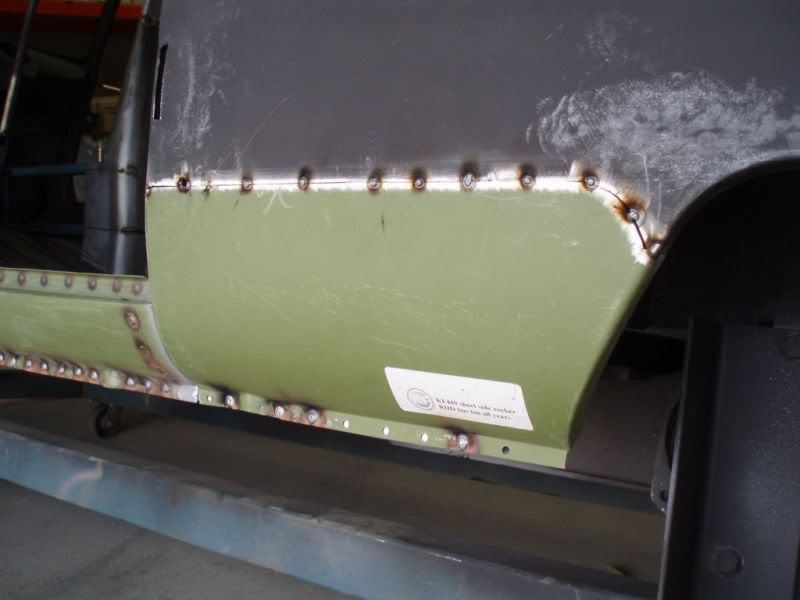
A lot of time was spent to get gaps right
Custom glove box construction
Doglegs on both sides had to be replaced as well as inner and outer valance and lower nose plus many other areas
Jacking points were customised so the ugly box sections are not visible from the side of the bus but are still functional for lifting on the hoist – late model non vw jack will be used on chassis rail instead.
A hint of things to come
New cargo floor....
The start of the air conditioning installation – under dash blower unit
Original heater outlets on dash top were removed and round vents out of a Mondeo were used to allow directional and flow control
A lot of time was spent to get gaps right
Custom glove box construction
-
67seeker
- DSKer
- Posts: 27
- Joined: Sun Feb 05, 2006 9:30 am
Some more progress shots - heading towards current day....
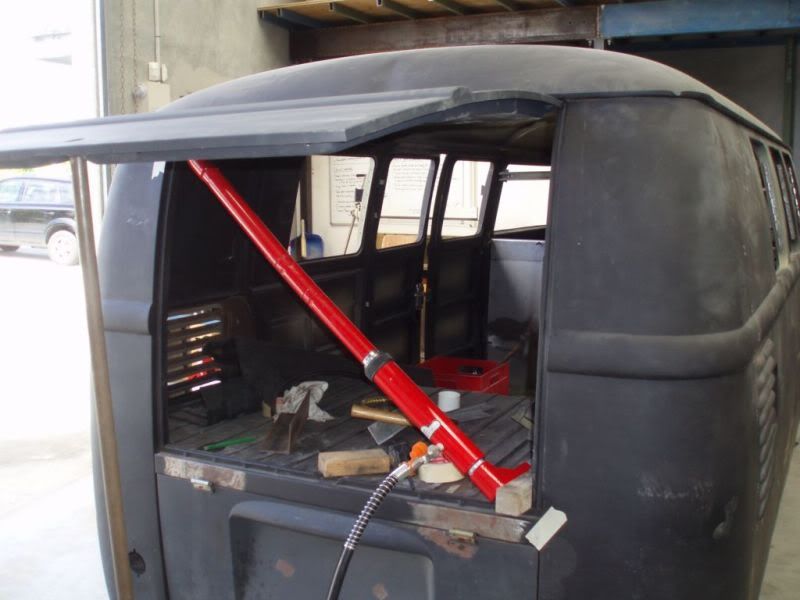
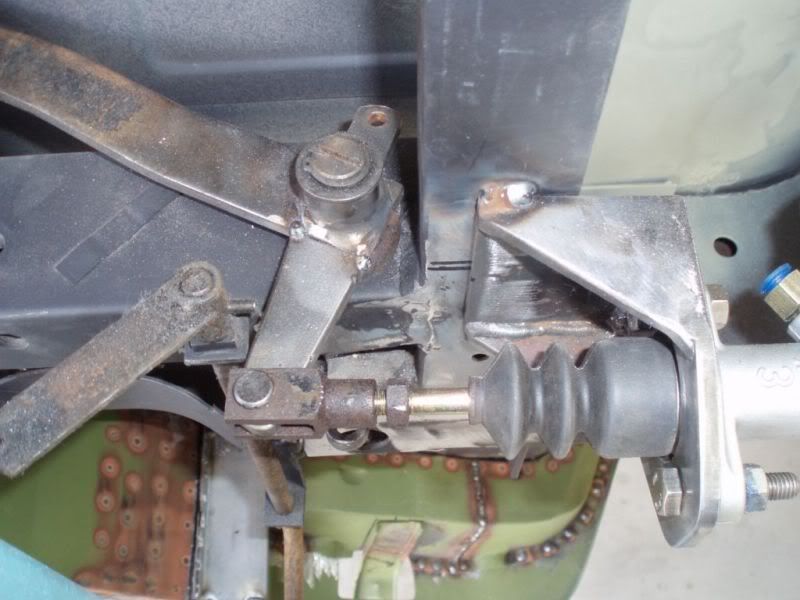
Custom hydraulic clutch setup was installed:
Hidden quick release bike mounts were fabricated so they could be folded under the floor when not in use
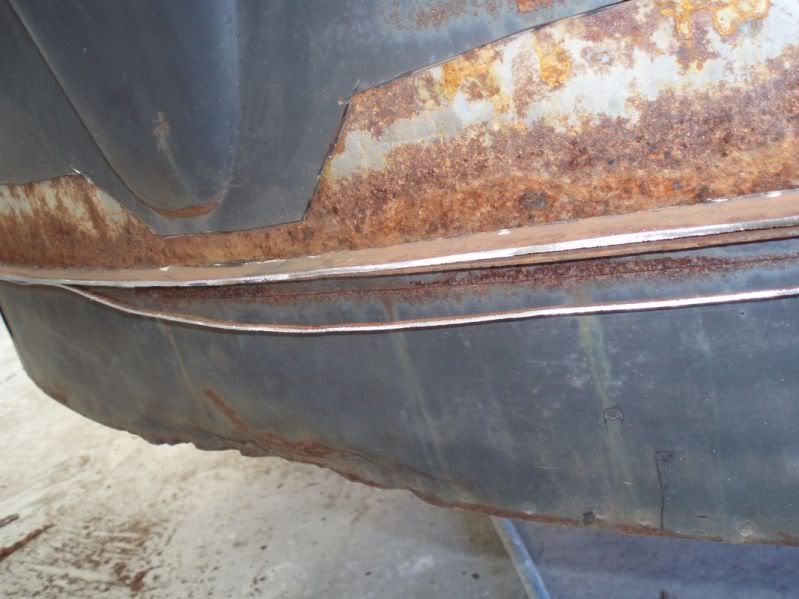
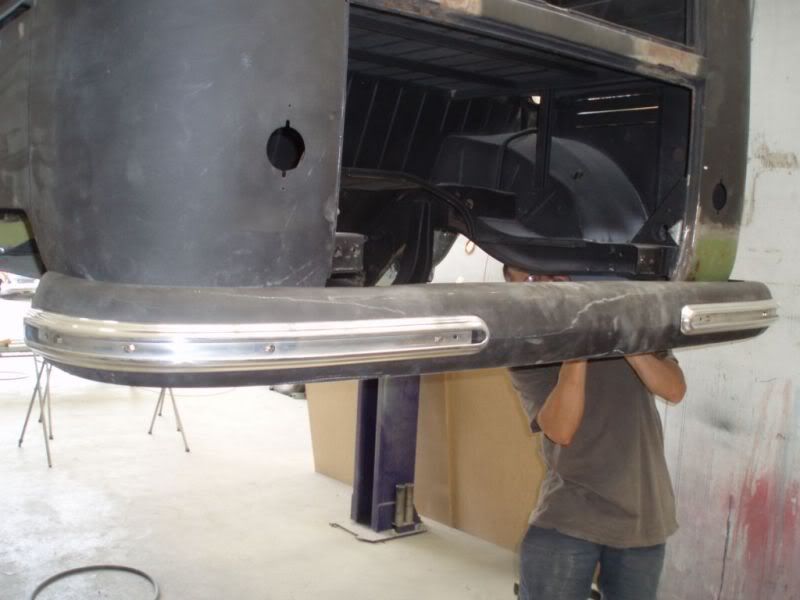
Bumpers will have deluxe trim along with the belt line trim
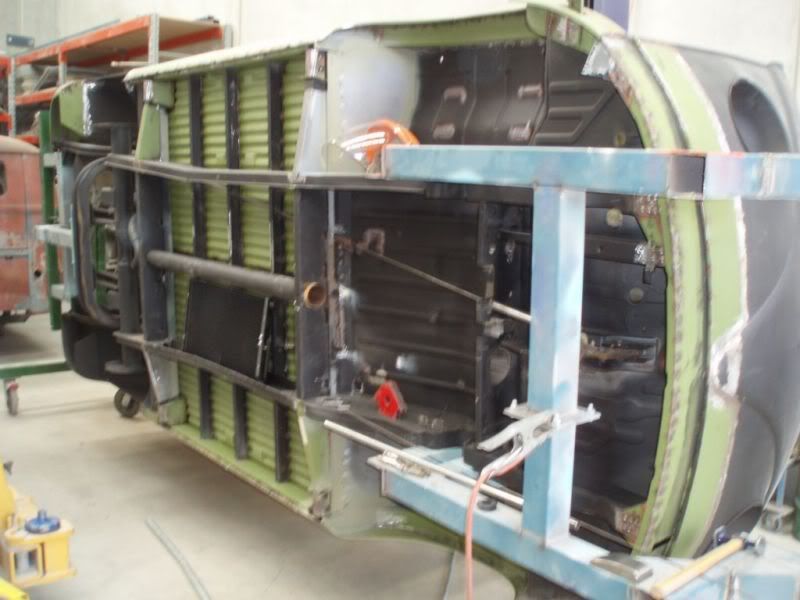
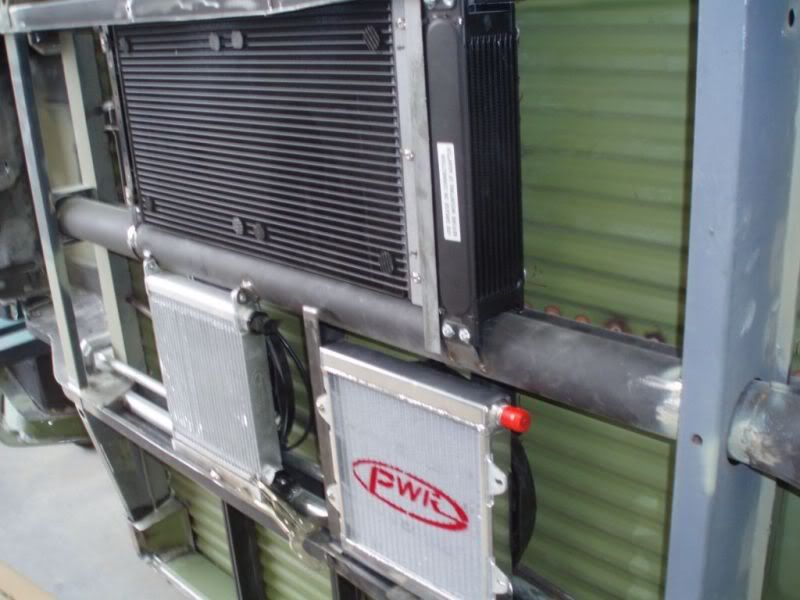
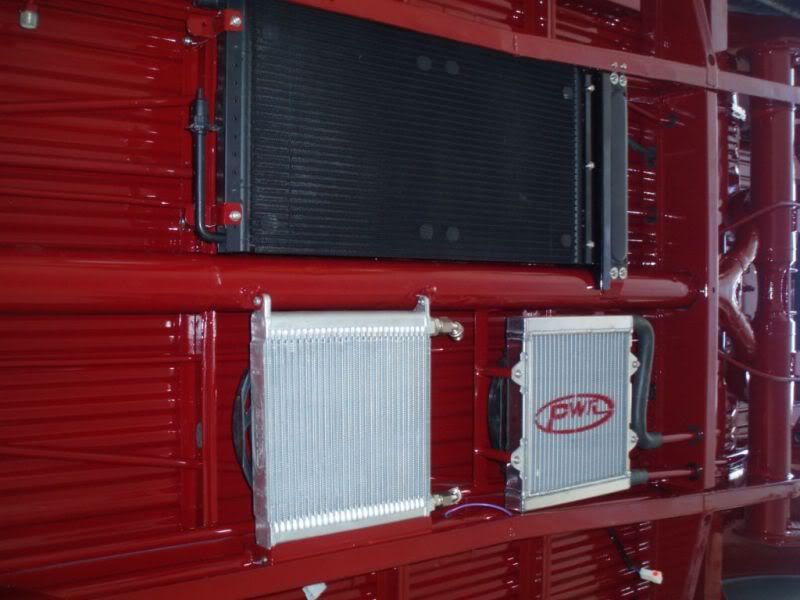
Under the bus there is a lot of plumbing including the air con condenser, engine oil cooler, supercharger intercooler and water to air intercooler radiator
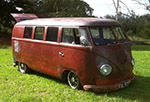
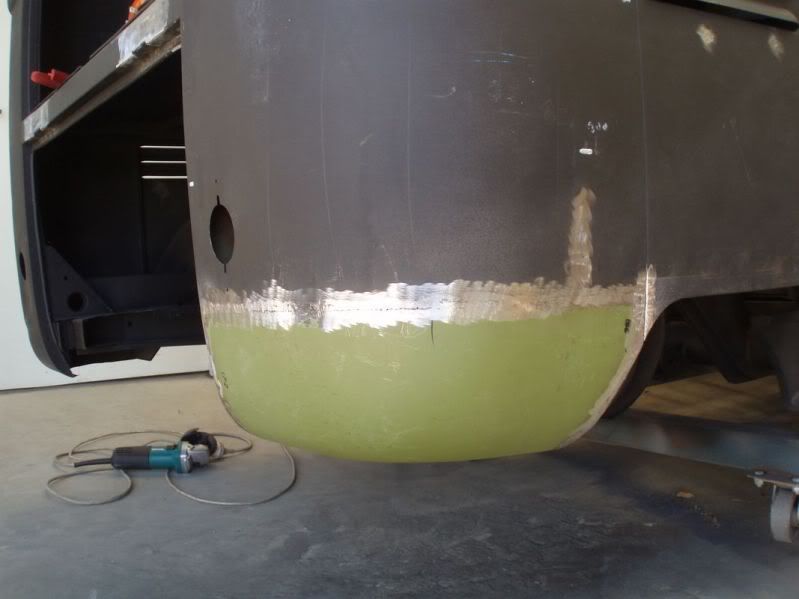
Fast forward a little bit after some colour was applied under the bus
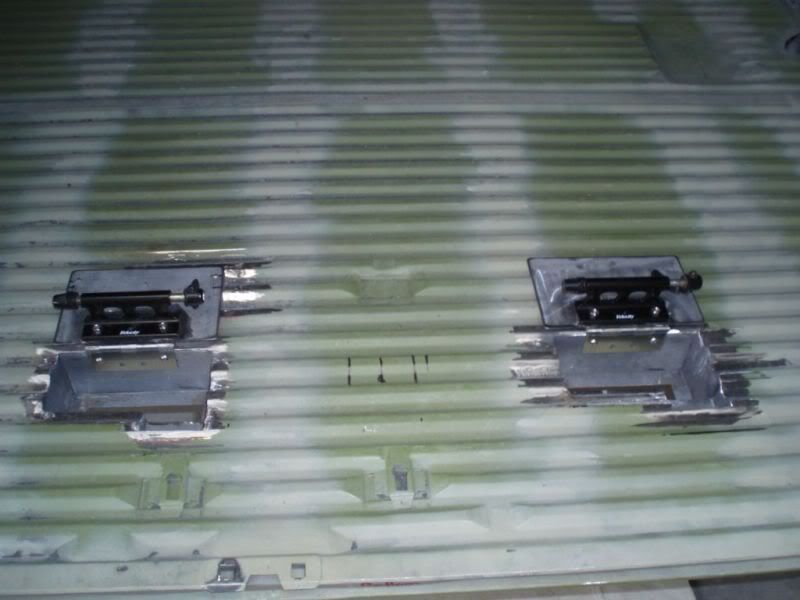
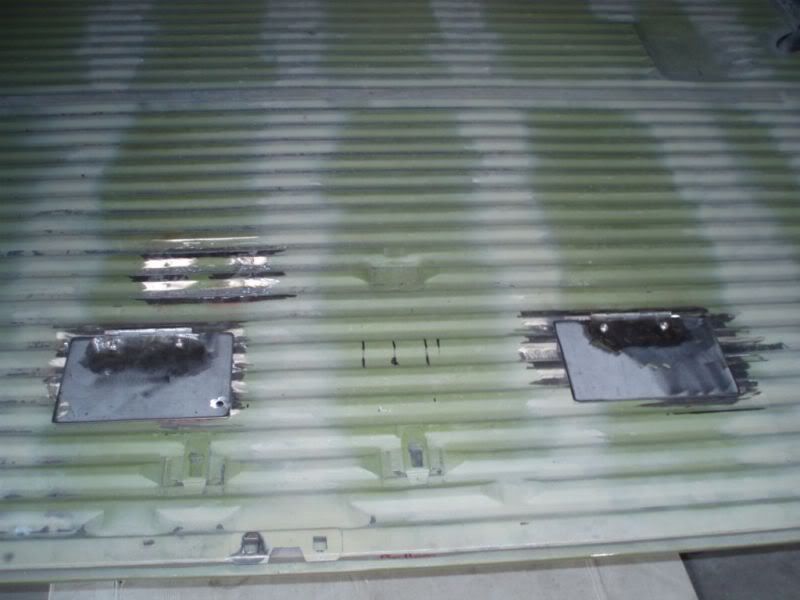
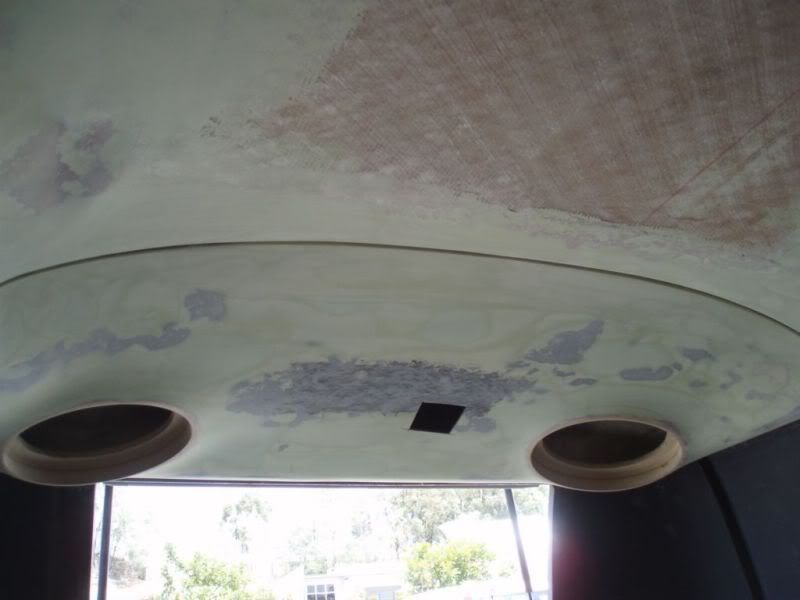
The start of the custom rigid fibreglass headliner including the rear section which doubles as a sub box housing two 10 inch subs
Again fast forward a lot of hours and the roof is taking shape....
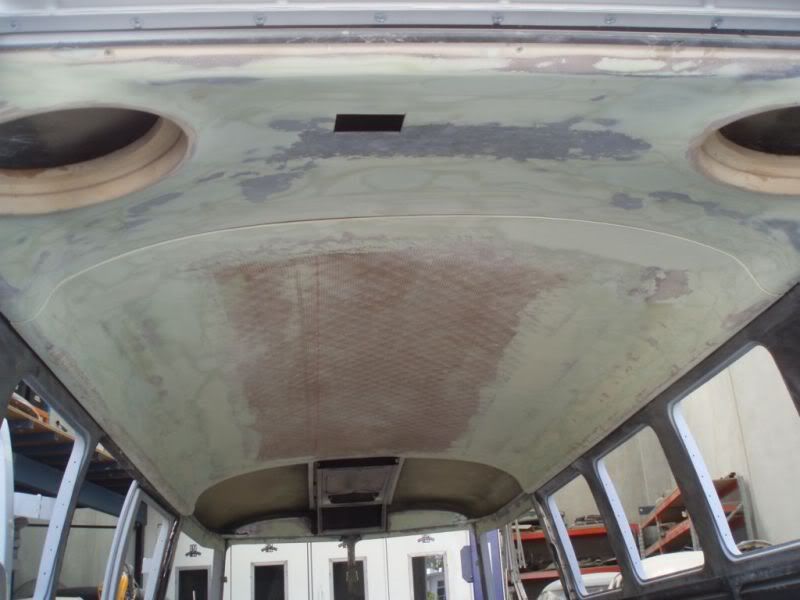
Headliner will be trimmed rather than painted – a bit work to come on the sub box with another surprise to come
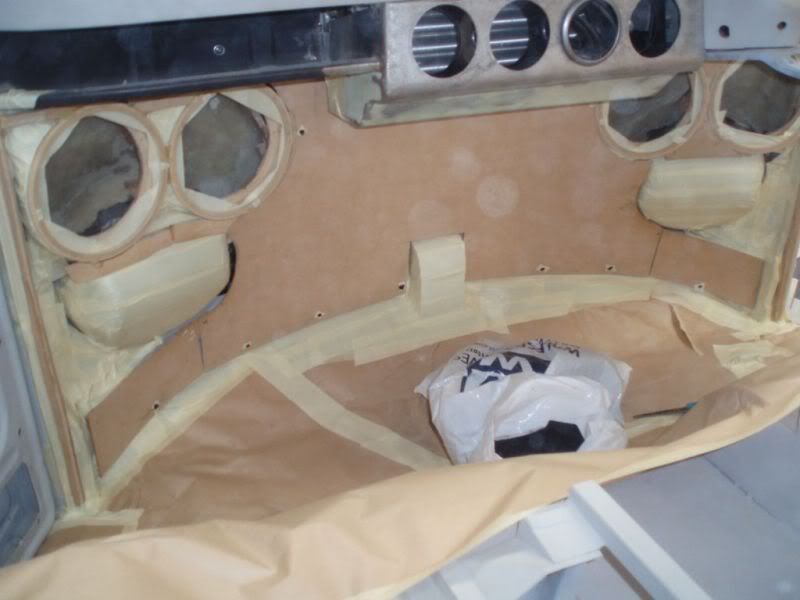
In addition to the two rear subs, the audio system will comprise three mid bass woofers (6.5in) up front per side to replicate different frequencies of music making a very efficient system. Front tweeters will provide the high frequencies and rear splits (mid bass woofers and tweeters) will provide the sound for any passengers in the rear. Here is the start of fabrication of the front pods (will be hidden behind a trim panel)
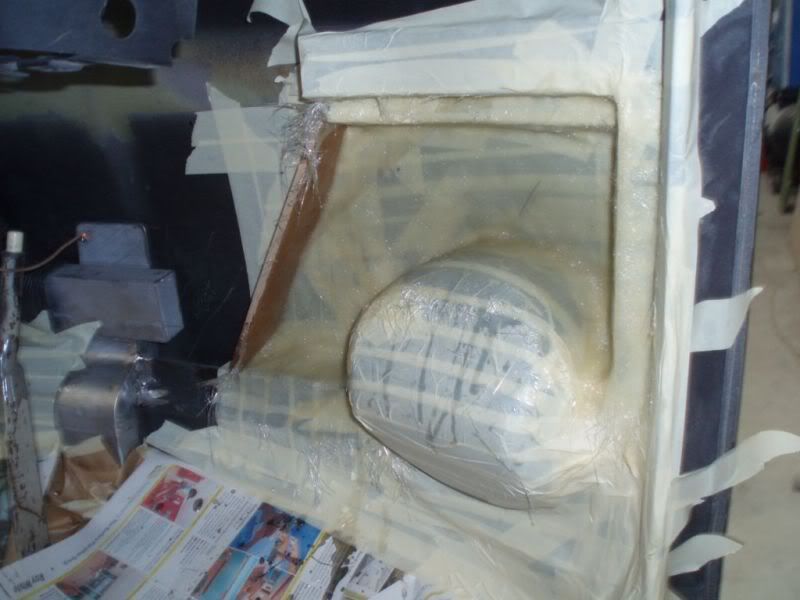
The pods which are sealed enclosures
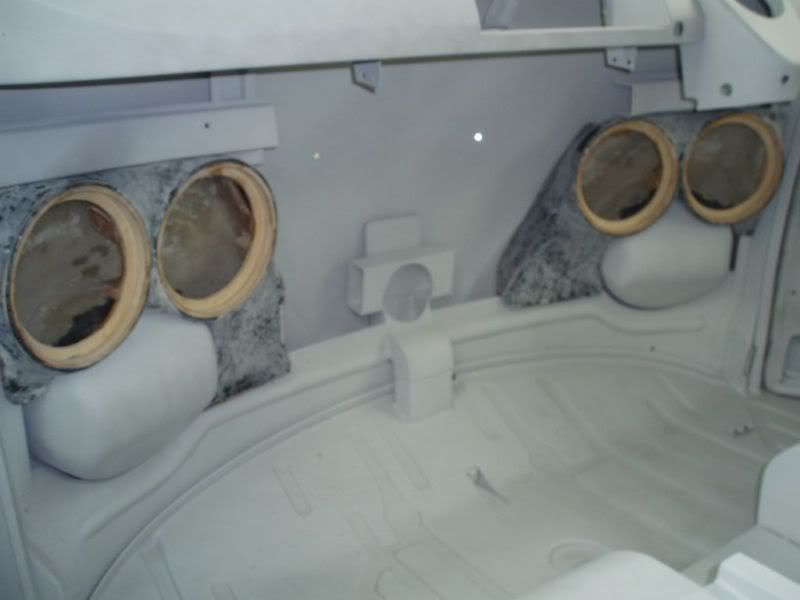
....and the start of the custom trim panel
Custom hydraulic clutch setup was installed:
Hidden quick release bike mounts were fabricated so they could be folded under the floor when not in use
Bumpers will have deluxe trim along with the belt line trim
Under the bus there is a lot of plumbing including the air con condenser, engine oil cooler, supercharger intercooler and water to air intercooler radiator
Fast forward a little bit after some colour was applied under the bus
The start of the custom rigid fibreglass headliner including the rear section which doubles as a sub box housing two 10 inch subs
Again fast forward a lot of hours and the roof is taking shape....
Headliner will be trimmed rather than painted – a bit work to come on the sub box with another surprise to come
In addition to the two rear subs, the audio system will comprise three mid bass woofers (6.5in) up front per side to replicate different frequencies of music making a very efficient system. Front tweeters will provide the high frequencies and rear splits (mid bass woofers and tweeters) will provide the sound for any passengers in the rear. Here is the start of fabrication of the front pods (will be hidden behind a trim panel)
The pods which are sealed enclosures
....and the start of the custom trim panel