Budget Report
Kombi Purchase and delivery $3,650
Tools $850
Jack stands and tools $200
Grinding and cutting discs $10
Extractor skrew & cobalt drill bit $26
Total to date $4,736
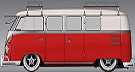
my $10,000 challenge with 61 Panel
Moderators: warb, Rawdyn, Leroy, byronbus, Tonz Magonz, dmb
-
joeM

- DSKer
- Posts: 288
- Joined: Mon Apr 04, 2011 10:22 pm
- Location: Melbourne Vic
-
warb

- Mod
- Posts: 7488
- Joined: Mon May 16, 2005 5:15 pm
- Location: Penrith, Nsw, Australia
- Contact:
-
dawerks
- DSKer
- Posts: 202
- Joined: Fri Feb 04, 2011 3:11 am
- Location: Kold Kanada!
-
joeM
- DSKer
- Posts: 288
- Joined: Mon Apr 04, 2011 10:22 pm
- Location: Melbourne Vic
Unfortunatelywarb wrote:wait, so the purchase price is included in the 10k?
I started stage 1 of cleaning the front end, I hope thats the worst of the mess. Not my favorite part of the project so far.
I would like to strip it down further to aid cleaning and painting.
Can anyone tell me whats safe to remove and replace?
I labeled some pics below if anyone could help identify the names of parts I would greatly appreciate it, will help researching parts costs.
- Attachments
-
- anatomy3.jpg (67.06 KiB) Viewed 7867 times
-
- anatomy2.jpg (76.88 KiB) Viewed 7867 times
-
- anatomy1.jpg (91.12 KiB) Viewed 7867 times
-
- stage1c.jpg (33.92 KiB) Viewed 7867 times
-
- stage1b.jpg (29.25 KiB) Viewed 7867 times
-
- Slightly cleaner
- stage1.jpg (61.98 KiB) Viewed 7867 times
-
splitbus
- DSKer
- Posts: 3232
- Joined: Sun Dec 09, 2007 7:47 am
- Location: Brisbane Northside
-
dawerks
- DSKer
- Posts: 202
- Joined: Fri Feb 04, 2011 3:11 am
- Location: Kold Kanada!
From your top photo down..
First pic; spindle, tie rod end, upper trailing arm,rubber bumper, lower trailing arm, sideplate (this part is what is cut to narrow a beam).
second pic; tie rod, tie rod end, pitman arm (actually there's a VW bus specific term)
third pic; center pin (your center pin is in this housing along with 2 bushings and the visible zerk fitting). You will be well served to read up on how to refurbish these bushings. You will need a 24mm reamer and a center pin kit. 99.99% of old splities have play in this center pin btw.
Your beam is looking sweet!!
-
dawerks
- DSKer
- Posts: 202
- Joined: Fri Feb 04, 2011 3:11 am
- Location: Kold Kanada!
As far as removal, you can go nuts! There are some shims in the spindle that you should keep track of. But otherwise, it's pretty straight forward.
The center pin refurbishment is a special thing and it has it's own dis assembly/assembly procedure.
I wouldn't remove the trailing arms, but you are so inclined, only remove one side from the torsion pack. (There's a bunch of leaves of metal in each of the tubes, they are held tight by a grub screw on the trailing arms).
The 'zerk' fittings should all be in good shape as you will be using them, ALOT
-
ngold
- DSKer
- Posts: 112
- Joined: Fri Mar 26, 2010 10:29 pm
- Location: The Shire
-
joeM
- DSKer
- Posts: 288
- Joined: Mon Apr 04, 2011 10:22 pm
- Location: Melbourne Vic
So Far
Not a fan of:
The grease, soooo much of it, ends up everywhere and no matter how much you think you got it all off you you still end up bringing it through the house, not making you popular with the wife.
Crap in your eyes, no matter what I wear, when working under the bus, stuff gets through my goggles and in my eyes, in my ears. Have to wear ear muffs, goggles, spray mask etc.
Dirty clothes, wife's not a fan of it either.
Don’t mind the:
Slow pace, may take 15 minutes to undo a bolt, or a day.
The looks on peoples faces when they see my girl for the first time, I know her potential and can see the end result.
Love the:
Challenges, whether you succeed and feel the satisfaction of achieving your goal or learn how it something doesn't work.
The fact that I’m restoring a piece of history.
Research, love hunting and learning what I need to get the job done.
DSK, couldn’t do this without the support of the members of this site, the encouragement has been fantastic and just what I needed. The advice has been priceless, thanks guys.
Can’t wait for:
The look on everyones face when the bus is ready, looking back at the footage of how it all began and then to what its ended up.
Traveling in the bus, I’ve never driven a kombi let alone a split screen. Looking forward to clocking up thousands of kilometers with the family.
-
4tune8

- DSKer
- Posts: 855
- Joined: Thu Mar 22, 2007 12:29 pm
- Location: melbourne
- Contact:
-
joeM
- DSKer
- Posts: 288
- Joined: Mon Apr 04, 2011 10:22 pm
- Location: Melbourne Vic
Time for the steering
Steering needs to come out now.
Ran into more challenges, anyone with advice would be truly appreciated
Ran into more challenges, anyone with advice would be truly appreciated
- Attachments
-
- There is a pin here I tried tapping it out but again not easy, I take it that this is how you remove it??
- acceleratorLink4.jpg (60.86 KiB) Viewed 7781 times
-
- I found that there are 2 bolts on the side, to get them out easier I'll take of the accelerator link.
- steering3.jpg (75.65 KiB) Viewed 7781 times
-
- To further the challenge the arm wont slide out, its stubborn, will try latter
- steering2.jpg (70.54 KiB) Viewed 7781 times
-
- This pin ended up a challenge, it wouldn't budge. had to play with the nut to loosen it so that the pin would not have pressure on it.
- steering1.JPG (83.39 KiB) Viewed 7781 times
-
splitbus
- DSKer
- Posts: 3232
- Joined: Sun Dec 09, 2007 7:47 am
- Location: Brisbane Northside
-
joeM
- DSKer
- Posts: 288
- Joined: Mon Apr 04, 2011 10:22 pm
- Location: Melbourne Vic
lol yep figured that one out, thanks so many of them under there.zerk = grease nipple
I have great news
Spoke to the wife and showed her the comments on DSK and she has agreed now that the budget shouldn't include tools
So the budget will only count on Bus related items (and the cost of the bus)
So NEW Budget report is now at just
$3,650
And its all thanks to you guys
I'll still post costs of special equipment that may come up.
Now I'm going to get that pulley
-
headstone
- DSKer
- Posts: 245
- Joined: Mon Oct 26, 2009 10:05 pm
- Location: geelong