Page 10 of 32
Re: '63 11 window
Posted: Fri Mar 26, 2021 4:40 pm
by morts
spl65t wrote: ↑Thu Mar 25, 2021 3:26 pm
Are you telling us, you do this just as a hobby on the side !!!

You are smashing it, I'm sure as shit - if you were on the East Coast peeps would be booking there bus in for you to ply your trade.
Whaddya mean East Coast - he lives in Wolfsburg

Re: '63 11 window
Posted: Fri Mar 26, 2021 7:39 pm
by spl65t
morts wrote: ↑Fri Mar 26, 2021 4:40 pm
spl65t wrote: ↑Thu Mar 25, 2021 3:26 pm
Are you telling us, you do this just as a hobby on the side !!!
You are smashing it, I'm sure as shit - if you were on the East Coast peeps would be booking there bus in for you to ply your trade.
Whaddya mean East Coast - he lives in Wolfsburg
Haha - Snap
Re: '63 11 window
Posted: Sun Mar 28, 2021 8:55 pm
by MID WEST DUBBER
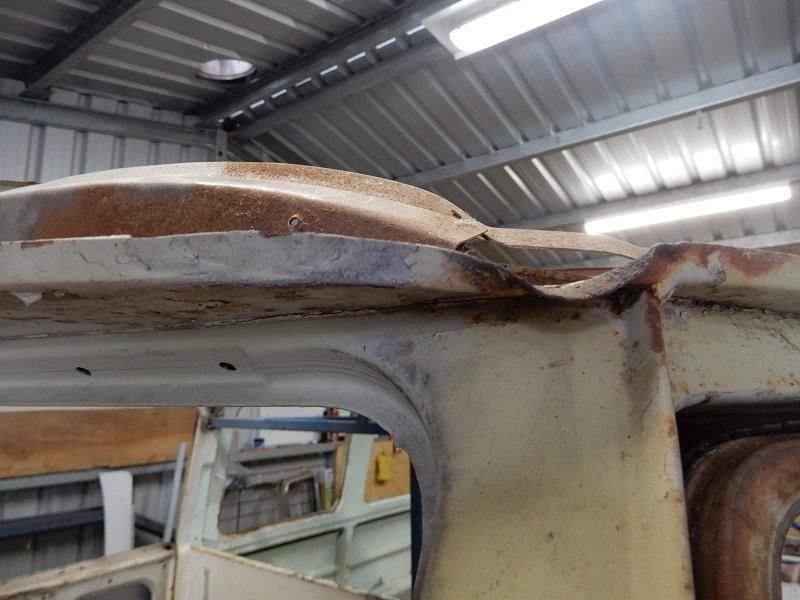
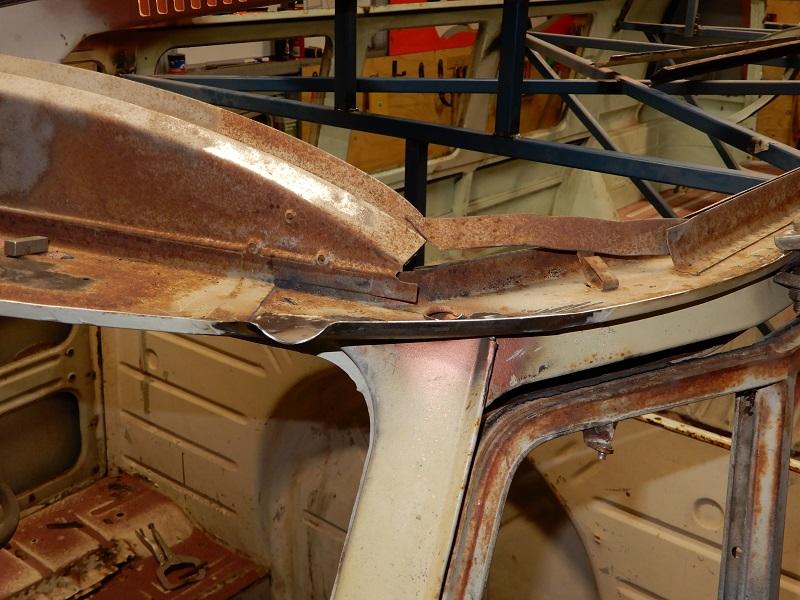
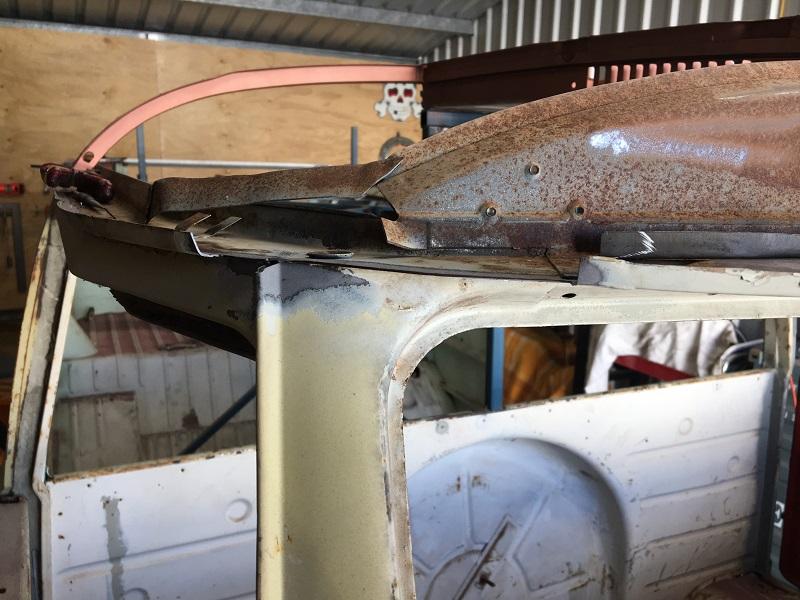
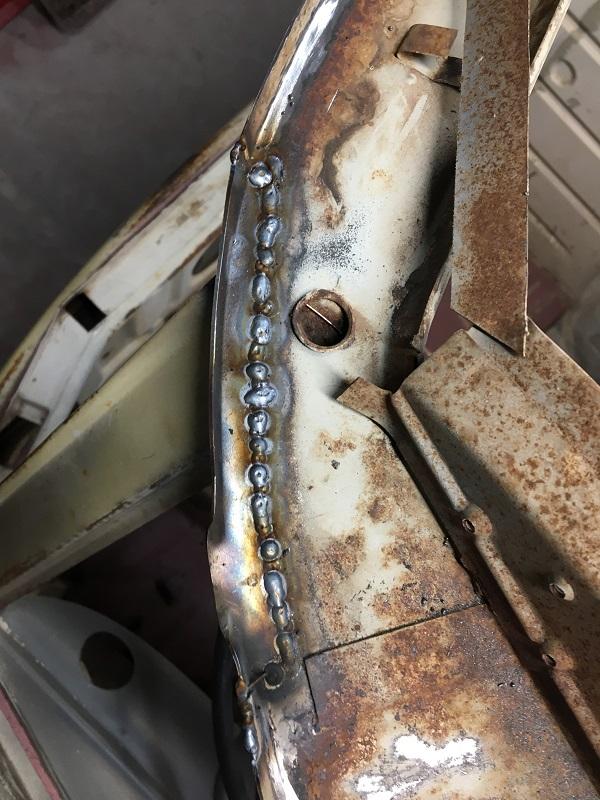
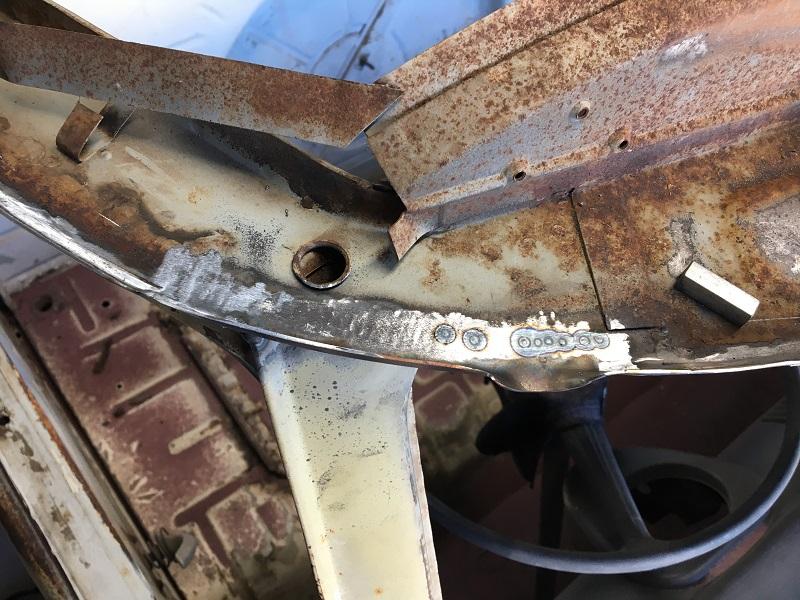
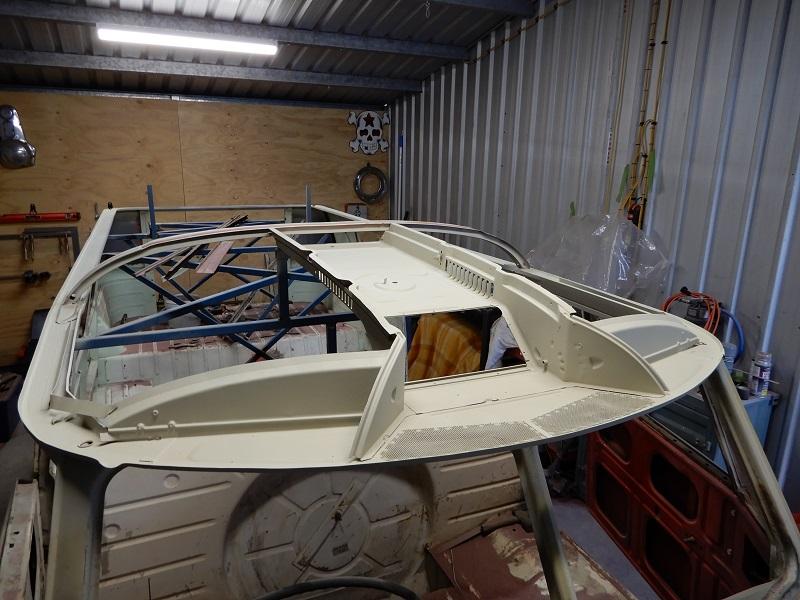
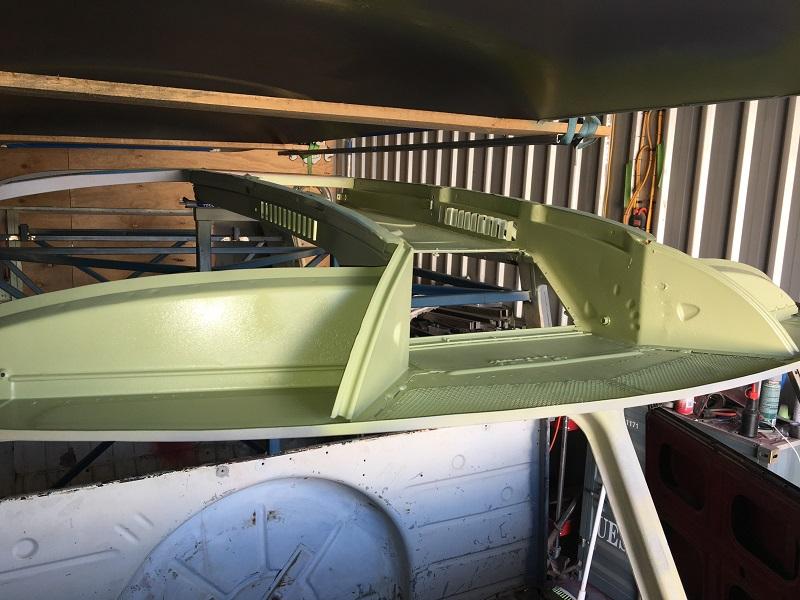
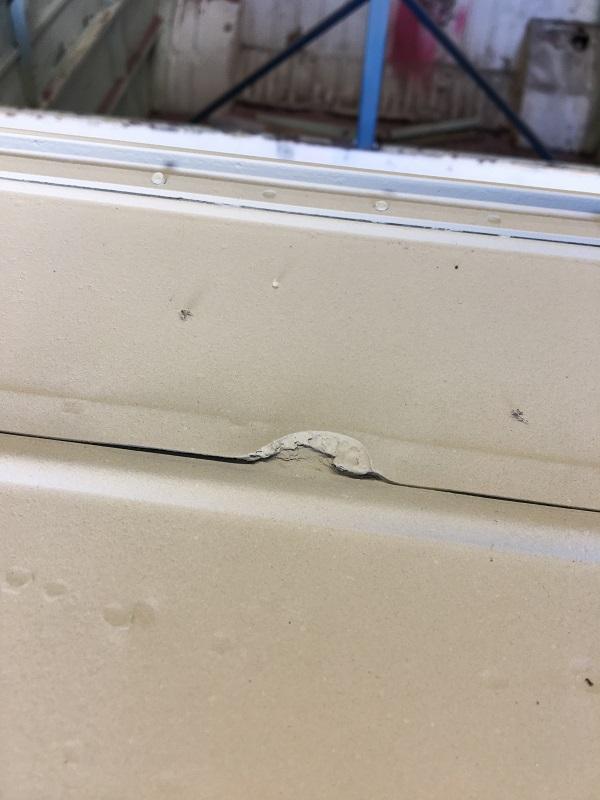
The seal channel/ cargo door upper catch piece was slightly damaged, so I decided to order a new one. When it arrived I compared the profile and details of the original vs the new KF one. The shape was way off and the cargo door rod holders not even close. So I had no other option but to repair and reuse the original. I couldn't reshape the KF panel as the strengthening pressing would be in the road... Bummer..
Sandblasted, repaired and straightened out...

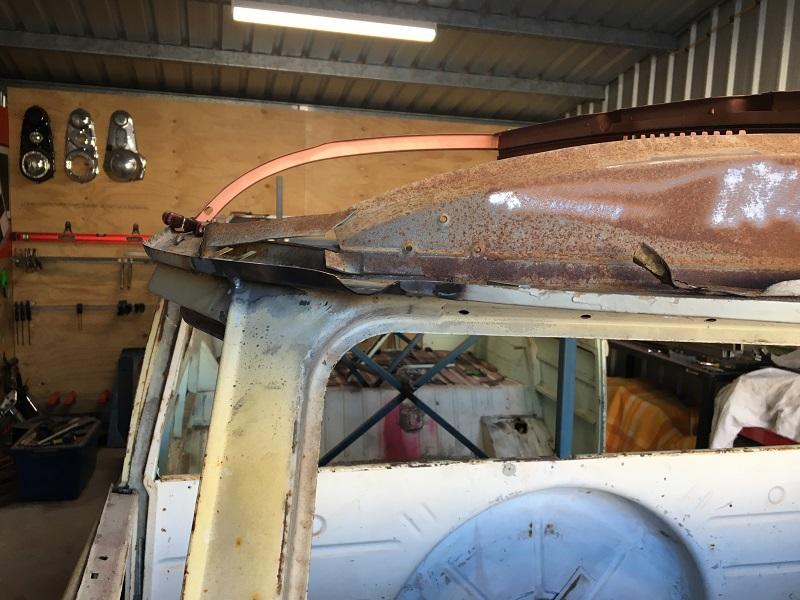
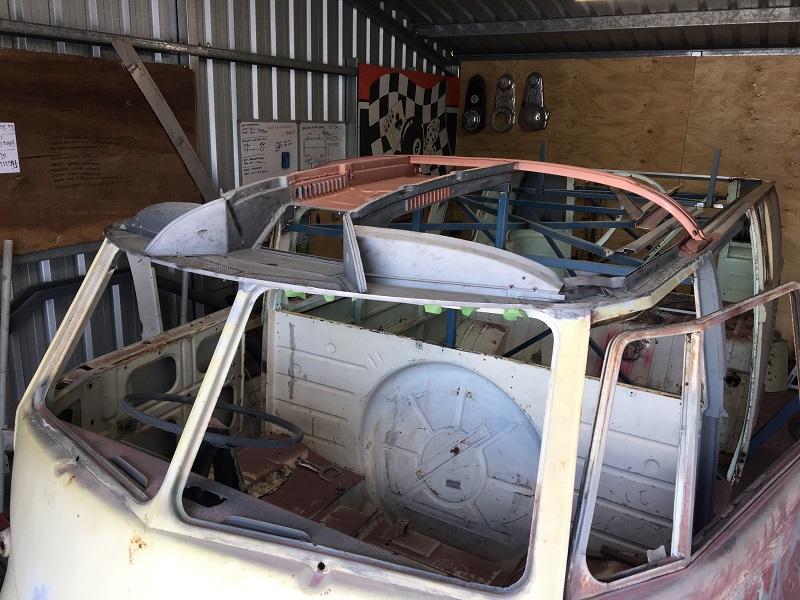
Some comparison photos...


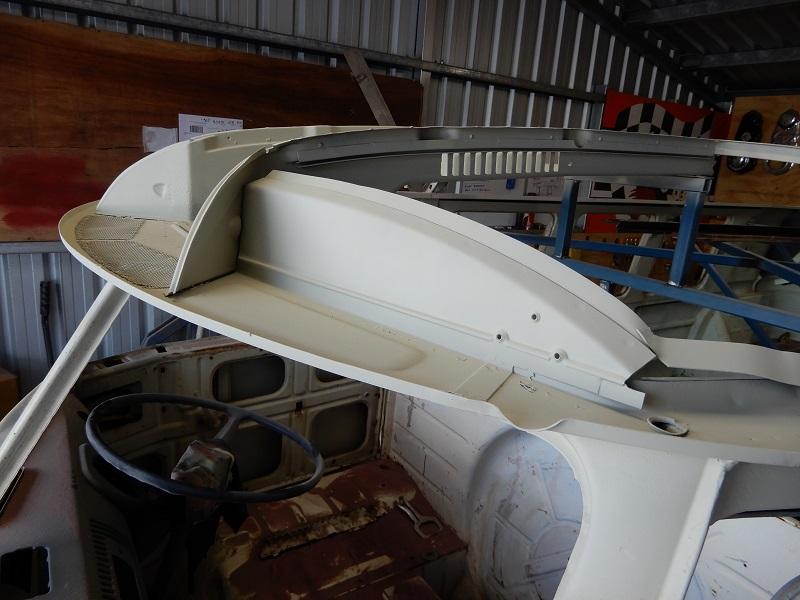
Refitted to the new gutter and tied back in. Much better...


Re: '63 11 window
Posted: Mon Mar 29, 2021 6:24 pm
by warb
noice, cheers for the heads up on the KF panel, interesting!.
Re: '63 11 window
Posted: Thu Apr 01, 2021 7:44 am
by D-Train
Killing it!! Amazing the difference between og an repro tho!
Re: '63 11 window
Posted: Fri Apr 02, 2021 6:31 pm
by MID WEST DUBBER
Re: '63 11 window
Posted: Sun Apr 04, 2021 9:00 am
by Zimblewinder
really neat work. Both my busses had calcium lines down the glass from the drip rail drain. I can see the sense of that mod.
Re: '63 11 window
Posted: Thu Apr 15, 2021 8:52 pm
by MID WEST DUBBER
Re: '63 11 window
Posted: Fri Apr 16, 2021 12:06 am
by warb
/spɛkˈtakjʊlə/

Re: '63 11 window
Posted: Fri Apr 16, 2021 7:00 am
by D-Train
Oh boy!!
Re: '63 11 window
Posted: Fri Apr 16, 2021 12:24 pm
by splitthis
Looking clean Rusty, nice work as always.
Re: '63 11 window
Posted: Mon Apr 19, 2021 11:01 pm
by Shaven
Bloody hell Rusty... thats some serious work buddy. Lovin the thread mate

Re: '63 11 window
Posted: Mon Apr 19, 2021 11:32 pm
by 1958kafer
Wow!

Re: '63 11 window
Posted: Wed Apr 21, 2021 7:51 pm
by MID WEST DUBBER
Sandblasting the airbox revealed one small section that had rust swelling in a seam.
View from inside the cab...

View from inside the air box...
Top section cut out and sandblasted to see how much needed repairing...
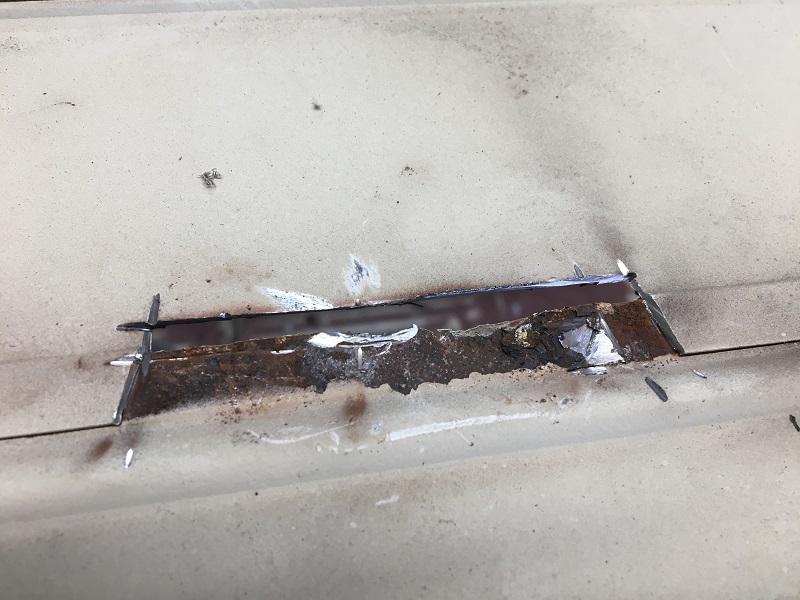
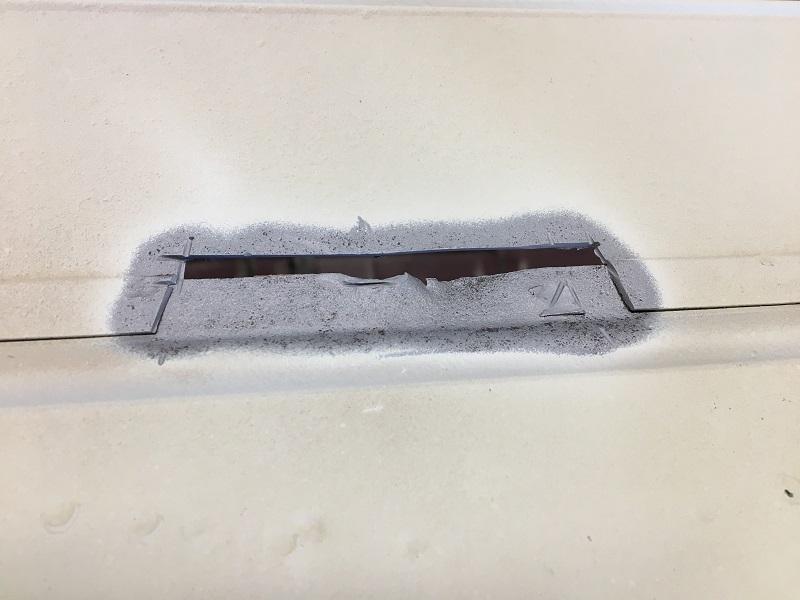
Bottom edge cut out and repaired...

Top section fabricated and welded in. Happy with the result...


Re: '63 11 window
Posted: Sun Apr 25, 2021 1:12 pm
by MID WEST DUBBER