Page 4 of 33
Re: '63 11 window
Posted: Wed Sep 23, 2015 11:00 pm
by MID WEST DUBBER
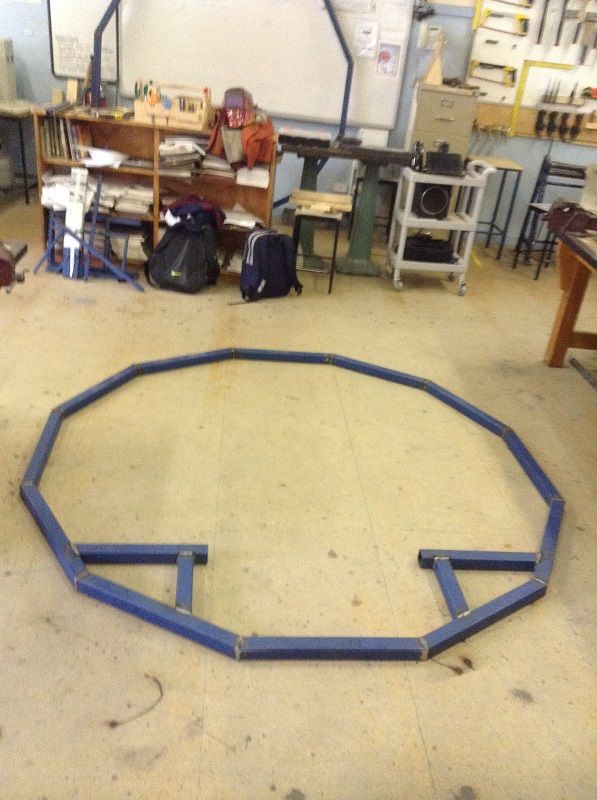
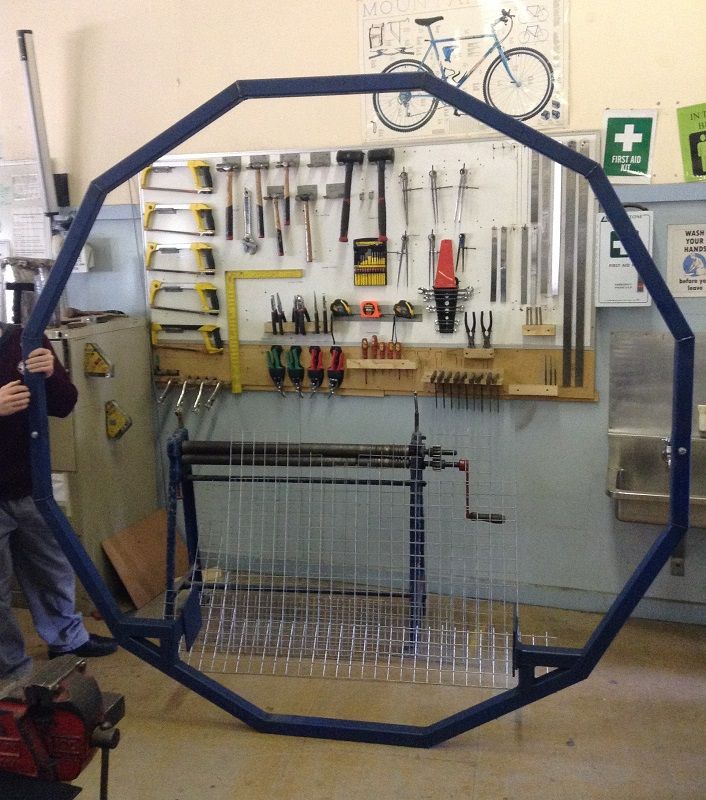
Time for an update about the Rotisserie I have been building at school...
With the hoop frames made I then started work on the front and rear mounting locations and got the supports welded into place...
Front...
Rear...
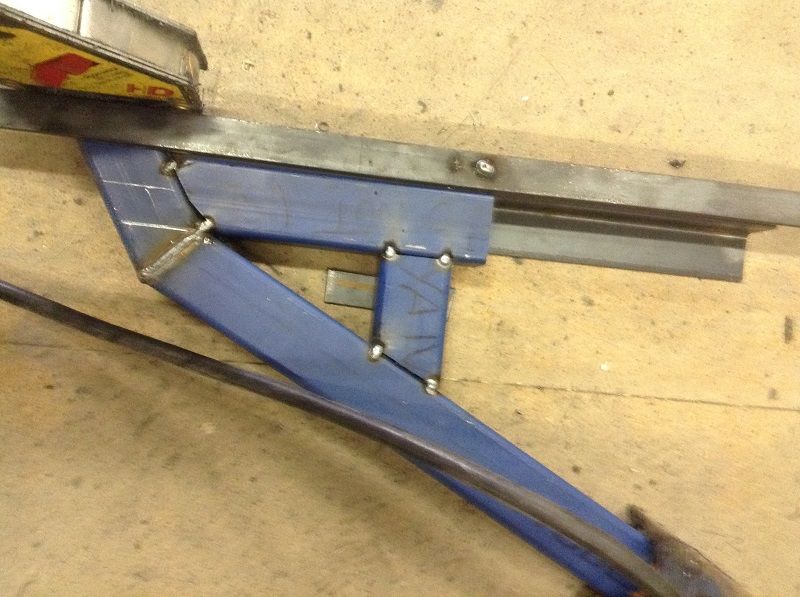
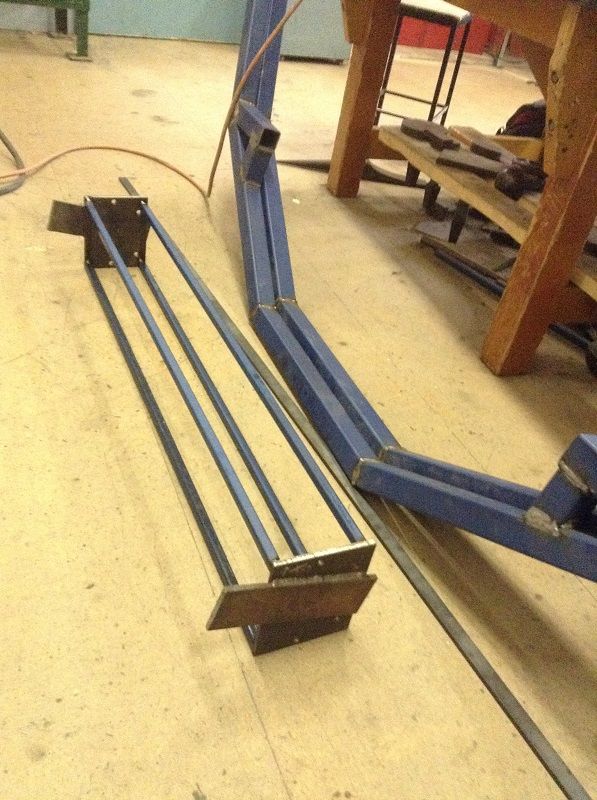
I tack welded equal lengths of RHS between the mounting plates to keep them square and straight when welding them to the rotisserie frame. The rear plates are offset and not central to the hoop as I wanted to have more clearance around the rear wheel arch...

Re: '63 11 window
Posted: Wed Sep 23, 2015 11:01 pm
by MID WEST DUBBER
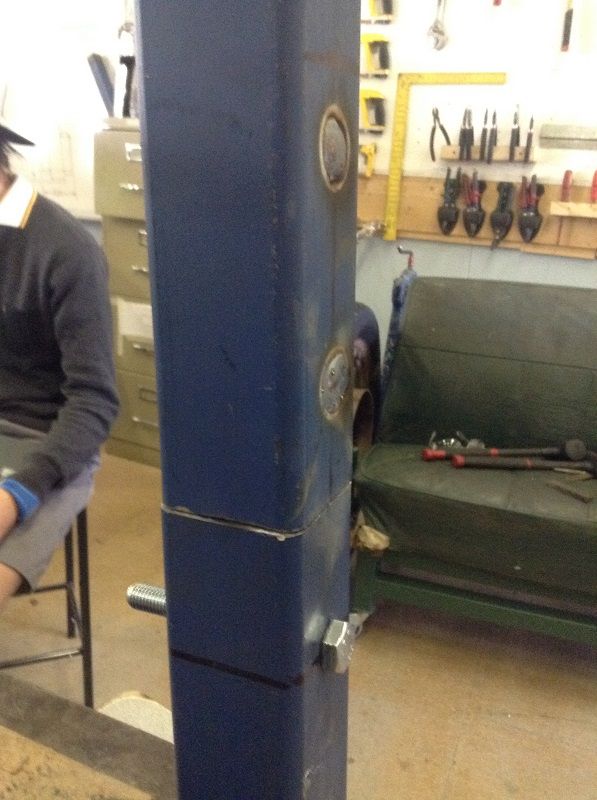
To make for easy installment and transport I chose to join the hoops with a sleeve style method with plug welds on one side and a bolt through the other side of the join...
All of the welds/joins/mounting plates etc were cleaned back and painted with a colour matched blue to the existing RHS...

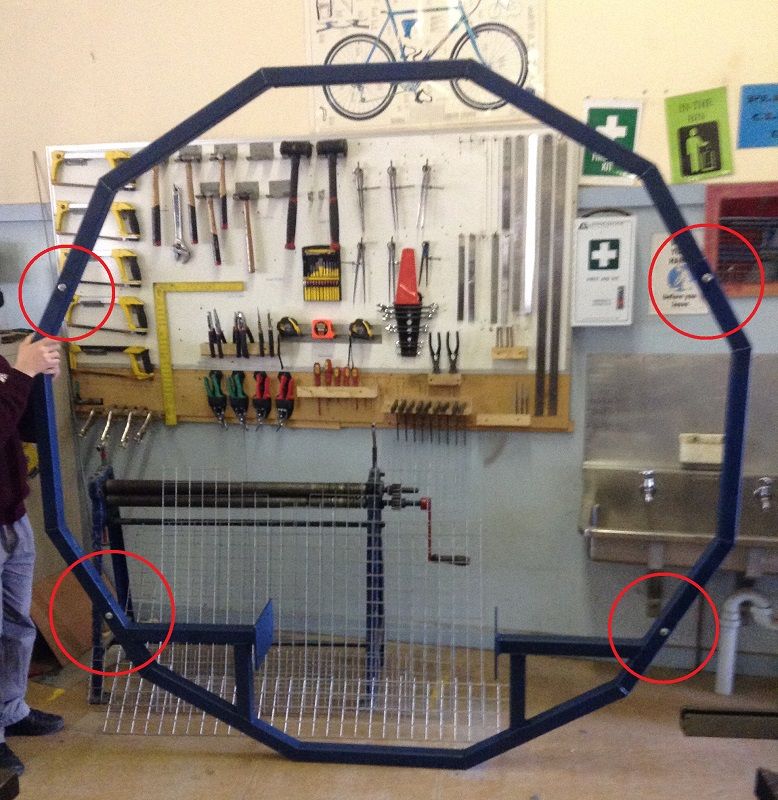
I separated the rear hoop into a top and bottom half with the sleeve joins to make the installation easy. I have circled the joins...
The front hoop was joined in 4 locations which will make it possible to disassemble part of the front hoop while attached to the car, to remove the front doors for dogleg repairs etc...
The main part of the Rotisserie is completed however later on down the track I will add RHS supports which join the two hoops together and also supports to rest underneath the chassis in the centre. Very happy with the outcome of my school project.
Re: '63 11 window
Posted: Thu Sep 24, 2015 6:25 am
by 63 left hooker
Great work Rusty, nothing like my school days

Re: '63 11 window
Posted: Thu Mar 10, 2016 4:07 pm
by MID WEST DUBBER
Re: '63 11 window
Posted: Thu Mar 10, 2016 4:10 pm
by MID WEST DUBBER
Re: '63 11 window
Posted: Thu Mar 10, 2016 4:14 pm
by MID WEST DUBBER
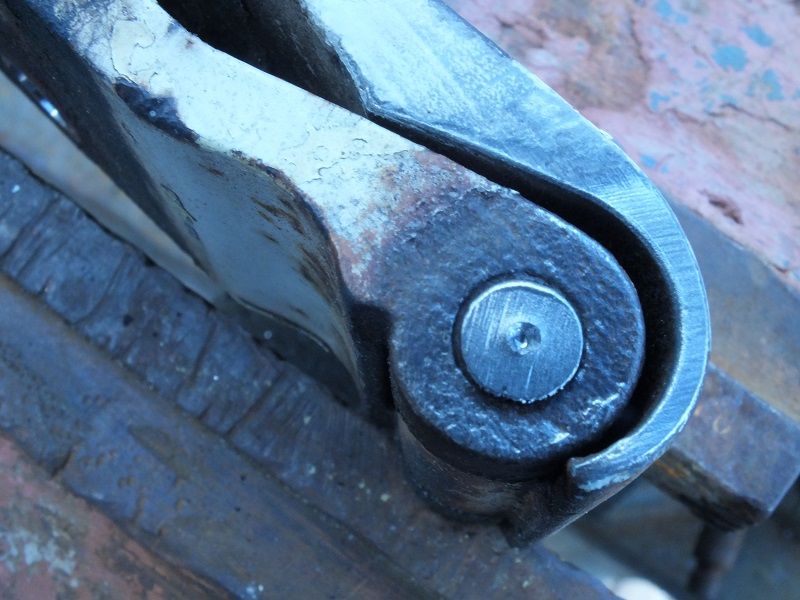
Front door hinge pin repair – Part 3
I ground the top and bottom of the existing pin almost flush with the hinge surface then centre punched both ends so the drill bit would locate.
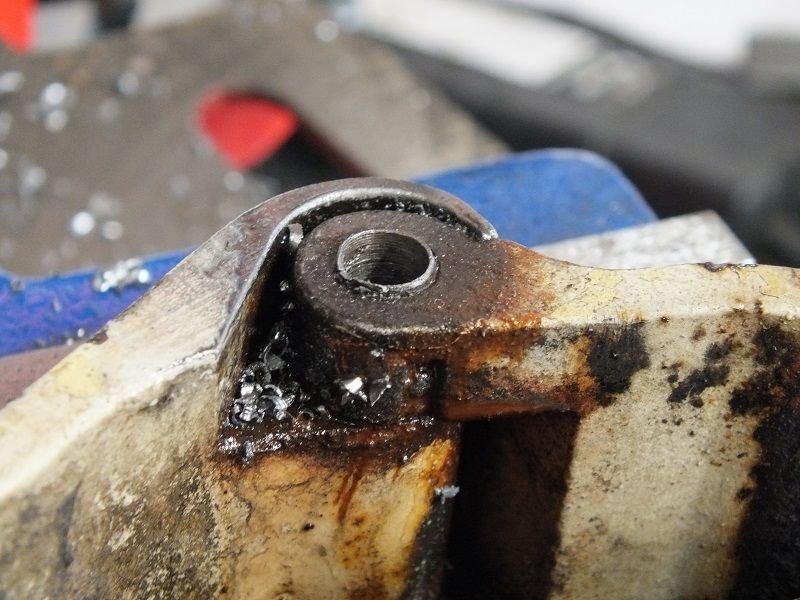
I then drilled out the pin, size by size until there was just a small layer of the pin remaining inside the shaft.
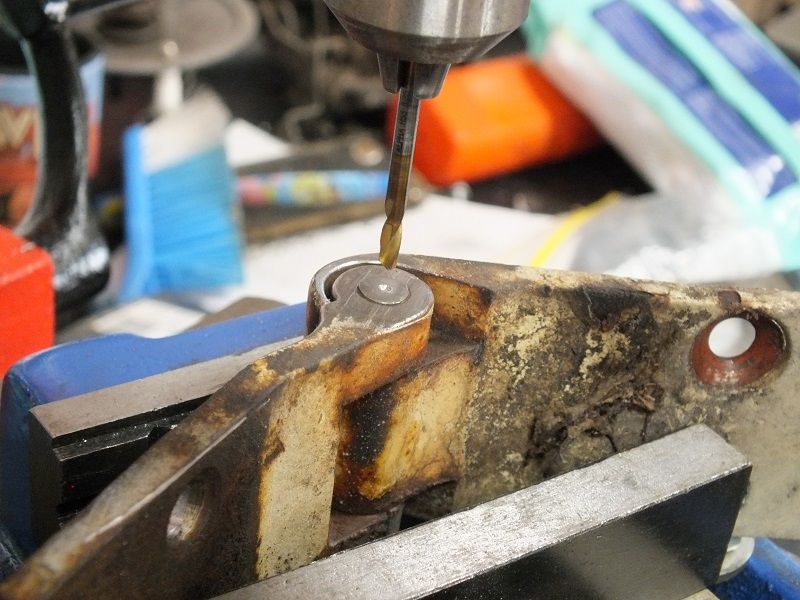
This pic shows the thin layer remaining inside the shaft…
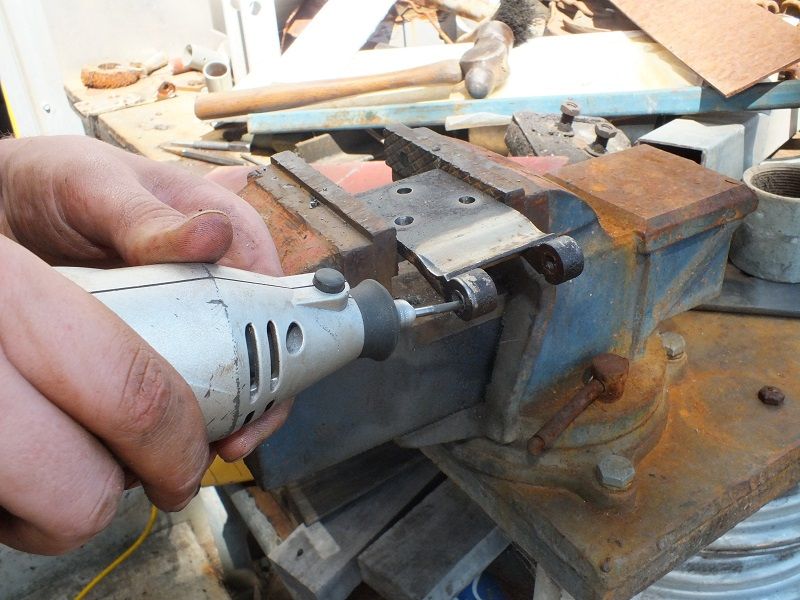
This step is where the dremel came in handy again. This time with a small tip grinding tool.
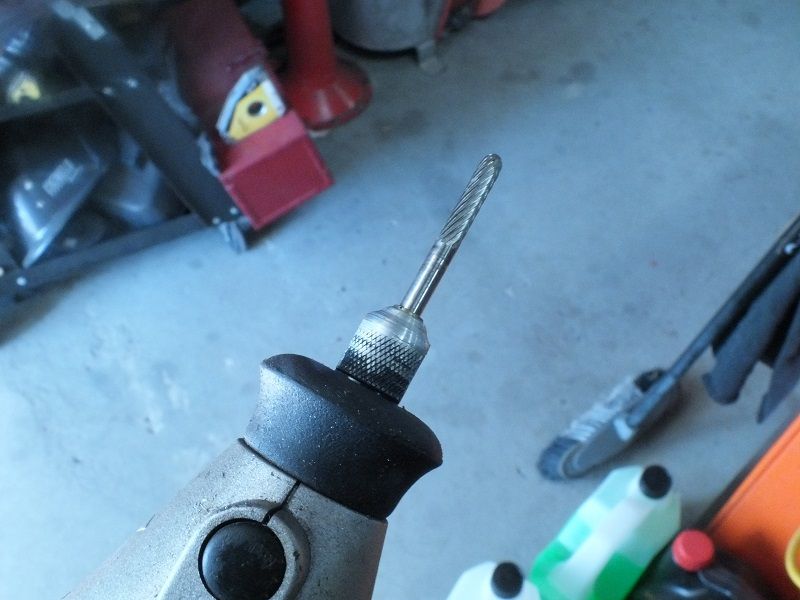
I used this little grinding tool to carefully grind out a small section of the remaining layer of the pin. This released the pressure from the pin and broke the rusted seal.
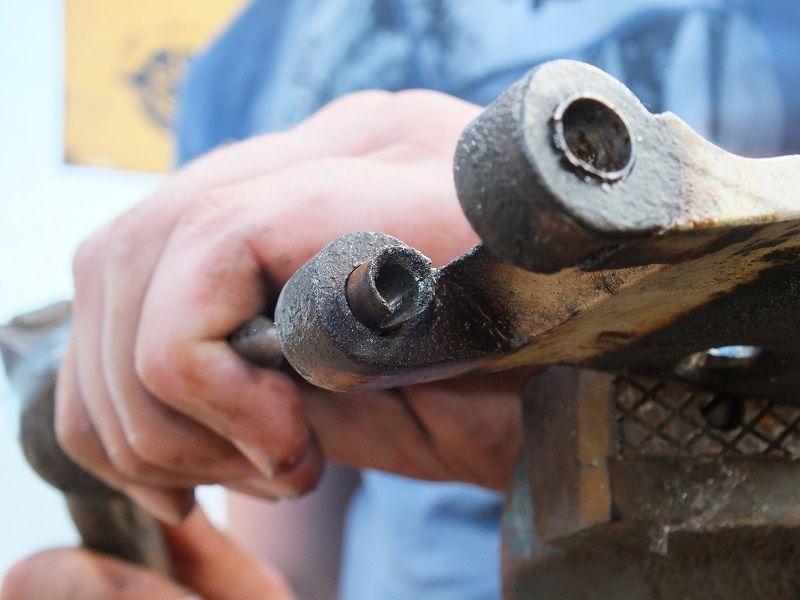
I could then use a small flat punch to drive out the remainder of the pin and leave the shaft inside the hinge untouched and undamaged.
Re: '63 11 window
Posted: Thu Mar 10, 2016 4:17 pm
by MID WEST DUBBER
Front door hinge pin repair – Part 4
A 5/16 drill bit was used to open the hole in both parts of the hinge…
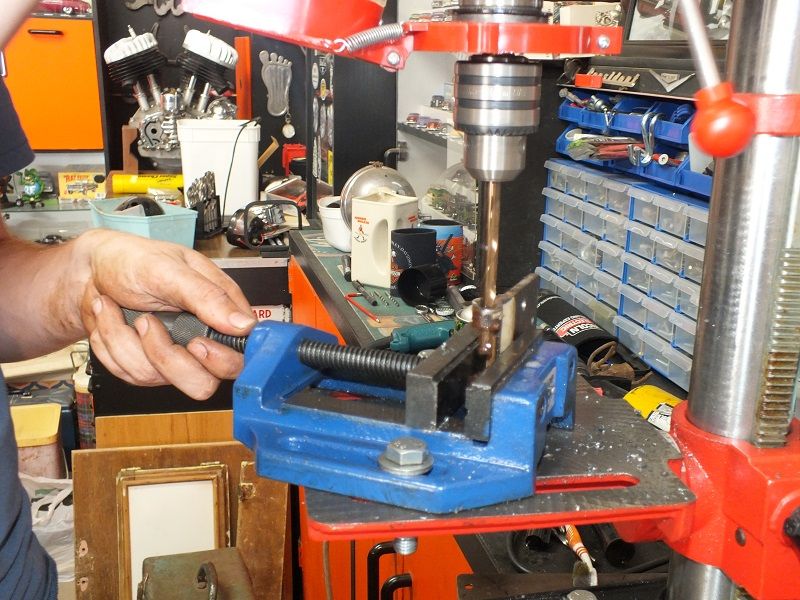
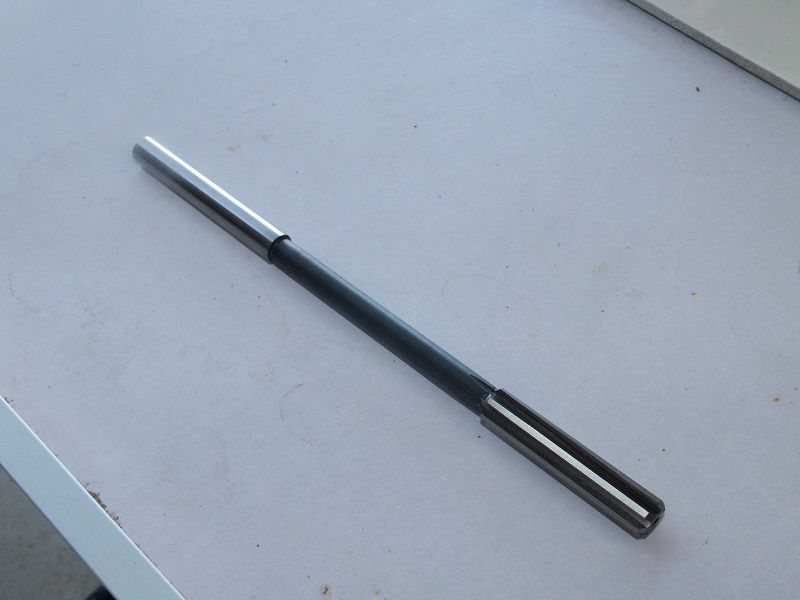
The 5/16 drill bit allowed the .3220” reamer (Purchased from Wolfsburg West) to accurately remove the remaining material and create a hole which would be spot on for the new oversize hinge pins/ mirror stalks.
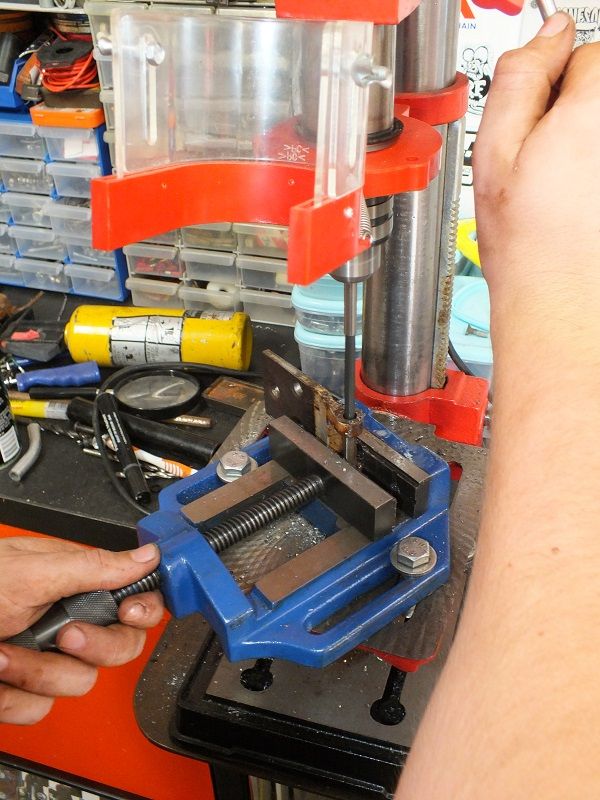
Using the reamer in the drill press at a low speed…
The new pin fitted through both parts of the hinge and was firm and moving freely. I used counter-sunk bolts and nyloc nuts to re-attach the hinge to the door. The hinge will soon be removed so I can sand blast and paint the cavity behind the hinge. The hinge can then be re-installed and the cuts I made can be welded and ground back.

Re: '63 11 window
Posted: Thu Mar 10, 2016 6:53 pm
by 63 left hooker
Great work there Rusty, all that schooling wasn't wasted was it?
Re: '63 11 window
Posted: Thu Mar 10, 2016 7:27 pm
by KombiMadness
Wow, great work! I really enjoyed that pictorial description of both the rotisserie hoop fab and removing the rusted hinge pin.
Yes, a bit different to my school woodwork/metalwork days..... The coolest thing we did was make skateboard decks.
Post up some more pictorials of your work, Rusty.

Re: '63 11 window
Posted: Sat Mar 12, 2016 8:24 am
by rabidkombi
Awesome work ,Rusty
Thank you for posting up the pictures

Re: '63 11 window
Posted: Sat Mar 12, 2016 8:57 am
by splitbus
Nice work, shame you couldn't just get the tool
Re: '63 11 window
Posted: Tue Nov 01, 2016 10:01 pm
by MID WEST DUBBER
Spent a little bit of time messing around with the tail lights for the bus today.
I've always been a fan of tail lights with a chrome bezel but I couldn't seem to find any apart from the all red US spec ones. I wasn't really all that keen on running the stock Red and Amber lenses with the painted silver style bezel built into the plastic.
So, I decided I would just fit the chrome bezel over the lenses.... But when I had all of the parts, I realised it wasn't going to be that simple.
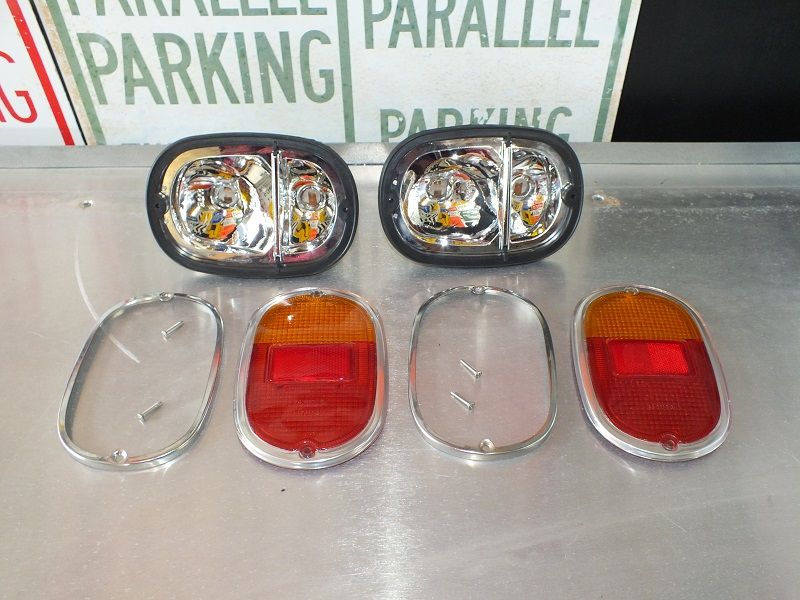
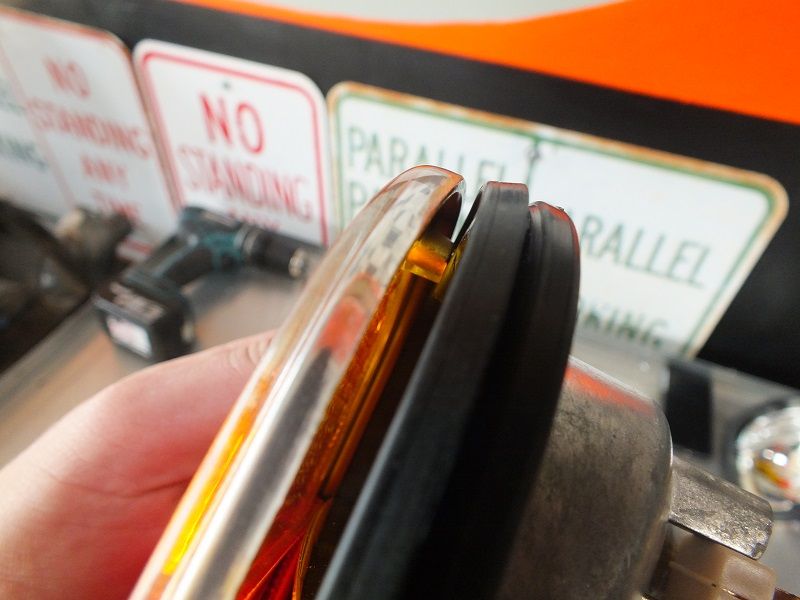
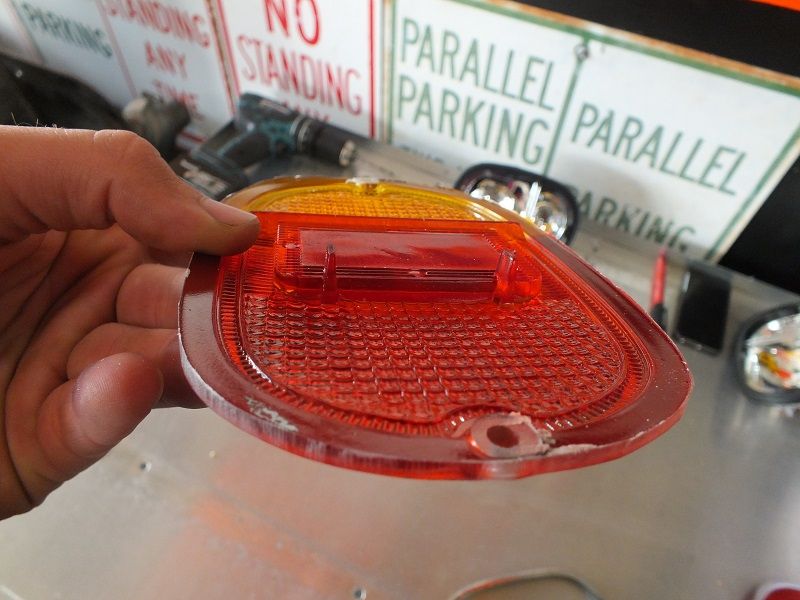
As you can see from this pic, the Hella lense is too large for the chrome bezel...
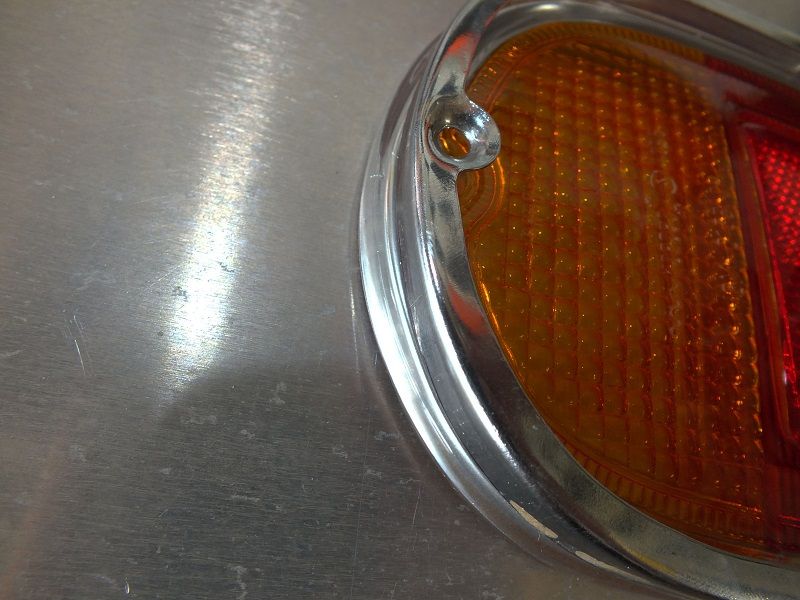
and the screw hole sticks out the back of the lense too far, not allowing it to sit flush...
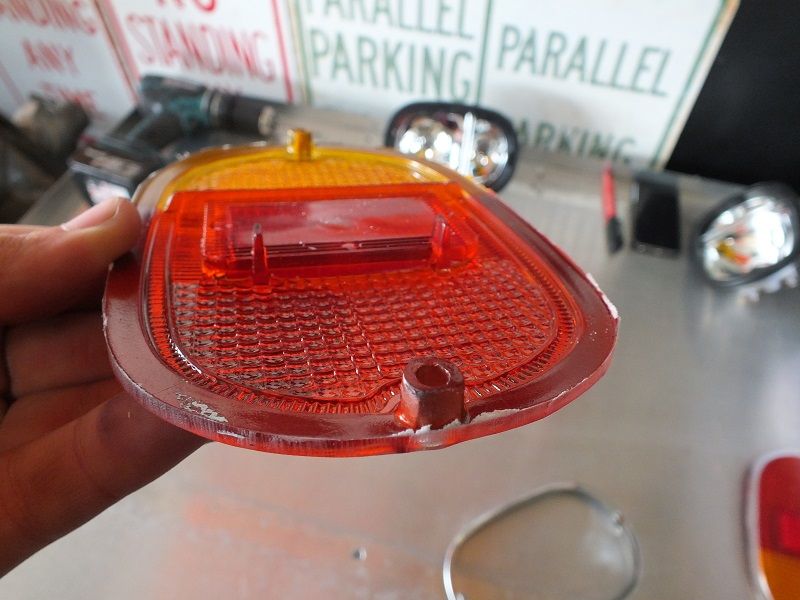
I started by using the bezel as a guide and marking out how much plastic I needed to remove from the outside edge to ensure the bezel will fit over...
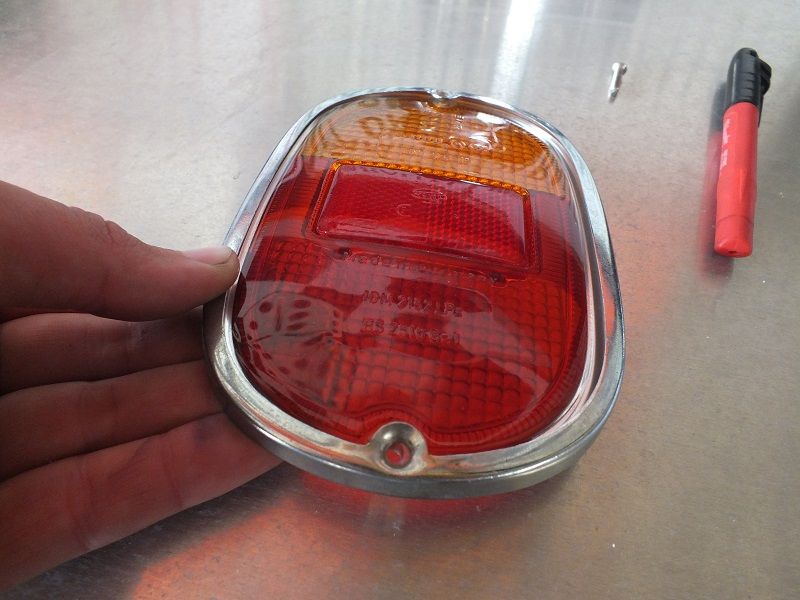
Having ground off the excess from the edges it was now time to remove the bulk of the screw hole so the lense would sit flush at the base...
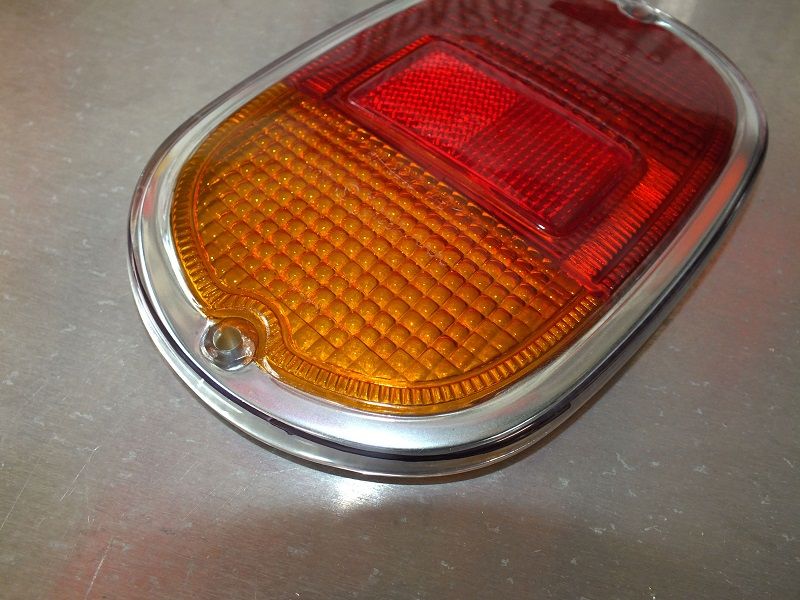
The bezel now fits around the outside...
Re: '63 11 window
Posted: Tue Nov 01, 2016 10:03 pm
by MID WEST DUBBER
Re: '63 11 window
Posted: Wed Nov 02, 2016 7:19 am
by rabidkombi
Awesome work
Re: '63 11 window
Posted: Wed Nov 02, 2016 7:22 am
by 57Bus
I was busy scratching my arse and chasing girls when I was at school, great work, keep it up!


