I installed the seatbelt mounts for the front seat too. 6mm plate with a nut welded on the back and then I plug weld it from inside. Once the welds are smoothed out you will just see the bolt hole from inside the bus.
In the cab between the seat and the bulkhead
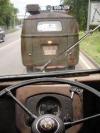
in the spare tyre spot
Then I got stuck into fixing this shit storm. Clearly the PO had a problem with his taillights falling off because he used a LOT of screws. There was a bit of lead in this corner and when I dug it out there was a small ding just below the hacked hole which had also crumpled the battery tray. Thankfully there was a small section of the OG taillight section left so I could take all the measurements I needed to line up the new panel.
Cut out the hole to clean it up and a bit of panel beating to straighten out the tray.
You can see there was a section of the tray that was rusted out and a portion of the D pillar had been hacked with the gas axe so I repaired them before i could do anything about the tail light.
Chasing any Neiman steering lock parts, will consider anything.
Got a day in the garage this week so was able to finish of the taillight sections.
When I started welding in the passenger side section I quickly realised that some of the steel was very thin and I kept blowing through. I had to cut out another section (and do another battery tray repair) and patch that to get solid steel to work with.
The drivers side hack was a little smaller but still the same mess to deal with. Both of the hacked holes were bigger than the available repair panels so I had to have some custom cut.
First I welded up the holes all over the place
The finished product, looks much nicer. I still have a small section of thin steel to replace on the drivers side but i need to get on an english wheel to put some curve on it first.
Chasing any Neiman steering lock parts, will consider anything.
Once the corners were sorted I could put the battery tray in. I had already replaced the engine bay side panels but when I dropped the autocraft battery tray into place the fit was pretty poor around the outside. I tried cutting and stretching it but ended up using the air chisel to adjust the flange. There is still a small gap from the top in some areas but the flange is flush against the corner, after some seam sealer you will never know. One thing I did do different to what most people do is I actually drilled through the corner and plug welded onto the battery tray from the outside rather than welding from underneath. It allowed me to crank up the welder and get a good hot puddle going on the brand new battery tray rather than having to run a cooler weld on the slightly thinned corner steel, it's also easier to get to and clean the weld up that way.
Then the closeout panel could go in, the battery tray is sandwiched between this and the wheel arch so it can't go in until the battery tray is done.
After cleaning up the welds and some etch.
Still need to clean this up a little more.
On a side note, the triangles where the valance mounts have been hacked on my bus, has anyone got the rear section of a bus lying around? I know you can get repro but I only need a small section of each. Please PM me if you have some you want to offload.
Chasing any Neiman steering lock parts, will consider anything.
braddick wrote:Nice work mate
Getting close now
Revolks 2017?
Just trying to get it off the rotisserie for someone . I want to have it in paint this year but finances won't allow it to be finished this year as I had hoped. 2018 on the road I reckon.
Chasing any Neiman steering lock parts, will consider anything.
the battery tray... i know you can but some special paste or what ever it is... id run it around the edges the seal it. just my thoughts (i'll find the stuff out)
Only those whom drive a Dual Cab, Know what real driving is all about