Page 3 of 29

Re: 60 11 window

Posted: Thu Mar 13, 2014 5:47 pm
by splitthis
Can anyone give me this measurement please?

Image

From edge to edge would be great (just above the engine bay seal holder on each side) thanks in advance.

Re: 60 11 window

Posted: Thu Mar 13, 2014 7:32 pm
by HELMUT
745mm

You're welcome, in advance :D

Re: 60 11 window

Posted: Thu Mar 13, 2014 8:49 pm
by splitthis
Champion! Thanks mate, I have the panels ready to go but didn't want to weld them in incase they weren't right.

Re: 60 11 window

Posted: Fri Jul 31, 2015 4:57 pm
by splitthis
It's been bloody ages since I updated this, but I have been making some slow progress between uni and work. I have taken lots of pics of each step but i'll just put up a rough overview.

Last time I updated this I had just cut out the patched bulkhead to replace it with a complete one. Very happy I did that because it looks 100 times better now.
Image

Then the bus went off to the blasters where it sat for 3 months waiting for him to squeeze it in. Came back looking nice and clean with only a couple of surprises.
Image

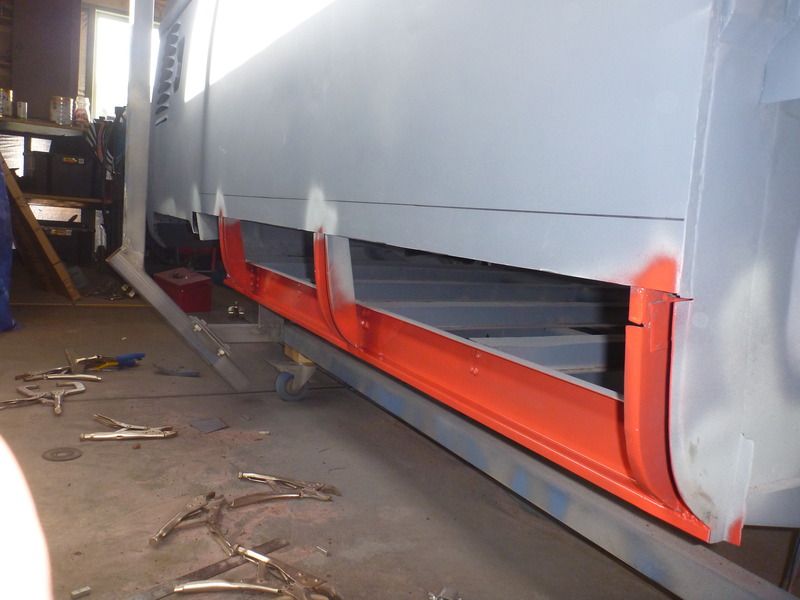
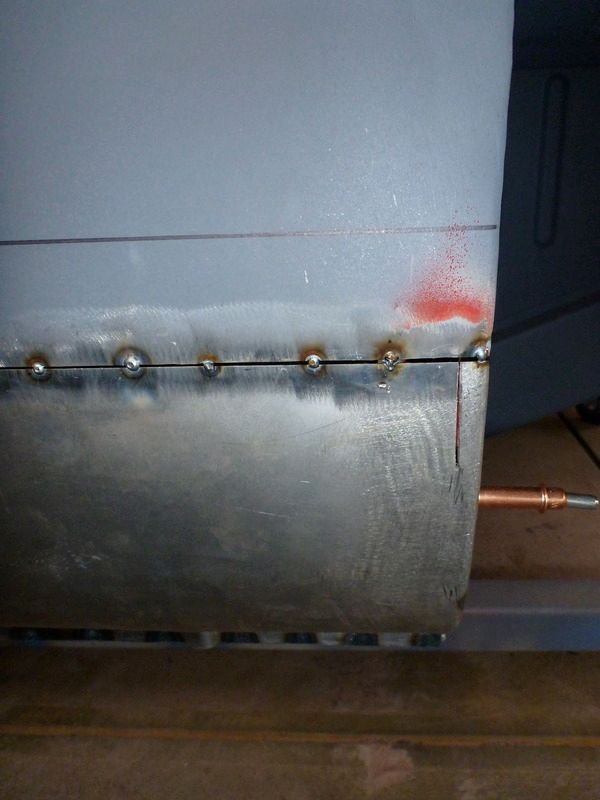
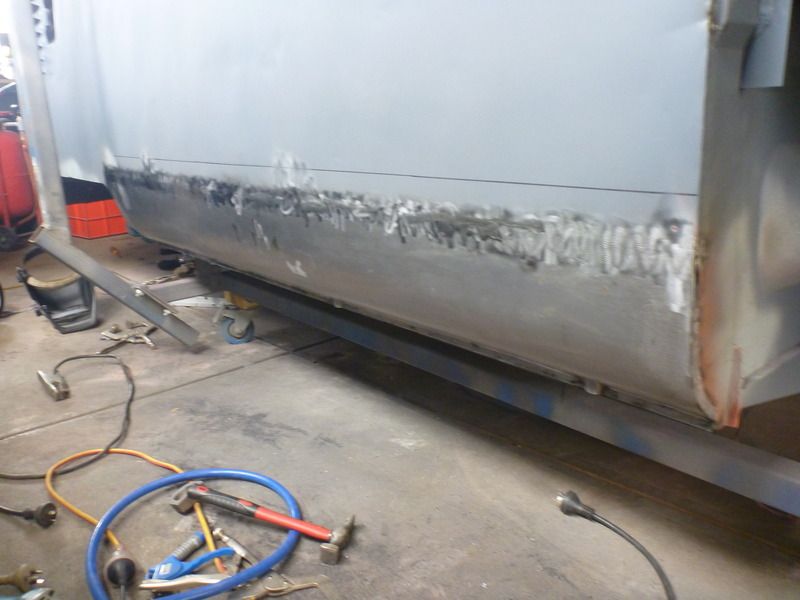
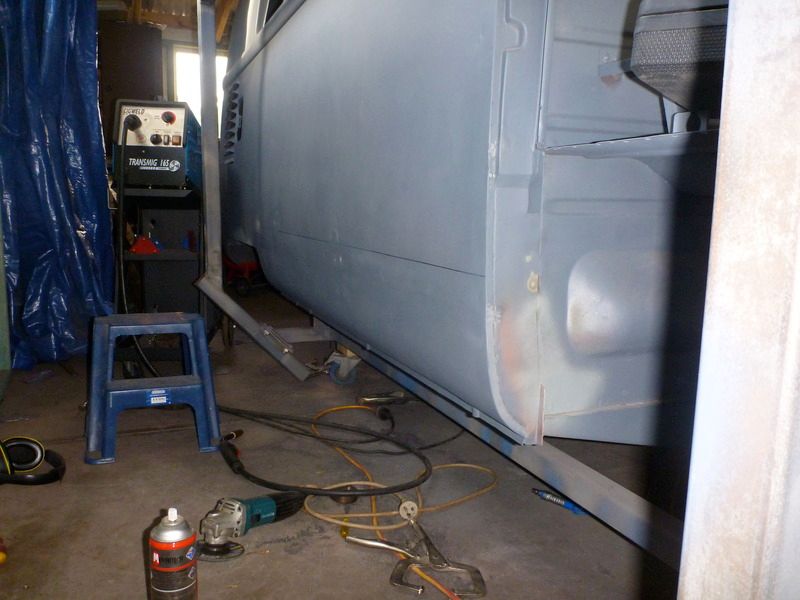
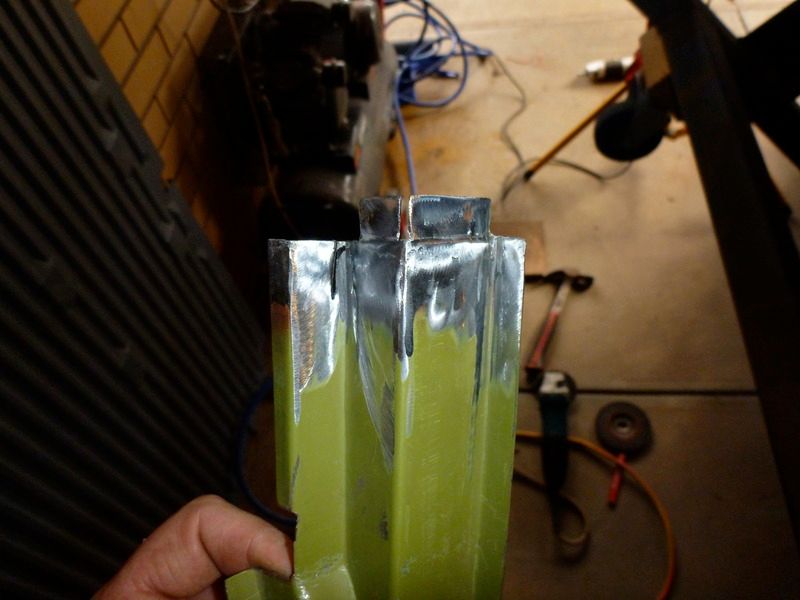
I got stuck straight into the long side because that was something I had been putting off. I was very paranoid about warpage so took it nice and slow, cooling after each tac. Ignore the red paint, it was just what I had lying around at the time, all the cavities have been etch primed, and then had either a couple of coats of zinc weld-through or gloss zinc guard enamel depending on location, I don't plan on ever welding on this bus again. I pre-drilled the bottom of the inner sill so I could plug weld from under the bus, it's a proper shit of a job plugging them all up and I have some nice scars to help me remember the job but it leaves a nicer finish on the visible part of the sill (obviously a spot welder would be ideal and much quicker but I don't have one).
Image

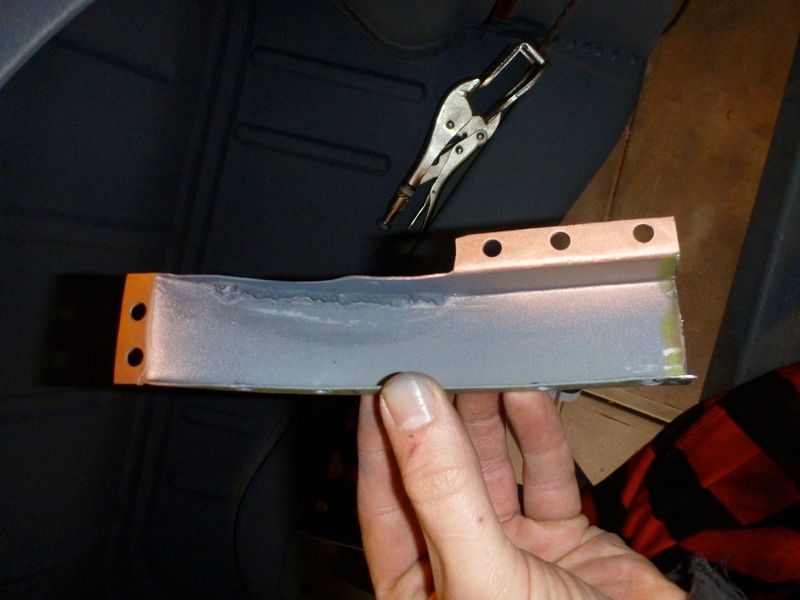
I had to slice the end of the autocraft panel as it wasn't square.
Image
Image

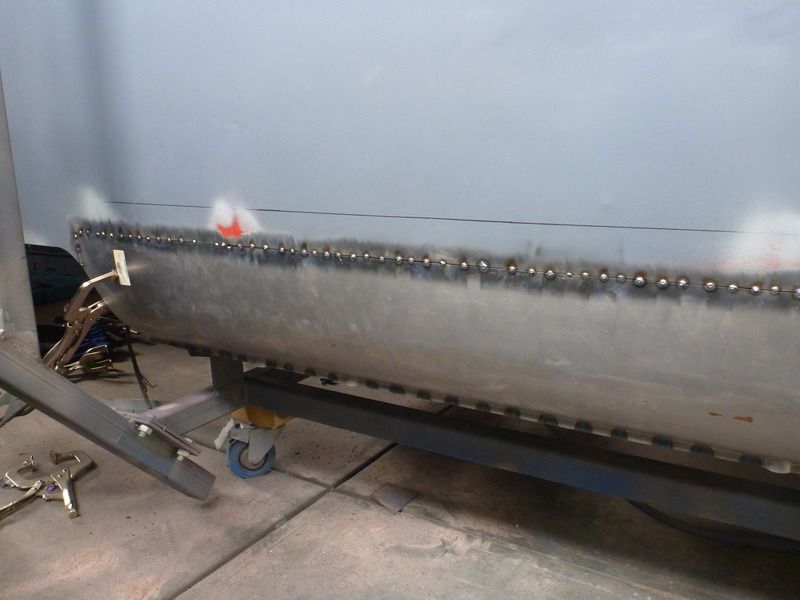
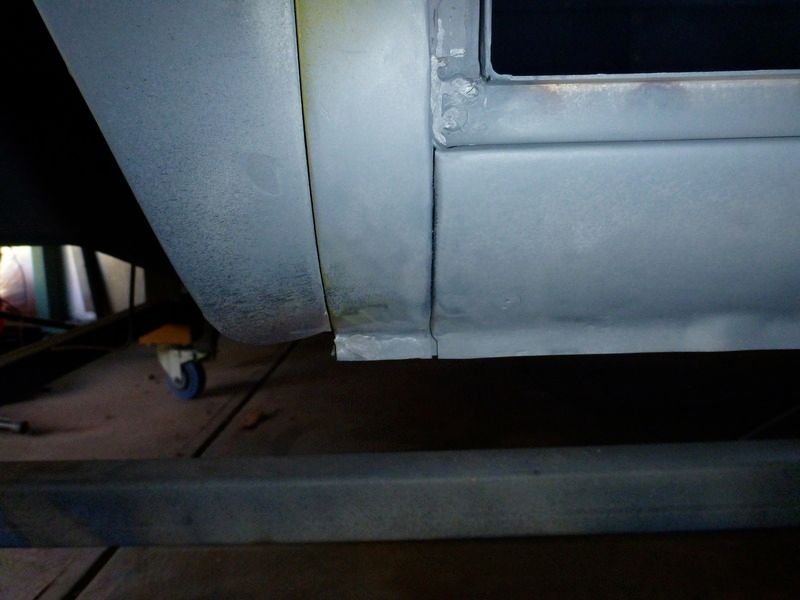
All ground down and primed, no filler and no warp!
Image
Image

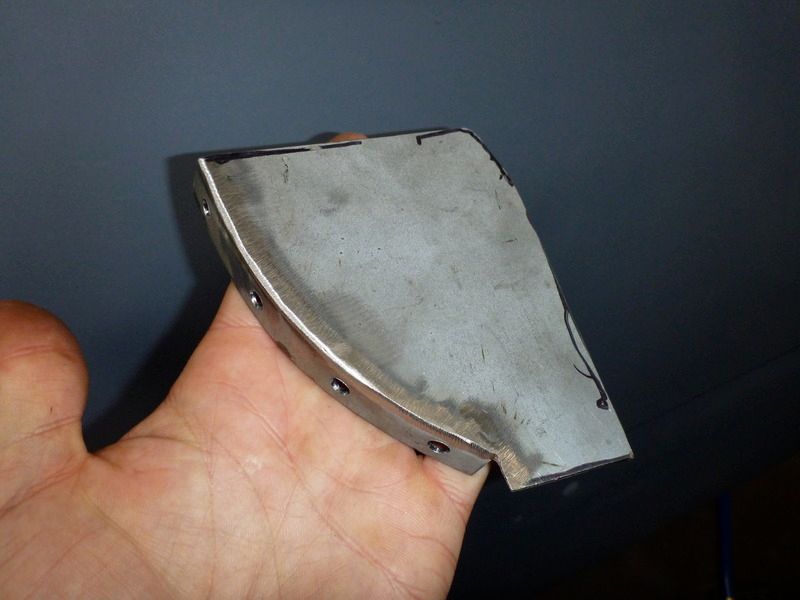
Once the sill was welded in I finished off this section of the wheel arch with a home made patch.
Image
Image

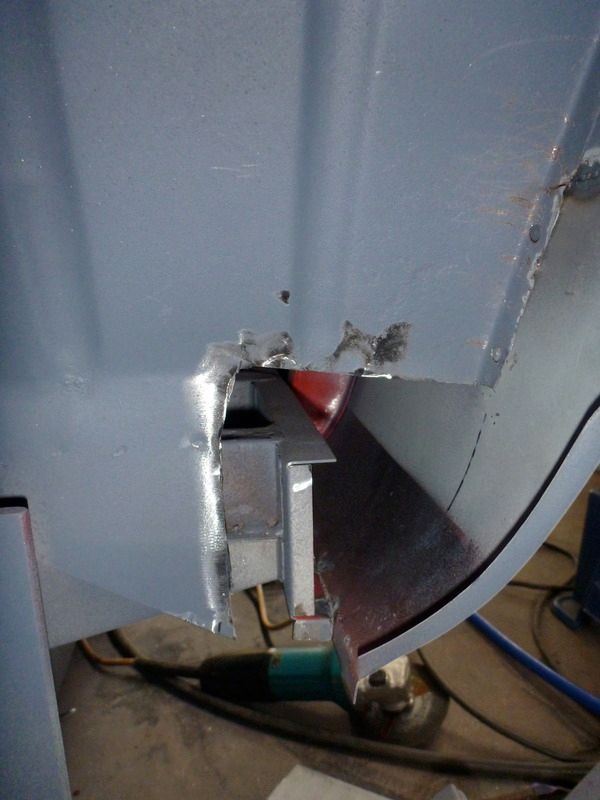
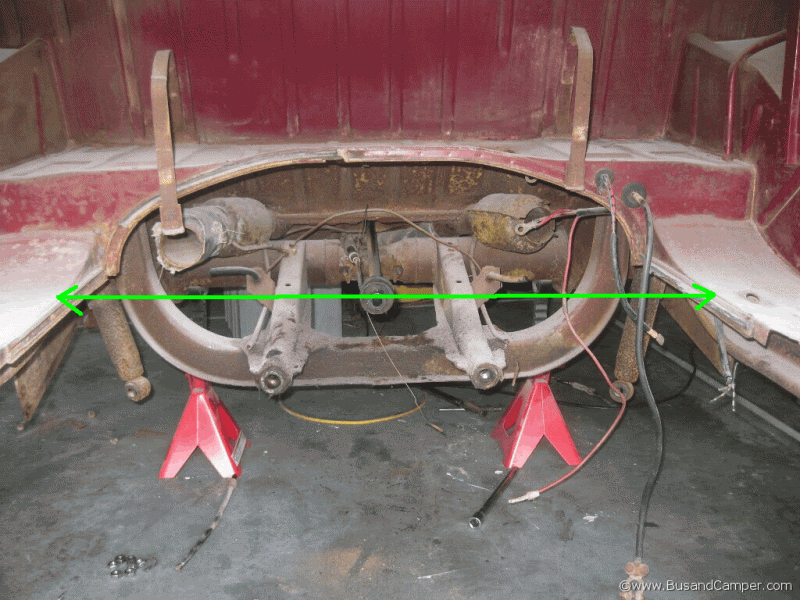
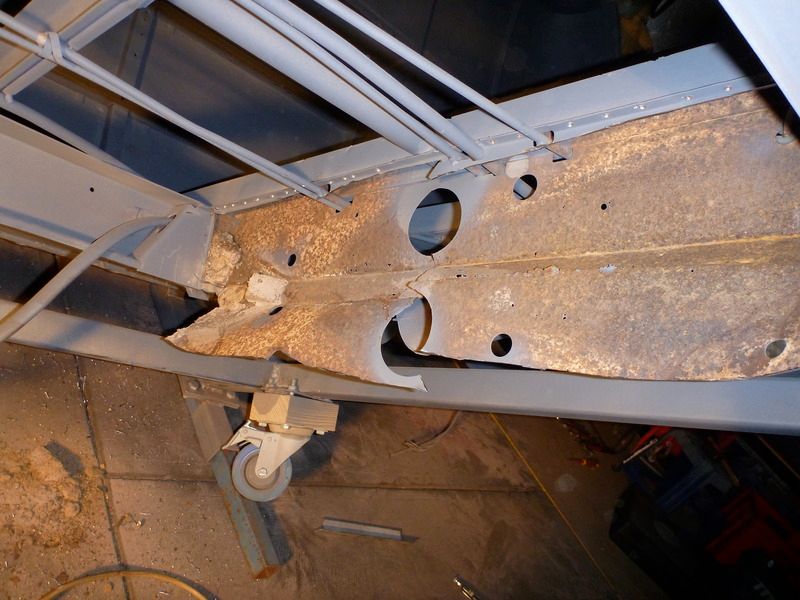
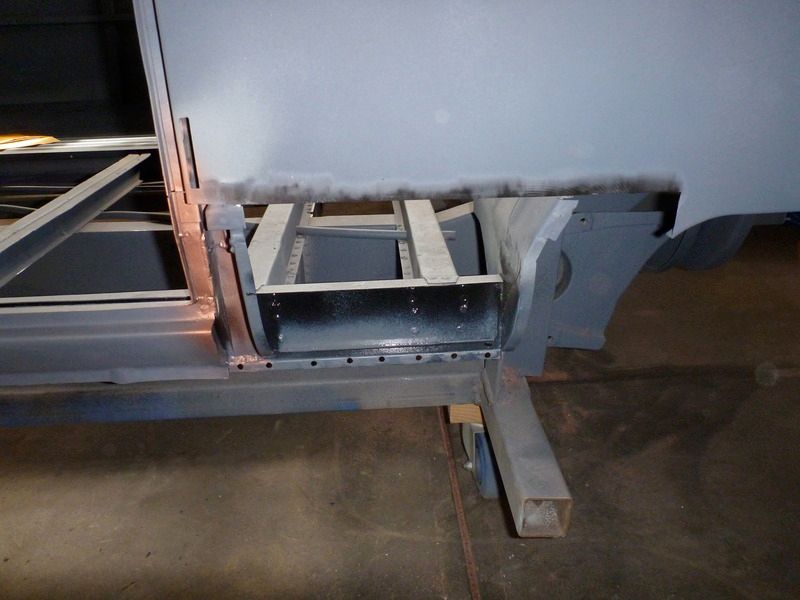
I replaced the front cross member before blasting and thought the rear was solid.... just another good reason to blast. Initially I thought I would patch it but it was thin in lots of spots so i just cut it out and put in an autocraft piece which was very nice quality and easy to fit with the floor still off.
Image
Image

The cross-member and heater tube (no pic) where the last of the chassis pieces to be fitted and then I moved onto the sill under the cargo doors. First I had to replace the bottom of the B and C pillars. I used Gerson stuff for both and they were shit. They made it easier than doing them from scratch but both needed adjusting and the C pillar was off in 3 different planes, for simple parts I expected better. I like to joggle the join for extra strength.
Image
Image


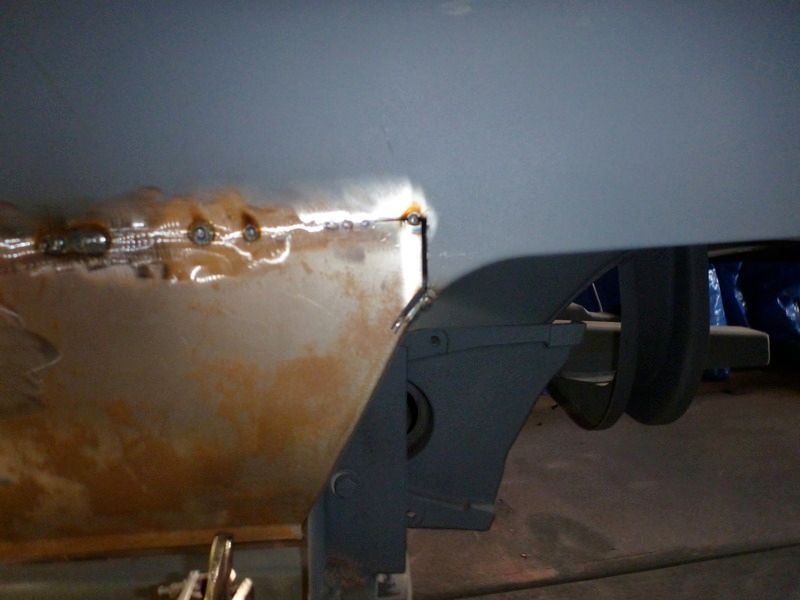
Once the pillars where in I could put the sill in. I painted the inside and then plug welded the strengthener to the skin before installation. I left the rusty dog leg in place to help ensure the lower B pillar and sill were in the right spot. I measured the door opening hundreds of times before welding it in.
Image
Image

Then I could fit the short sill, this needed a little tweak to get it to fit right but was pretty good overall.
Image
Image

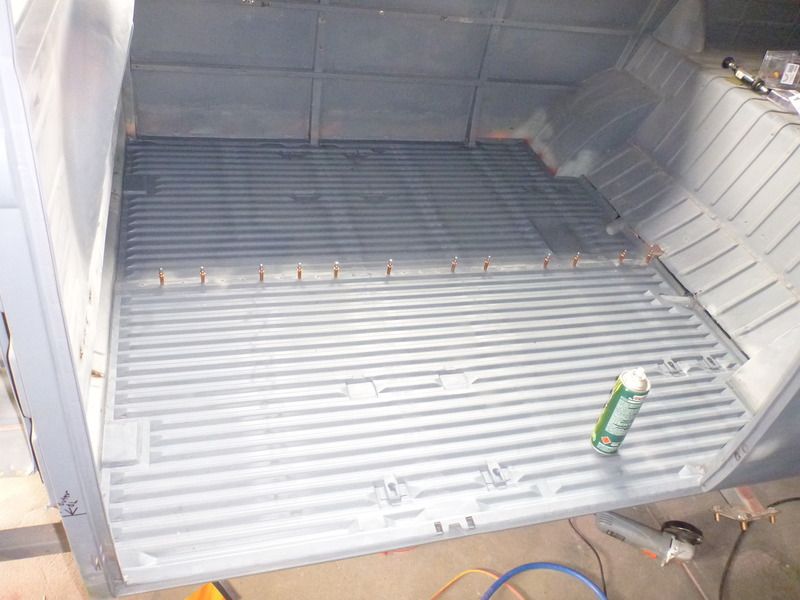
Then came the fun bit, fitting the cargo floor. I had started trial fitting and trimming before blasting so it was pretty much ready to go. Thankfully the father in law wanted to help out so I put him to work drilling the 650ish holes.
Image

All welded down except for the centre join. Came up bloody awesome and got me pumped as it was starting to feel like a bus again.
Image

Re: 60 11 window

Posted: Fri Jul 31, 2015 5:21 pm
by splitthis
Once the floor was in I cut up an old bay rear door to finish up the passenger side wheel arch.
Image
Image

Onto the engine bay and the IRS conversion. I went with the CE stuff because it's proven to work and imho it's the closest to the factory IRS in the later busses.
Image

Then I could weld in the engine bay sides which had been hacked out for a bigger engine at some stage. I can't put the battery tray in until I replace my taillight sections which where both hacked out with a gas axe.
Image
Image

Up the front and I had to replace the drivers side floor section. in hindsight I should have waited until the A pillar was done because I had to stretch this to meet the pillar.
Image
Image

Then onto the bottom of both A-pillars. The drivers side needed to be replaced to above the hinge, big thanks to Pat for the loan of his pillar jig, my bust had been side swiped pretty viciously at some stage and everything on the drivers side was off a little.
Passenger first
Image
Image

Then cut this crap out
Image
Image

Small patch before the pillar went in
Image

Thanks again Pat, this was a life saver
Image

I actually cut and re-welded this on twice trying to get the lines right. This was the first attempt and you can see the bottom comes in too much.
Image

Re: 60 11 window

Posted: Fri Jul 31, 2015 5:49 pm
by splitthis
I found fitting the inner front valance to be a bit of a pain in the ass. The replacement didn't have enough of a curve so needed lots of brute force and vicegrips to get it into position. I cut out two access holes in the headlight support panel to get access to weld it to the chassis rails. This wont be seen once the nose is back on so i thought it was worth it for extra strength.
Image
Image

Welded to the A pillars
Image
Image

It's also welded to the bottom of the chassis rails and then plugged to the headlight support the whole way across.
Image
Image

Then it got some seam sealer and paint on the inside before the outer valance went on (no pic yet)
Image

Both A pillars needed work up the top too. the passenger side wasn't too bad but the drivers side pretty much needs replacing from dash to roof.
Image
Image
Image

While I was at it I replaced the flogged out nut plates, the new ones are much stronger and will never strip
Image
Image
Image

Re: 60 11 window

Posted: Fri Jul 31, 2015 6:04 pm
by Roo
You have been a busy boy!! Very inspiring mate. Keep going now...

Re: 60 11 window

Posted: Fri Jul 31, 2015 8:51 pm
by rabidkombi
Awesome work :D

Re: 60 11 window

Posted: Sat Aug 01, 2015 11:06 pm
by braddick
Great update awesome work mate, keep at it clock is ticking

Re: 60 11 window

Posted: Sun Aug 02, 2015 8:04 pm
by Leroy
Awesome work! Love the attention to detail 8)

Re: 60 11 window

Posted: Sun Aug 02, 2015 8:09 pm
by red hot bus
Great work Matt, coming along nicly

Re: 60 11 window

Posted: Sun Aug 02, 2015 10:19 pm
by joshroom
sweet work mate. love that jig! how do you take it in/out? just tilt it foward and out the door opening?

Re: 60 11 window

Posted: Sun Aug 02, 2015 10:29 pm
by Cam Biscuit
Big job, great work!

Re: 60 11 window

Posted: Mon Aug 03, 2015 7:54 pm
by splitthis
Thanks guys. Posting all the pics at once makes it look like I'm working much quicker than I am. It's getting there though, I'll post some more pics up later this week.

joshroom wrote:sweet work mate. love that jig! how do you take it in/out? just tilt it foward and out the door opening?
It takes a little bit of manoeuvring but if you look closely it is in three parts which helps. The main section screws in where the striker plates go and then the "legs" are bolted through the forward buffer holes. Then that has a removable piece on each side which bolts to the top and bottom door hinge mounting plates. It's pretty hardcore, Pat did a great job. It saved me lots of heartache, without it, welding in the A pillar would have been guesswork.

Re: 60 11 window

Posted: Mon Aug 03, 2015 10:29 pm
by gaz
Good work mate, nice welds 8)