... And so it begins.
Moderators: warb, Rawdyn, Leroy, byronbus, Tonz Magonz, dmb
-
Fathermarc
- DSKer
- Posts: 285
- Joined: Thu Mar 21, 2013 6:25 pm
Re: ... And so it begins.
Cont...
- Attachments
-
- Popped this little beauty out for polishing. I wish VW had used a lot more Aluminium for the controls as it would have been nice to polish more.
-
- I couldn't be arsed to take them out to paint. So glad I didn't . Was easy enough in situ.
-
- Steering column and Handbrake Sanded and enameled black.
-
- Looks very Chinese.
---------
58 Kombi
69 Soft top beetle
65 Izh Jupiter with side car
2006 Ducati 999 Xerox
58 Kombi
69 Soft top beetle
65 Izh Jupiter with side car
2006 Ducati 999 Xerox
-
kombi niko
- DSKer
- Posts: 1402
- Joined: Sat Mar 30, 2013 4:28 pm
- Location: Mornington peninsula
- Contact:
Re: ... And so it begins.
love that steering wheel oldschool as 
-
Cam Biscuit
- DSKer
- Posts: 1516
- Joined: Sun Feb 26, 2012 4:56 pm
- Location: Radelaide
Re: ... And so it begins.
What sort of putty did you use on the wheel?
-
Fathermarc
- DSKer
- Posts: 285
- Joined: Thu Mar 21, 2013 6:25 pm
Re: ... And so it begins.
Epoxy Putty from SupercheapCam Arnott wrote:What sort of putty did you use on the wheel?
---------
58 Kombi
69 Soft top beetle
65 Izh Jupiter with side car
2006 Ducati 999 Xerox
58 Kombi
69 Soft top beetle
65 Izh Jupiter with side car
2006 Ducati 999 Xerox
-
Fathermarc
- DSKer
- Posts: 285
- Joined: Thu Mar 21, 2013 6:25 pm
Re: ... And so it begins.
140614 - Resto
Today was the day that I started the IRS conversion. I propped the Kombi up on axle stands after taking of the big Axle nut off. I then whipped off the wheels. Took the brakes apart and disconnected the brake lines. Disconnected the clutch cable and the connections at the starter motor. Disconnected the gear rod coupling. Next I clamped the spring plate and undid the 4 bolts from the near side, I half expected the spring plate to release under pressure with a chopping motion downwards. But it just separated from the reduction boxes by a few centimeters. The Off Side was stuck fast. I tried everything and eventually had to chop the bolt heads off as I was beginning to round off the heads. Once the suspension was release I used a trolley jack to slide the gear box free of the kombi.
I cut the horns off as instructed but ran out of time before I could grind the plates back that I will have to do tomorrow. Not it was getting dark I decided to retreat to the garage and begin assembling the drive shafts with the new bus and bug CV joints packing the new CV's with Molybdenum grease. I managed to buy new conical washes from the guys at "Coolair" over in the UK. 3.50GBP each if your interested. They were here in a week and a perfect match to the originals. The Bug CV's needed three to take up the play. Two on the inside and the other on the outside under the retaining clip washer. The bus CV joints only needed the one conical washer on the inside edge.
Next I took the old nose cone off the original bus gearbox and was going to switch it with the bug nose cone. But they are completely different.... Have I missed something crucial? At first glance I don't understand how they can be switch over. Maybe there's something I've missed and have come upstairs to do a little more research. Also didn't fully understand that I need to have bay stub axles and thought I would be using the original bus stub axles. Why I thought that I don't know. So now I'm in desperate need of a a pair of bay stub axles. I'm using CSP disc conversion all round and so wasn't really looking for bay parts. Now I realize that they're the missing piece of the jigsaw. So now the Kombi's having to sleep out in the cold under cover until I can work out how to get it back under the car port. I was hoping to have the IRS done this weekend. GRRRRRRRRR
I'll post some photos tomorrow. If you can help out with some advise and/or a pair of stub axles. That would be greatly appreciated.
M.
---------
58 Kombi
69 Soft top beetle
65 Izh Jupiter with side car
2006 Ducati 999 Xerox
58 Kombi
69 Soft top beetle
65 Izh Jupiter with side car
2006 Ducati 999 Xerox
-
splitbus
- DSKer
- Posts: 3232
- Joined: Sun Dec 09, 2007 7:47 am
- Location: Brisbane Northside
Re: ... And so it begins.
What irs box have you got
Mike |o\*/o| 55 11 Window
I don't have a bucket list I have a fu#kit list a mile long
I don't have a bucket list I have a fu#kit list a mile long
-
Fathermarc
- DSKer
- Posts: 285
- Joined: Thu Mar 21, 2013 6:25 pm
Re: ... And so it begins.
splitbus wrote:What irs box have you got
Its an AT
---------
58 Kombi
69 Soft top beetle
65 Izh Jupiter with side car
2006 Ducati 999 Xerox
58 Kombi
69 Soft top beetle
65 Izh Jupiter with side car
2006 Ducati 999 Xerox
-
Fathermarc
- DSKer
- Posts: 285
- Joined: Thu Mar 21, 2013 6:25 pm
Re: ... And so it begins.
140622-Resto
Oh what a weekend. I got most of the IRS kit welded in place and bolted the most part of the kit in. It says that it should take about 4 hours to fit but that doesn't include sand blasting in and around the rear axle area and engine compartment. Priming and painting the area after welding. It took me two days and I still haven't got the gearbox in yet. That's got something to do with some outstanding parts which have yet to arrive. Still i always feel better about something when I can take my time and prepare it properly. Despite my excitement I want to make sure that it's the best I can do.
Heads up... If you have a pre-1959 bus please note that your nose cone needs replacing with a later gearbox nose cone. Plus you will need to make or buy a nose cone conversion bracket. Easy enough to make but I bought mine from WagonsWest. Not because I'm lazy I just have too much to do.(Plus it looks very well made)
Here are the pics... I'm itching to get the rear end back together engine and all.
- Attachments
-
- I had sand blasted the engine compartment a few months back and given it lashings of rust converter. I wanted to give it another going over to make sure.
-
- Sand blasted the engine compartment.
-
- Original horns chopped out and prepared for the new Creative Engineering IRS to go in.
-
- Inside and around the rear axle sand blasted clean and rust free.
-
- Looking forward to getting this baby rolling on the floor again.
-
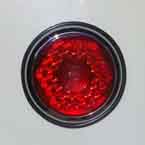
- I need a third brake light if you have one knocking around.
-
- Dove blue L31 mixed up at Supercheap. Really good colour match and the paints are from a good source.
-
- Enging compartment with the first coat of Dove Blue.
-
- Need some liquid gasket to fit the replacement nose cone and the impending conversion bracket from WagonsWest.
-
- Ready for the next phase.
---------
58 Kombi
69 Soft top beetle
65 Izh Jupiter with side car
2006 Ducati 999 Xerox
58 Kombi
69 Soft top beetle
65 Izh Jupiter with side car
2006 Ducati 999 Xerox
-
Fathermarc
- DSKer
- Posts: 285
- Joined: Thu Mar 21, 2013 6:25 pm
Re: ... And so it begins.
140729 - Resto
I've been trying to write this for days but have been too busy to find the time. The weekend restoration went well. Waiting for news on some wide five early bay drums meant I had to bide my time and do the little jobs and detailing that otherwise would have been rushed past in an effort to get through the ever increasing list. So a good thing really.
IRS (cont.):
First off I installed the CE IRS last week and so this week had time to detailed the under side of the rear end with Hammerite blue. General ly the underside has been pretty well maintained with slight surface rust in patches here and there. Nothing that the Hammerite can't easily neutralize and it looks cool to boot. Now all I need is the convertion bracket from the States to turn up and the Early bay drums to be rebuilt and this little baby can go back on the ground. After finishing off both sides I set to work on the engine lid hinge support which I poorly tacked in at the beginning of this restoration. Once neatened up and I was happy with the results I turned my attention to welding in place the pop out window hinges.
Pop Out Window Hinges:
Making a hardboard template, I offered it up to the original hinge & drilled out the screw hole location. Then screwed a new hinge to the board and drilled out pilot holes for the spot welds in the blank leaf of the hinge. Positioned the template in the window opening, use a drill bit of corresponding size ground down to zero degrees and drill through the pilot holes. This will prepare the area of body work for welding. Repeat this on each window opening. All windows holes lined up with the hinges perfectly and it was a simple task to screw everything in place. I bought some stainless steel pop out latch spacer from a DSK member and they worked a treat. You know who you are, thank you.
Gearbox detailing:
Next up was to prepare the gearbox. Fitting a replacement nose cone. The operation is pretty straight forward. Before you start make sure that its in neautral. Remove the existing nose cone and reuse the original hockey stick from the Split screen. All parts were thoroughly cleaned and all burrs removed from the new strike plate. I didn't use a paper gasket but silicone gasket for high temperatures and oil resilience. Once put together I made sure I could push the rod and select gears. Then it was time to wash the casing and the starter motor and give it 3 coats of high temp. black paint. Stealthy! I like the look of this paint. It's a ceramic based paint and dries Matt with a copper-ish tint to it. Super sexy.
So now were sitting pretty waiting for the gearbox bracket and hubs, which I'm hoping turn up for next weekend. Fingers are crossed.
Images below:140629
- Attachments
-
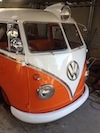
- Window in... Yeah she looks like a bus again.
-
-
-
-
- Hinges
-
-
-
-
- CE Suspension Brackets
-
- CE Spring Plates
Last edited by Fathermarc on Thu Jul 03, 2014 1:56 pm, edited 1 time in total.
---------
58 Kombi
69 Soft top beetle
65 Izh Jupiter with side car
2006 Ducati 999 Xerox
58 Kombi
69 Soft top beetle
65 Izh Jupiter with side car
2006 Ducati 999 Xerox
-
Fathermarc
- DSKer
- Posts: 285
- Joined: Thu Mar 21, 2013 6:25 pm
Re: ... And so it begins.
Images part 2
- Attachments
-
-
-
-
-
-
-
-
-
- Ready to install.
---------
58 Kombi
69 Soft top beetle
65 Izh Jupiter with side car
2006 Ducati 999 Xerox
58 Kombi
69 Soft top beetle
65 Izh Jupiter with side car
2006 Ducati 999 Xerox
-
marz
- DSKer
- Posts: 36
- Joined: Sun Jul 16, 2006 8:07 pm
- Location: Geelong
Re: ... And so it begins.
Engine bay looks great, I have to prep mine for a splash of paint and I'm not enjoying it!.
-
Fathermarc
- DSKer
- Posts: 285
- Joined: Thu Mar 21, 2013 6:25 pm
Re: ... And so it begins.
marz wrote:Engine bay looks great, I have to prep mine for a splash of paint and I'm not enjoying it!.
Thanks Marz... It took three attempts and I think it's going to need a good sanding back now ready for the final coats.
---------
58 Kombi
69 Soft top beetle
65 Izh Jupiter with side car
2006 Ducati 999 Xerox
58 Kombi
69 Soft top beetle
65 Izh Jupiter with side car
2006 Ducati 999 Xerox
-
Rudy_032
- DSKer
- Posts: 75
- Joined: Wed Mar 13, 2013 3:28 pm
Re: ... And so it begins.
Looks the goods. That gearbox paint is sweet as, what brand is it?
Hos did you know what splines to start the spring plates on? When the motor goes in and its under norman weight do you think you will have to adjust it? About to do mine.
Hos did you know what splines to start the spring plates on? When the motor goes in and its under norman weight do you think you will have to adjust it? About to do mine.
67 Splitty
68 Bay
74 Bay
2004 Golf
68 Bay
74 Bay
2004 Golf
-
Fathermarc
- DSKer
- Posts: 285
- Joined: Thu Mar 21, 2013 6:25 pm
Re: ... And so it begins.
Rudy_032 wrote:Looks the goods. That gearbox paint is sweet as, what brand is it?
Hos did you know what splines to start the spring plates on? When the motor goes in and its under norman weight do you think you will have to adjust it? About to do mine.
Thanks I agree the paint looks really good, even better in real life. Its this one.
http://www.supercheapauto.com.au/online ... 0405#Cross
Creative Engineering instruction's guide was for a 3.5 to 4 inch drop to allow 12mm clearance from bottom of spring plate to bottom of housing. Their plates are easily adjustable and final tuning comes later when the engine is in and the Kombi's on the floor under normal weight. I would check with your spring plate manufacturer though.
---------
58 Kombi
69 Soft top beetle
65 Izh Jupiter with side car
2006 Ducati 999 Xerox
58 Kombi
69 Soft top beetle
65 Izh Jupiter with side car
2006 Ducati 999 Xerox
-
Fathermarc
- DSKer
- Posts: 285
- Joined: Thu Mar 21, 2013 6:25 pm
Re: ... And so it begins.
070714_Resto
Oh my god what a weekend. Saturday we went to have a look at the new place we've just bought. We got there early Saturday morning. I was planning to get back to the project around lunchtime. It was so that we spent the whole day chillaxing by the water. We didn't want to return.
Sunday I found all the bits I was waiting for had arrived. The 5 wide drums from a 68 and the nosecone conversion from Wagenwest turned up whilst we were away. Great! So Sunday was time to roll up the sleeves and get on with fitting the IRS. I decided some time ago that rushing any task is fruitless. There are tasks that need to be completed as we go along.
Seat belt Mounts.
Whilst the engine bay is empty I thought it would be wise to weld in achor points for a rea seat seat belt mount. I used the old spring plate. Cut it up, drilled it out and welded it in place whilst tacking some nuts too.
Larger fuel tank.
I cut the filler pipe off the old tank and fitted it to the late bay fuel tank with a short section of silicone tube. using the old straps which were cleaned up. I made some extensions out ofa stainless steel flat bar that has been knocking around.
AT gearbox.
The gearbox was a bit of a pain for me. Everyone says fit the old T2 hockey stick into the new nose cone. This gave me a headache. I could select gear out of the bus but when fitted in situ. I couldn't select a gear. I took the gear box out 3 times before trying the bug hockey stick. Needless to say that this worked perfectly. Got the gear box in and filled her up with fresh oil. Selects gear perfectly.
Engine Bay.
gave the engine bay a final prepping and another coat of paint with the new tank in situ. starting to take shape. Looking forward to getting the engine put back in.
68/69 wide 5 drums. (Rocking Horse shit)
I stripped them down to the back plates as I know just how rare these back plates are. Wire wheeled them back to the bare metal. Acid etched them an then Hammerite the plates to protect them for the future. Will rebuild the brakes this week.
Enjoy the images.
- Attachments
-
-
-
-
-
-
- Inside wasn't too bad the bearings need a repack and everything needs a clean up.
-
-
-
-
---------
58 Kombi
69 Soft top beetle
65 Izh Jupiter with side car
2006 Ducati 999 Xerox
58 Kombi
69 Soft top beetle
65 Izh Jupiter with side car
2006 Ducati 999 Xerox