My turquoise eleven window bus
Moderators: warb, Rawdyn, Leroy, byronbus, Tonz Magonz, dmb
-
joshroom
- DSKer
- Posts: 487
- Joined: Sat Jul 21, 2007 11:08 pm
- Location: perth
My turquoise eleven window bus
Just having a go at uploading some photos of my bus, these are some of the better shots it is solid up top but most of the lower stuff is pretty cancer ridden inner outer sills doglegs front cargo floor outriggers all need replacement ill do my best to put photos up from time to time. peace fellas!
- Attachments
-
- nose view.jpg (38.94 KiB) Viewed 4817 times
-
- side view.jpg (48.36 KiB) Viewed 4817 times
-
- back view.jpg (28.28 KiB) Viewed 4817 times
-
- front view med.jpg (53.55 KiB) Viewed 4818 times
Last edited by joshroom on Thu Aug 23, 2012 12:40 am, edited 2 times in total.
-
joshroom
- DSKer
- Posts: 487
- Joined: Sat Jul 21, 2007 11:08 pm
- Location: perth
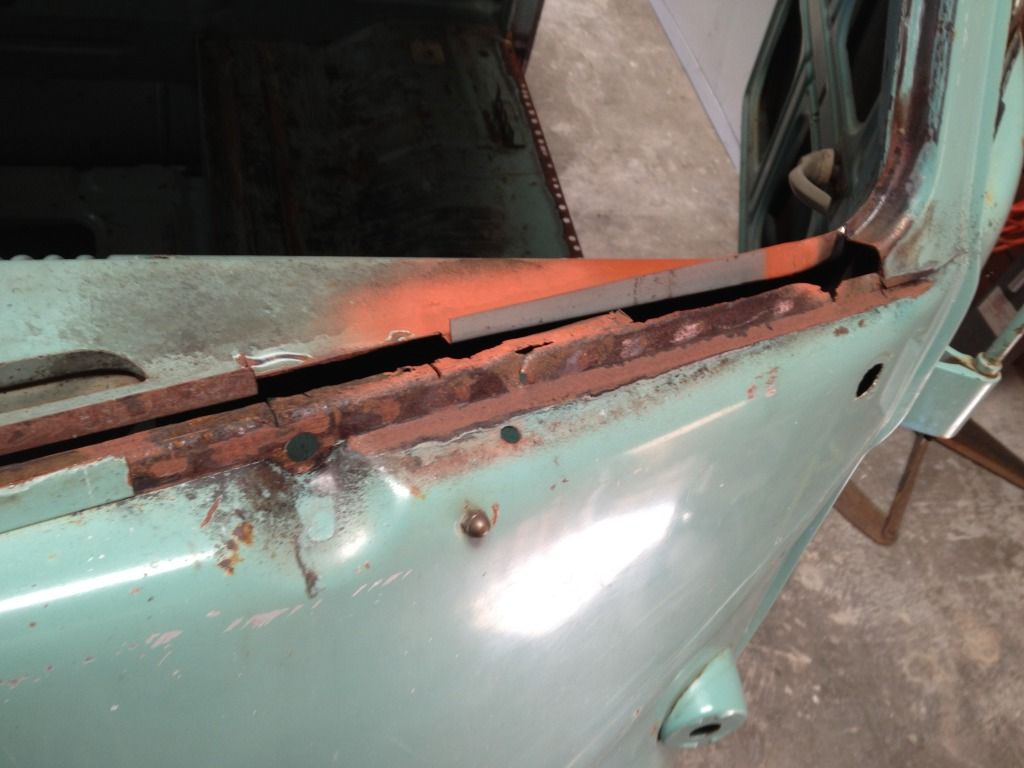
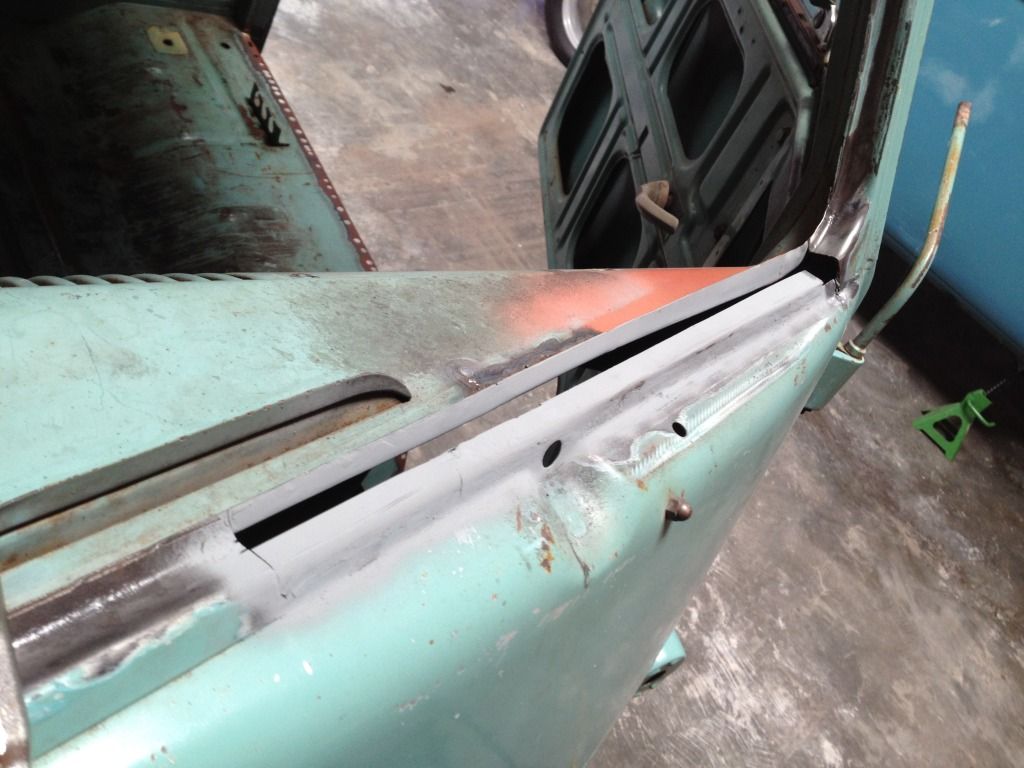
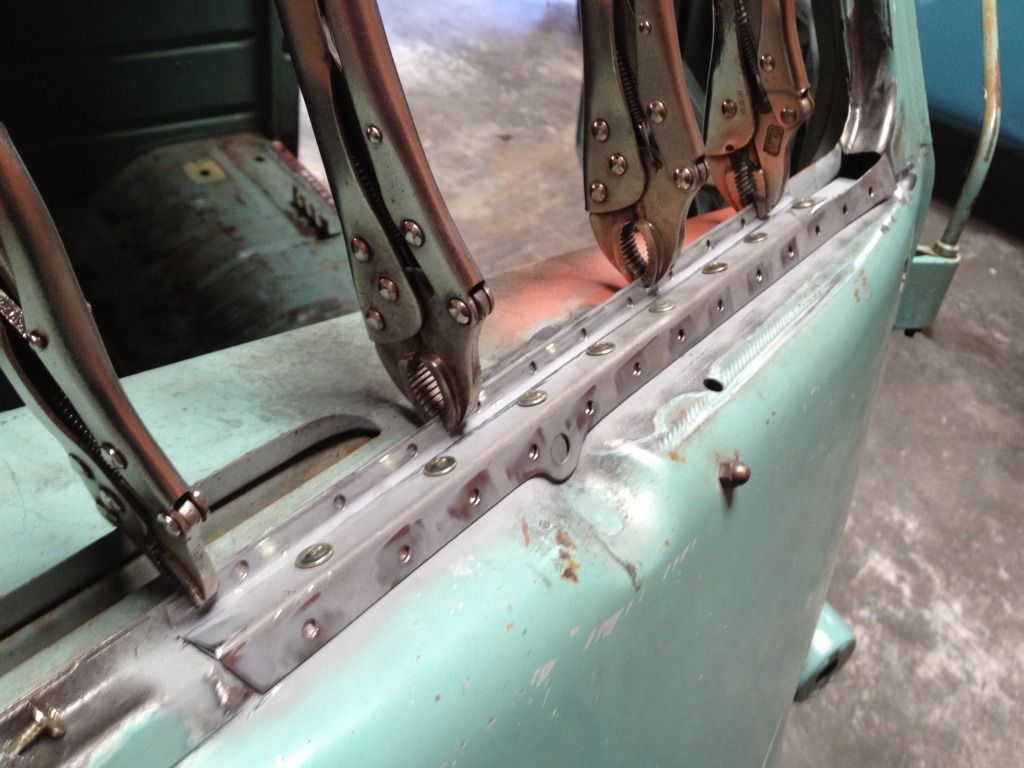
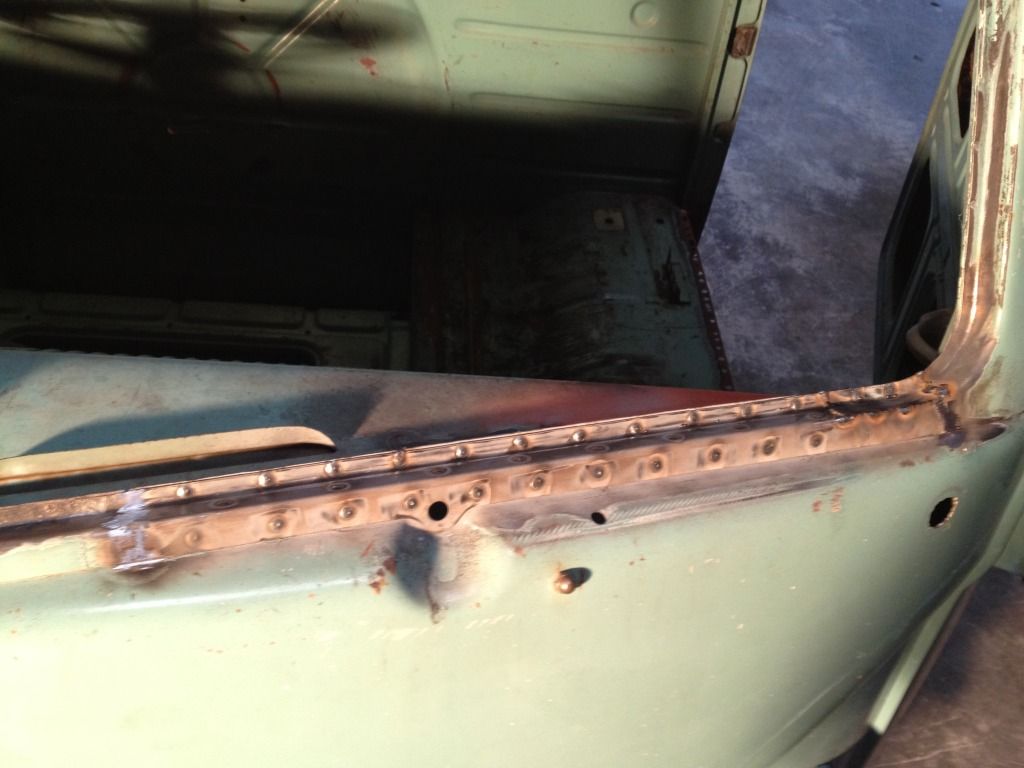
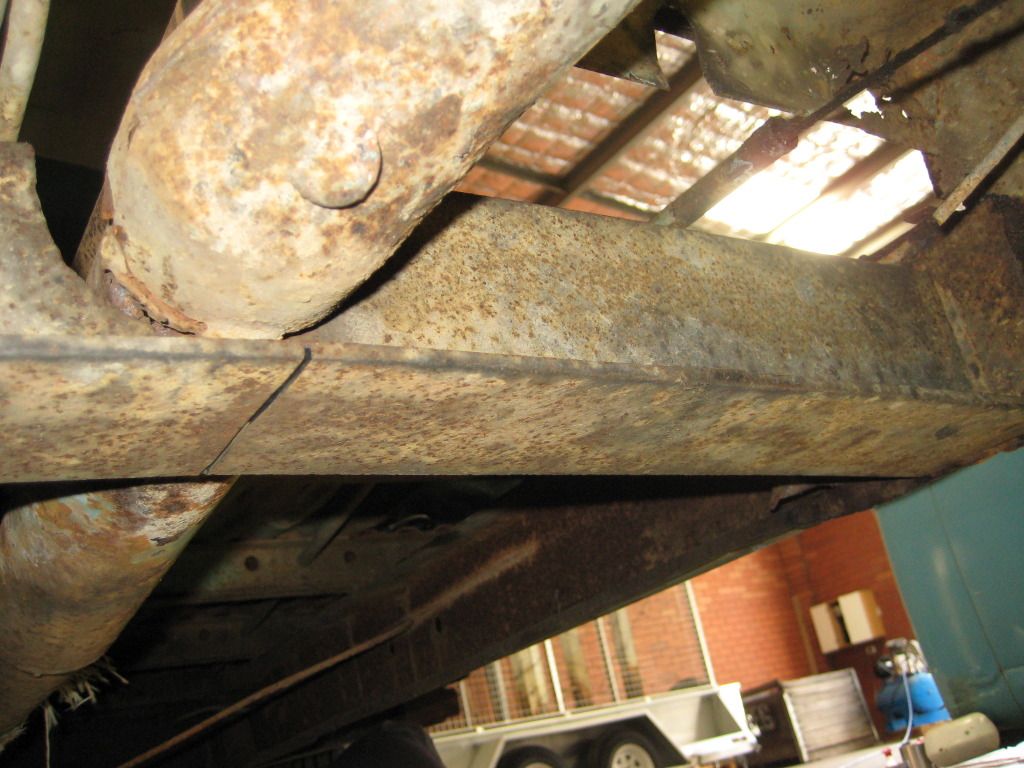
these are some pics of the repairs ive started to the cargo floor support rails/stringers. I just had some steel folded to the correct profile so i can cut it up to the lengths i need then plug weld the sections back to back and fold the ends at 90 degrees to mate up with the inner sills.
- Attachments
-
- crustyone.jpg (41.92 KiB) Viewed 4811 times
-
- new old.jpg (42.44 KiB) Viewed 4811 times
-
- stringer spot.jpg (44 KiB) Viewed 4811 times
-
- stringer magnet.jpg (47.59 KiB) Viewed 4811 times
-
- stringer 1.jpg (43.4 KiB) Viewed 4811 times
-
splitbus
- DSKer
- Posts: 3232
- Joined: Sun Dec 09, 2007 7:47 am
- Location: Brisbane Northside
-
OMR_007

- DSKer
- Posts: 657
- Joined: Mon Feb 25, 2008 10:45 pm
- Location: Brisbane
-
kroozzn62

- DSKer
- Posts: 855
- Joined: Fri May 20, 2005 10:27 am
-
Kombi Trip
- DSKer
- Posts: 1493
- Joined: Thu Dec 29, 2005 5:20 pm
- Location: Far North QLD
- Contact:
-
joshroom
- DSKer
- Posts: 487
- Joined: Sat Jul 21, 2007 11:08 pm
- Location: perth
heres a few pics of them seats 67 they are pretty hammered they will probably get the blanket treatment untill i can aford an upholsterer to fix em.
- Attachments
-
- seat1.jpg (61.86 KiB) Viewed 4724 times
-
- seat2.jpg (34.78 KiB) Viewed 4724 times
-
- seat3.jpg (51.07 KiB) Viewed 4724 times
-
- seat4.jpg (69.27 KiB) Viewed 4724 times
-
- seat5.jpg (64.36 KiB) Viewed 4724 times
-
doveblue
- DSKer
- Posts: 121
- Joined: Fri Oct 27, 2006 9:17 pm
- Location: alpine region
-
joshroom
- DSKer
- Posts: 487
- Joined: Sat Jul 21, 2007 11:08 pm
- Location: perth
yeah i would love some ratty delux trim if anyone has got some for sale,dont think i'd fork out for new repro stuff (as nice as it is) but i will need something in all those holes,i think it would be a shame to weld them shut. the other bus i think is a 63 standard 11, nipples, slash-cuts,and different rear arches its probably in better nick but its covered in layers of house paint.and I had already started this one i'd feel like i was abandoning him if i swapped.
____________
-
doveblue
- DSKer
- Posts: 121
- Joined: Fri Oct 27, 2006 9:17 pm
- Location: alpine region
-
joshroom
- DSKer
- Posts: 487
- Joined: Sat Jul 21, 2007 11:08 pm
- Location: perth
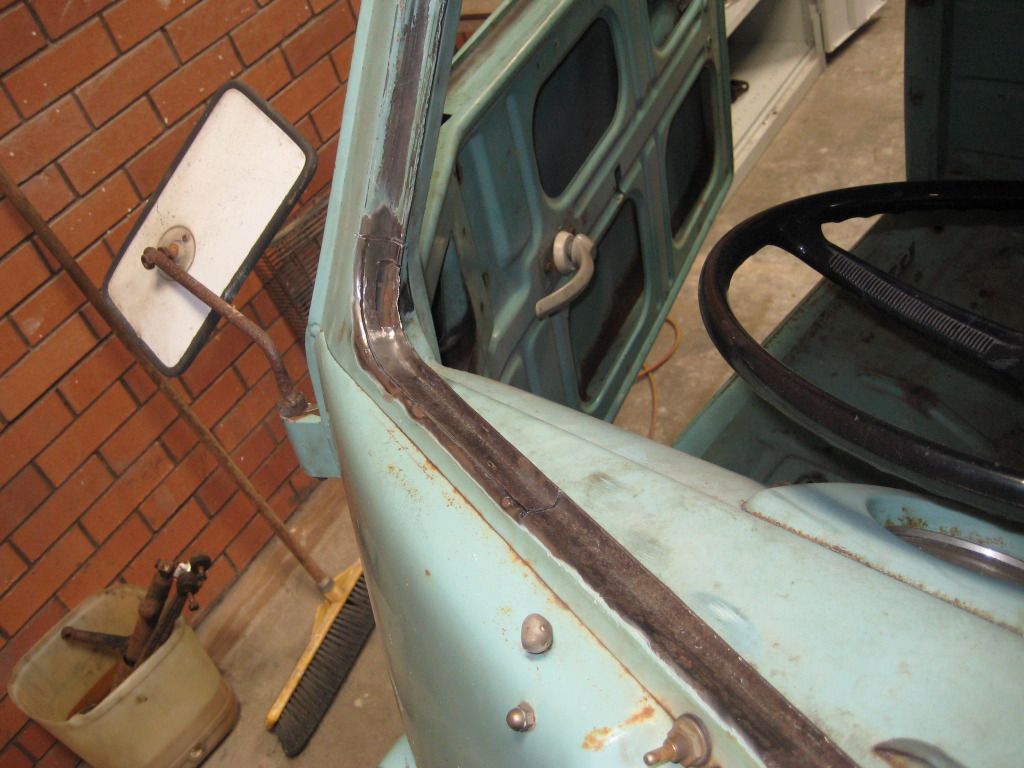
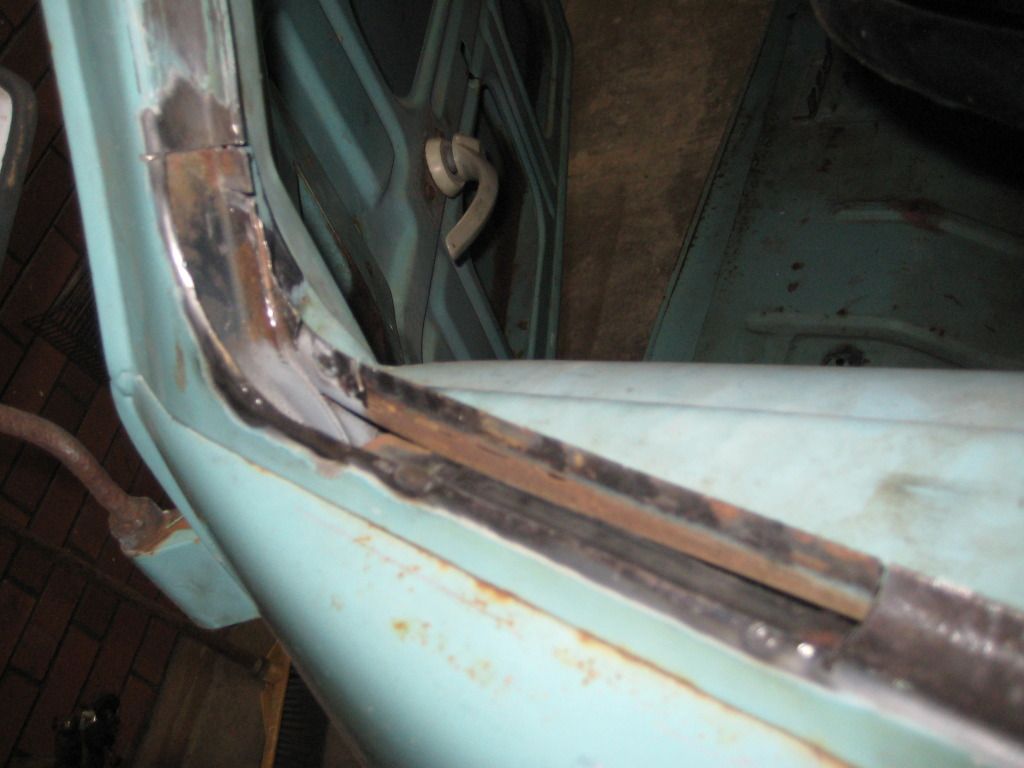
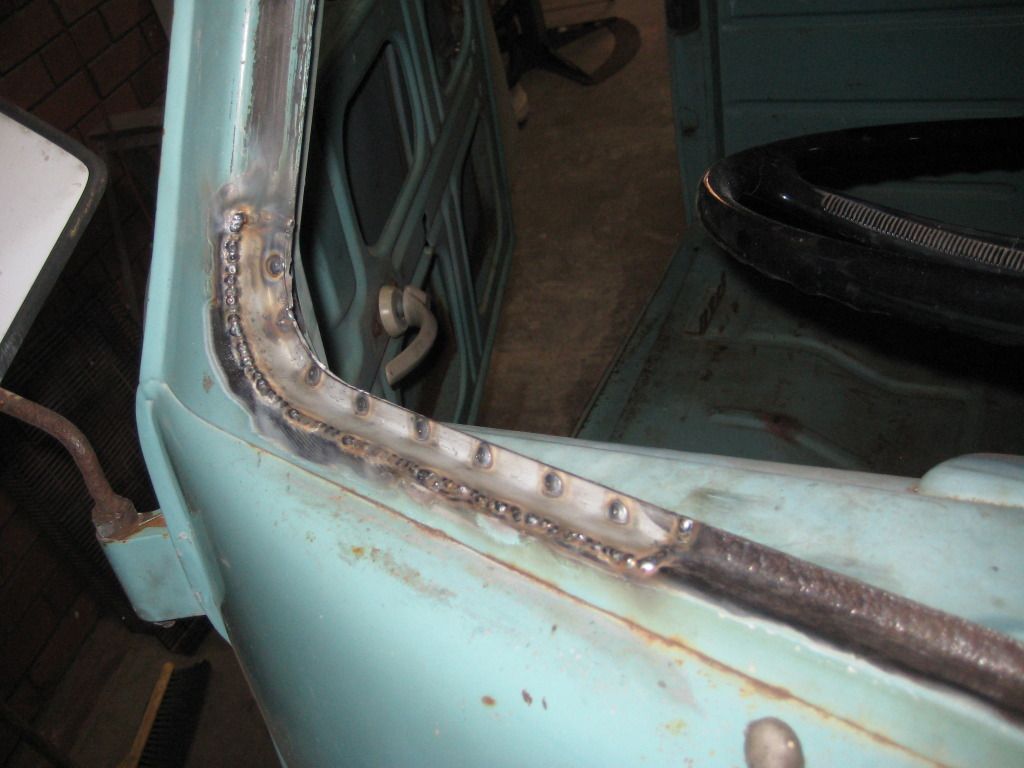
Finally got my bus around at the workshop. given another look over and found some pretty krook farmyard hacks but I'll put up some photos of them later. so I kicked off with some windscreen surround repairs that I had left hacked up about four years ago.
Passenger side was the worst but "A"pillar was solid.
tried out FC's tek screw trick, I'll give that a big thumbs up!
Drivers side a bit pitted so I replaced the worst of it. Again the "A"pillar was in great nick.
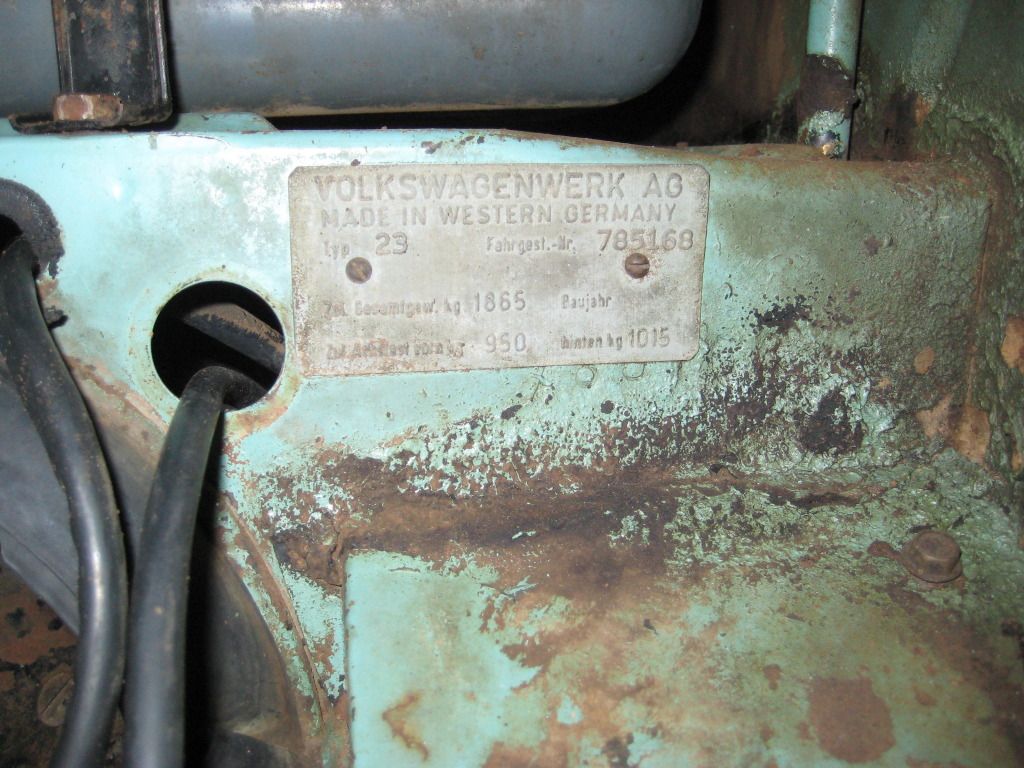
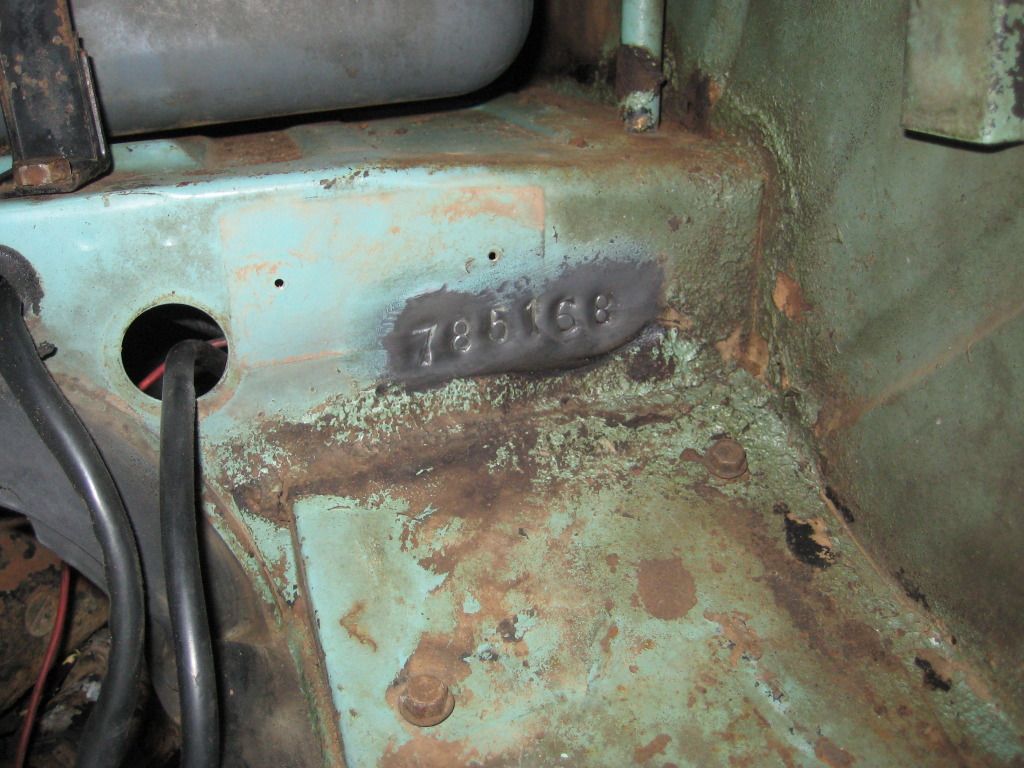
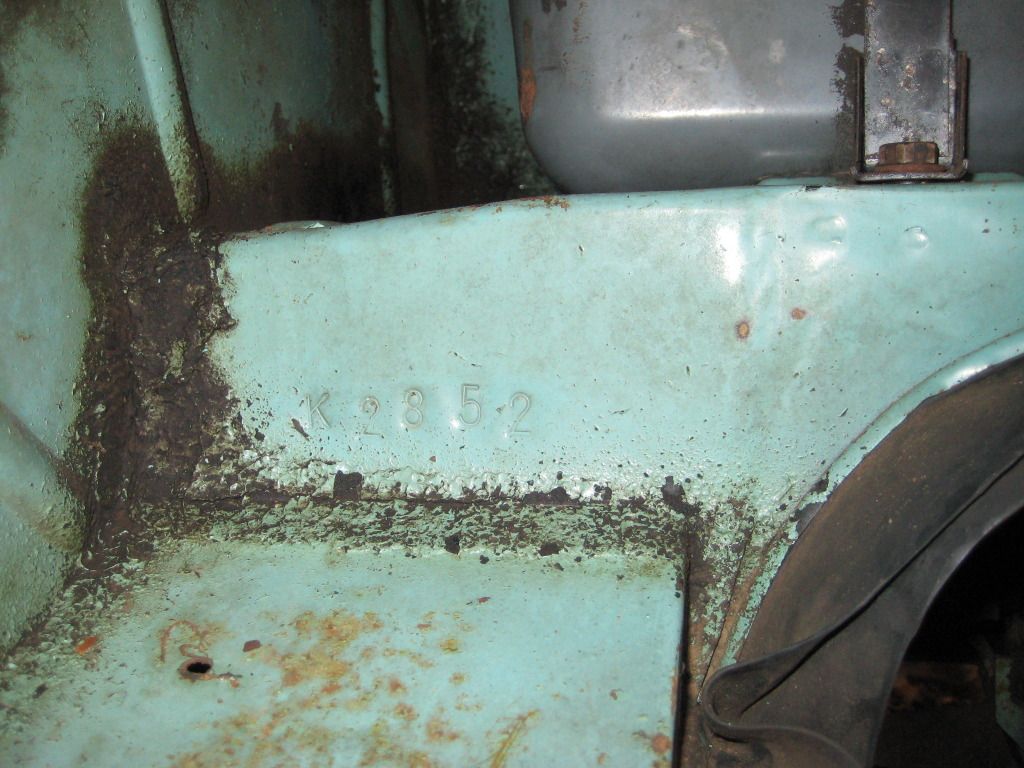
I'm not sure about a couple of things about this bus. Firstly, what year is my bus? 61? and secondly is there anyway of telling if the deluxe trim was dealer/VW fitted, going by the compliance plate? I was also told about a local dealer that used to paint their bus roofs (white paint straight over the factory colour) so it may have been optioned then. If someone could work it from these numbers and possibly shed some light on anything else I' be grateful.
Passenger side was the worst but "A"pillar was solid.
tried out FC's tek screw trick, I'll give that a big thumbs up!
Drivers side a bit pitted so I replaced the worst of it. Again the "A"pillar was in great nick.
I'm not sure about a couple of things about this bus. Firstly, what year is my bus? 61? and secondly is there anyway of telling if the deluxe trim was dealer/VW fitted, going by the compliance plate? I was also told about a local dealer that used to paint their bus roofs (white paint straight over the factory colour) so it may have been optioned then. If someone could work it from these numbers and possibly shed some light on anything else I' be grateful.
____________
-
Leroy
- DSKer
- Posts: 2544
- Joined: Thu Jul 05, 2007 11:58 pm
- Location: Brisbane (bayside)
-
nick62
- DSKer
- Posts: 239
- Joined: Sun Jan 20, 2008 9:48 pm
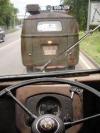
My bus is this colour, and the roof was also painted white. I have a 62, this is a GREAT colour! Looks from the dash shot you do not have a fuel gauge? I think they started to fit gauges and drop the reserve tap in 62. What tail light setup do you have? Double round lights were not on 62-they went to the "oval" shape that continued through to round 71-72. wouldnt be hard to reference the chassis no. great bus!
more betters for goods nicer
-
joshroom
- DSKer
- Posts: 487
- Joined: Sat Jul 21, 2007 11:08 pm
- Location: perth
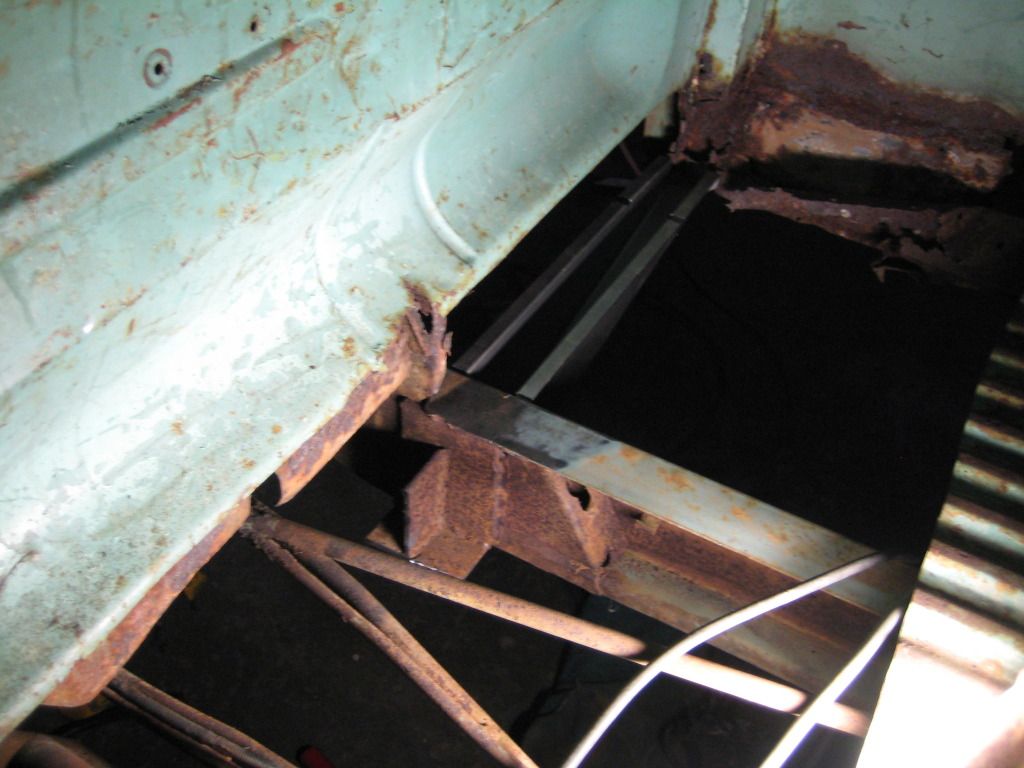
the front floor had some rust along the lip that is spotted to the headlight support panel. Patched with some funky green donated by the munster boys (cheers gents)
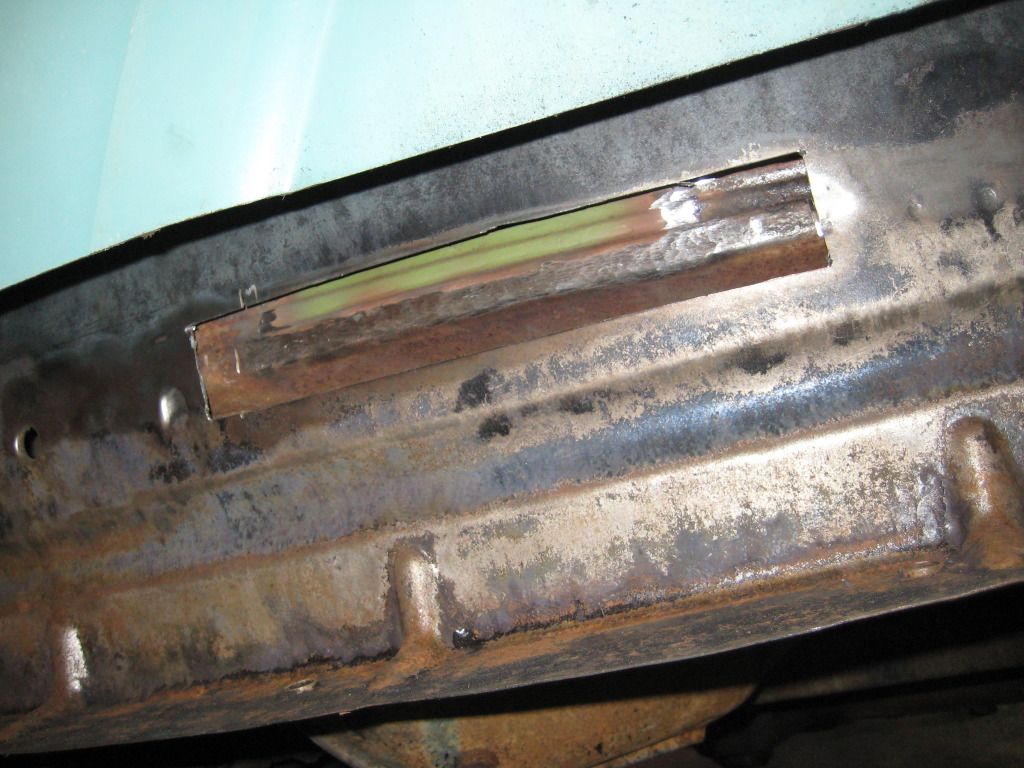
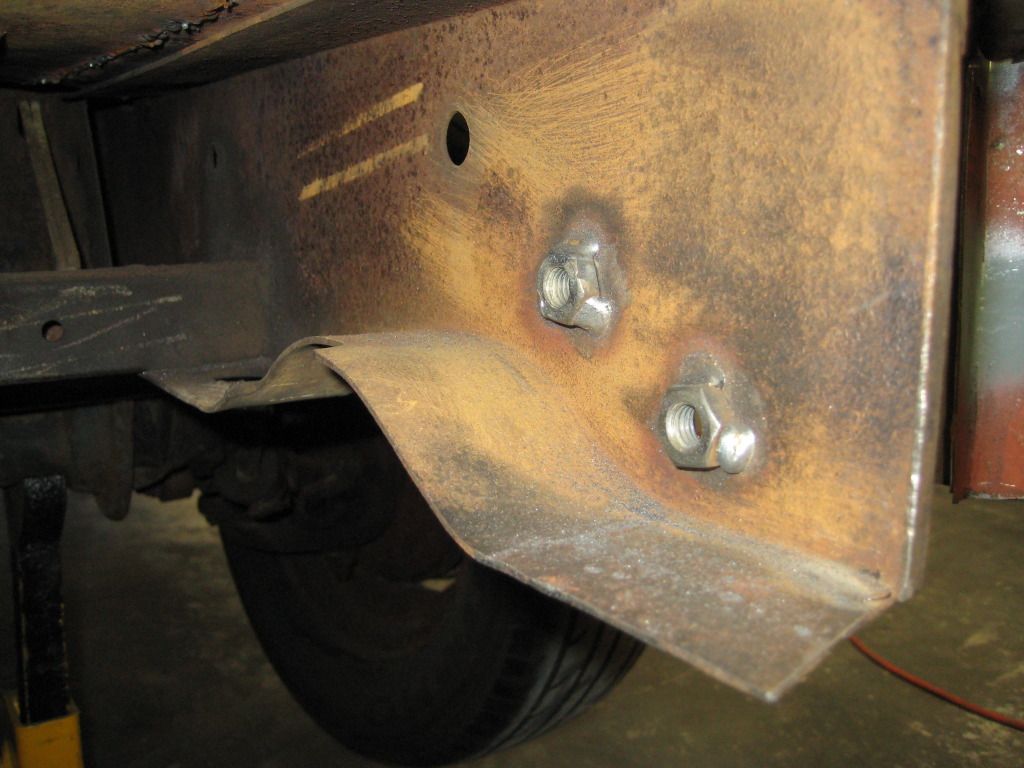
also notice the bumper bar mounting nuts missing from inside the chassis legs.
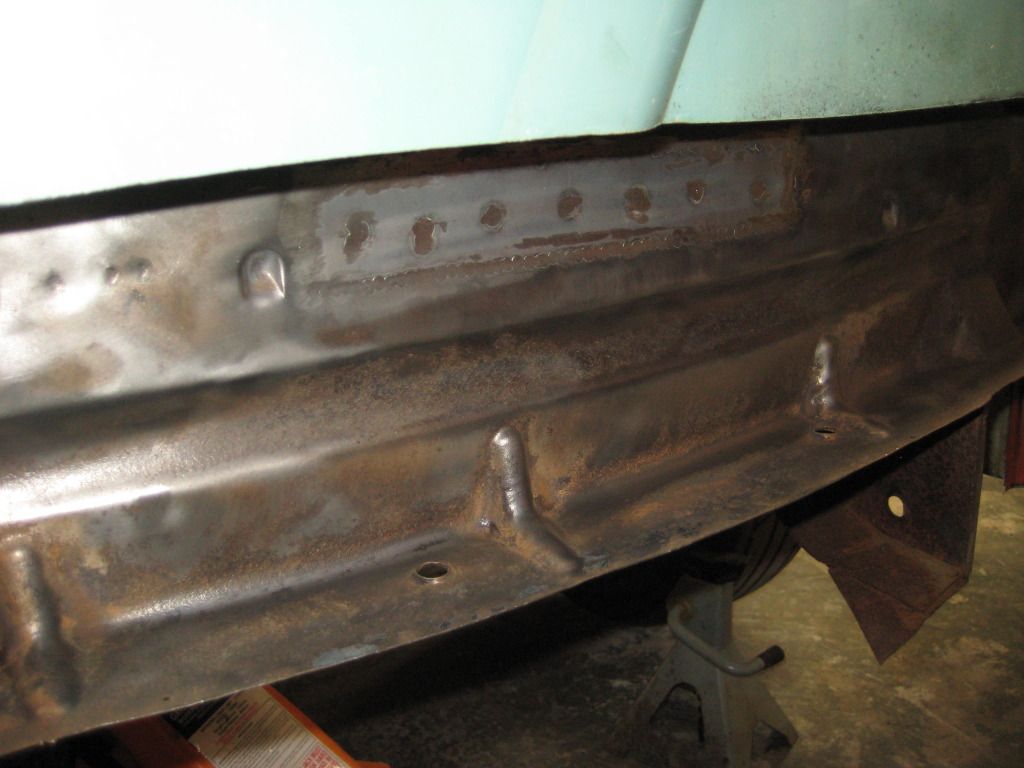
welded in some new ones
replaced the "A" pillar bottom and rebuilt the RHS of the headlight support panel.
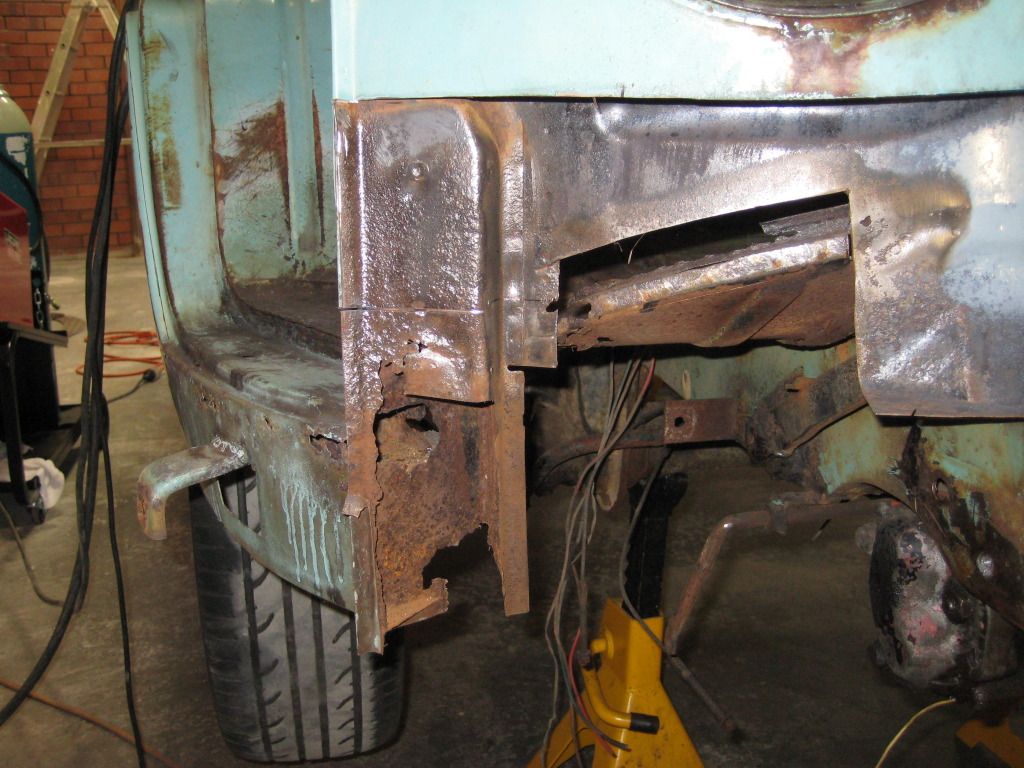
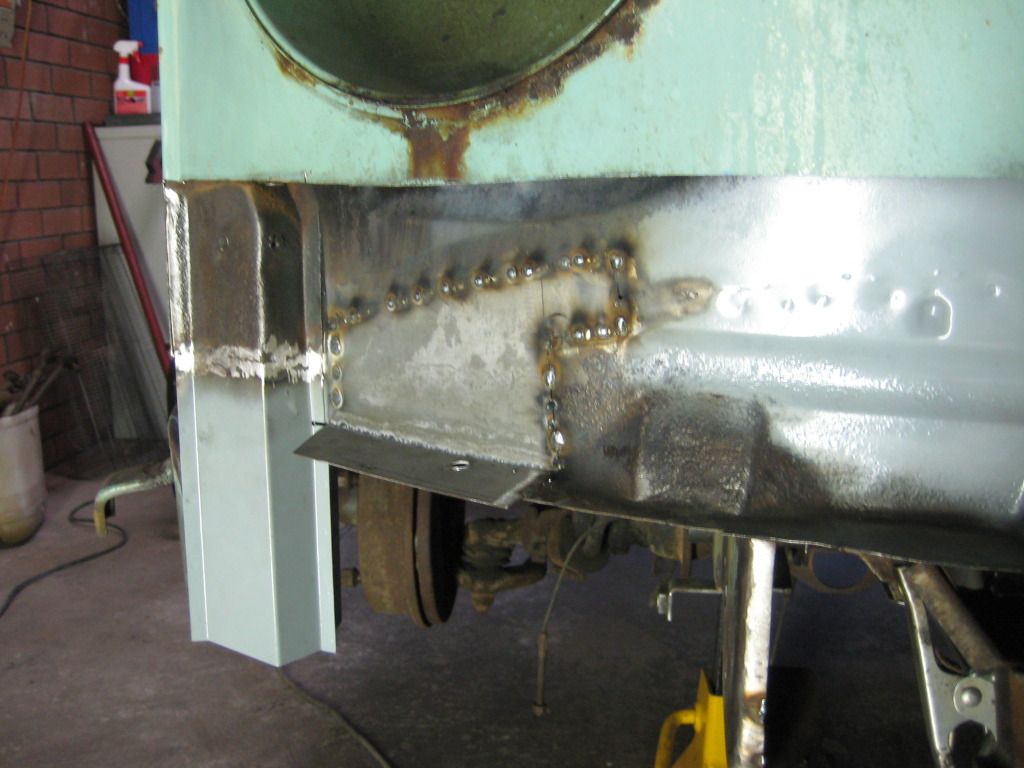
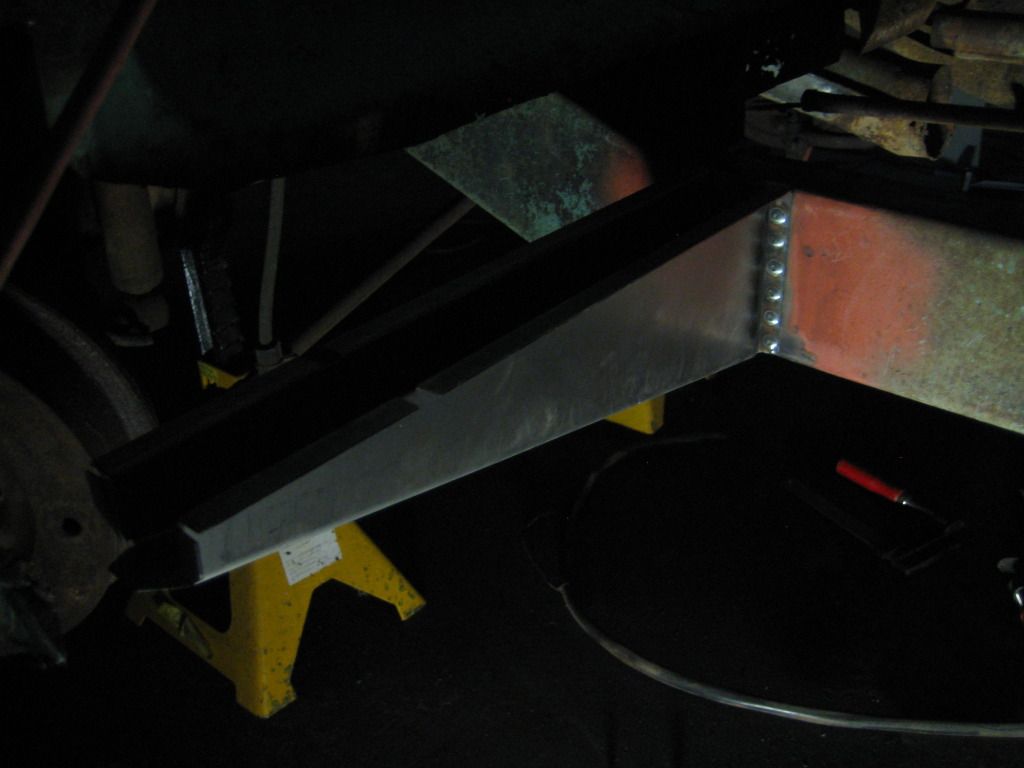
the front and rear chassis cross members were replaced with big "T" shape beams and plates welded into the inner sections of the chassis. I've started cutting them out but its gonna take alot of grinding to clean it up.
also notice the bumper bar mounting nuts missing from inside the chassis legs.
welded in some new ones
replaced the "A" pillar bottom and rebuilt the RHS of the headlight support panel.
the front and rear chassis cross members were replaced with big "T" shape beams and plates welded into the inner sections of the chassis. I've started cutting them out but its gonna take alot of grinding to clean it up.
____________
-
joshroom
- DSKer
- Posts: 487
- Joined: Sat Jul 21, 2007 11:08 pm
- Location: perth